PHP & Web Development Blogs

Search Results For: build
Showing 1 to 5 of 33 blog articles.
17891 views · 5 years ago
Creating a Virus with PHP

In his talk, “Writing Viruses for Fun, Not Profit,”Ben Dechrai (after making the viewer take a pledge to only use this knowledge for good and not evil) walks through how many viruses operate, and just how easy it is to build your own self-replicating virus in PHP.

The danger of many of these viruses according to Ben is that the most dangerous viruses often escape detection by not looking like a virus. Instead they encrypt their code to hide their true intent, while also constantly adapting and evolving.

Perhaps even more dangerously, they act like they’re benign and don’t actually do anything - often times laying dormant until called upon by the malicious actor.

Creating the Virus

What’s scary is just how simple it was for Ben to create such a virus, one that mutated ever so slightly as it infected every other file on the server. Opening up unlimited possibilities from scraping customer data, to DDOS attacks, to simply hijacking your domain.


But those attacks are just the start as Ben demonstrated how easy it is to write new files, delete files, 
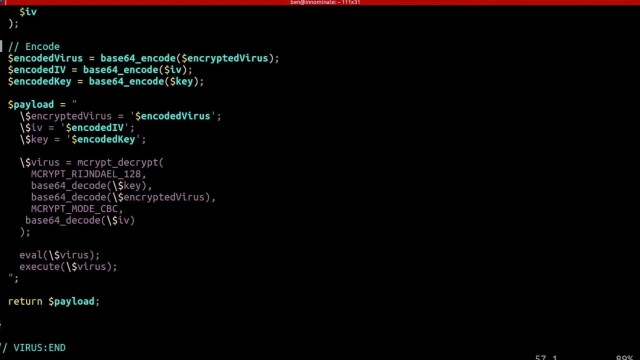
eval() and execute foreign code - which could even be extended to accessing the underlying server itself if shell_exec() is enabled.

To add to the problem, Ben shares how challenging it can be to identify malicious code on your server as many of these attacks are far more sophisticated than the the virus he created in a matter of minutes - hiding themselves and often appearing as if they are part of the original source code.

Deploying the Virus

To drive his point home, Ben demonstrates how even seemingly secure systems can be vulnerable - as all it takes is one tiny misstep within your application.

He highlights this by building what should be a secure photo gallery - one that checks the extension and mime-type of the image - and even stores it outside of the public directory. He goes even farther by adding additional sanity checks with a PHP script that then renders the image.

After walking through the code and it’s security features, he then downloads a simple image from the internet. Opening his editor he quickly injects the virus (written in PHP) into the image and uploads it, passing all of the server checks.

Surely, since it passed these checks the system is secure, right? Ben loads the gallery to proudly show off the image - which is just that… an image, with nothing special or out of the ordinary.
Except that when he opens the image gallery files, each has been infected with the malicious code.

The culprit that allowed for Ben to hijack an entire system and execute foreign code, create new files, and even hijack the entire site? When displaying the image the file was included using PHP’s include() function, instead of pulling in the data using file_get_contents() and echoing it out.

Such a simple mistake provided Ben, if he was a malicious hacker, complete access to all of the files on the system.

Protecting Yourself

Security always exists in layers - and this could have been prevented by including a few more layers, such as using an open source library to rewrite the image, reviewing the image source before pulling it in, or again not giving it executable access by using the PHP include() function.

But what’s terrifying is how simple it is to hijack a site, how easy it is to get access to your system and private data, and how easy it is to overlook security vulnerabilities - especially with open source tooling and those that take plugins.

As Ben explains, sometimes the core code itself is really secure, but then you get two different plugins that when used together accidentally create a security vulnerability. That by itself is one of the most challenging as you can audit each plugin individually, and still not know you’re opening up your system to malicious actors.

This is why it's not just important to stay up to date on the latest security measures and best practices, but to be constantly thinking like a hacker and testing your code for vulnerabilities.

Learn More

You can watch thefull video to learn more how viruses operate, how to quickly build your own PHP virus (but you must promise to use it for good), and what to watch for in order to protect yourself, your customers, and your architecture.
24619 views · 4 years ago
PHP CHAT WITH SOCKETS

Hey Friends,

I am sharing a very interesting blog on how to create a chat system in php without using ajax. As we all know ajax based chat system in php is not a good solution
because itincreases the server load and redundant xhr calls on our server.

Instead, I am going to use sockets for incoming messages from and send messages to another user. So lets try them out using the following steps:


Step 1: Cross check in php.ini that sockets extension is enabled


;extension=sockets
extension=sockets


Step 2: Create server.php file


This file will handle the incoming and outgoing messages on sockets, Add following variables in top of the file:

$host = 'localhost';
$port = '9000';
$null = NULL; 


Step 3: After it add helper methods


The following code for handshake with new incoming connections and encrypt and decrypt messages incoming and outgoing over sockets:

function send_message($msg)
{
global $clients;
foreach($clients as $changed_socket)
{
@socket_write($changed_socket,$msg,strlen($msg));
}
return true;
}
function unmask($text) {
$length = ord($text[1]) & 127;
if($length == 126) {
$masks = substr($text, 4, 4);
$data = substr($text, 8);
}
elseif($length == 127) {
$masks = substr($text, 10, 4);
$data = substr($text, 14);
}
else {
$masks = substr($text, 2, 4);
$data = substr($text, 6);
}
$text = "";
for ($i = 0; $i < strlen($data); ++$i) {
$text .= $data[$i] ^ $masks[$i%4];
}
return $text;
}
function mask($text)
{
$b1 = 0x80 | (0x1 & 0x0f);
$length = strlen($text);

if($length <= 125)
$header = pack('CC', $b1, $length);
elseif($length > 125 && $length < 65536)
$header = pack('CCn', $b1, 126, $length);
elseif($length >= 65536)
$header = pack('CCNN', $b1, 127, $length);
return $header.$text;
}
function perform_handshaking($receved_header,$client_conn, $host, $port)
{
$headers = array();
$lines = preg_split("/

/", $receved_header);
foreach($lines as $line)
{
$line = chop($line);
if(preg_match('/\A(\S+): (.*)\z/', $line, $matches))
{
$headers[$matches[1]] = $matches[2];
}
}
$secKey = $headers['Sec-WebSocket-Key'];
$secAccept = base64_encode(pack('H*', sha1($secKey . '258EAFA5-E914-47DA-95CA-C5AB0DC85B11')));
$upgrade = "HTTP/1.1 101 Web Socket Protocol Handshake

" .
"Upgrade: websocket

" .
"Connection: Upgrade

" .
"WebSocket-Origin: $host

" .
"WebSocket-Location: ws://$host:$port/php-ws/chat-daemon.php

".
"Sec-WebSocket-Accept:$secAccept


";
socket_write($client_conn,$upgrade,strlen($upgrade));
}


Step 4: Now add following code to create bind and listen tcp/ip sockets:


$socket = socket_create(AF_INET, SOCK_STREAM, SOL_TCP);
socket_set_option($socket, SOL_SOCKET, SO_REUSEADDR, 1);
socket_bind($socket, 0, $port);
socket_listen($socket);
$clients = array($socket);


Ok now a endless loop that will use for handeling incominga nd send messages:

while (true) {
$changed = $clients;
socket_select($changed, $null, $null, 0, 10);

if (in_array($socket, $changed)) {
$socket_new = socket_accept($socket); $clients[] = $socket_new;
$header = socket_read($socket_new, 1024); perform_handshaking($header, $socket_new, $host, $port);
socket_getpeername($socket_new, $ip); $response = mask(json_encode(array('type'=>'system', 'message'=>$ip.' connected'))); send_message($response);
$found_socket = array_search($socket, $changed);
unset($changed[$found_socket]);
}

foreach ($changed as $changed_socket) {

while(socket_recv($changed_socket, $buf, 1024, 0) >= 1)
{
$received_text = unmask($buf); $tst_msg = json_decode($received_text, true); $user_name = $tst_msg['name']; $user_message = $tst_msg['message']; $user_color = $tst_msg['color'];
$response_text = mask(json_encode(array('type'=>'usermsg', 'name'=>$user_name, 'message'=>$user_message, 'color'=>$user_color)));
send_message($response_text); break 2; }

$buf = @socket_read($changed_socket, 1024, PHP_NORMAL_READ);
if ($buf === false) { $found_socket = array_search($changed_socket, $clients);
socket_getpeername($changed_socket, $ip);
unset($clients[$found_socket]);

$response = mask(json_encode(array('type'=>'system', 'message'=>$ip.' disconnected')));
send_message($response);
}
}
}
socket_close($socket);


So you are ready with server side socket program, Now its time to move on front side where we will implement w3c provided client side Web Socket Apis,

Step 5: create a file named index.php for frontend usage with following initial code


$host = 'localhost';
$port = '9000';
$subfolder = "php_ws/";
$colors = array('#007AFF','#FF7000','#FF7000','#15E25F','#CFC700','#CFC700','#CF1100','#CF00BE','#F00');
$color_pick = array_rand($colors);
<!DOCTYPE html>
<html>
<head>
<meta name="viewport" content="width=device-width, initial-scale=1">
</head>
<body>
<div class="chat-wrapper">
<div id="message-box"></div>
<div class="user-panel">
<input type="text" name="name" id="name" placeholder="Your Name" maxlength="15" />
<input type="text" name="message" id="message" placeholder="Type your message here..." maxlength="100" />
<button id="send-message">Send</button>
</div>
</div>
</body>
</html>


Now add some basic styling in the head section using following code:

<style type="text/css">
.chat-wrapper {
font: bold 11px/normal 'lucida grande', tahoma, verdana, arial, sans-serif;
background: #00a6bb;
padding: 20px;
margin: 20px auto;
box-shadow: 2px 2px 2px 0px #00000017;
max-width:700px;
min-width:500px;
}
#message-box {
width: 97%;
display: inline-block;
height: 300px;
background: #fff;
box-shadow: inset 0px 0px 2px #00000017;
overflow: auto;
padding: 10px;
}
.user-panel{
margin-top: 10px;
}
input[type=text]{
border: none;
padding: 5px 5px;
box-shadow: 2px 2px 2px #0000001c;
}
input[type=text]#name{
width:20%;
}
input[type=text]#message{
width:60%;
}
button#send-message {
border: none;
padding: 5px 15px;
background: #11e0fb;
box-shadow: 2px 2px 2px #0000001c;
}
</style>


Ok Style is all set now need to add a jquery script and create web socket object and handle all events on it as following code need to add before closing of bosy tag:

<script src="https://ajax.googleapis.com/ajax/libs/jquery/3.3.1/jquery.min.js"></script>
<script language="javascript" type="text/javascript">
var msgBox = $('#message-box');
var wsUri = "ws://".$host.":".$port."/php-ws/server.php";
websocket = new WebSocket(wsUri);

websocket.onopen = function(ev) { msgBox.append('<div class="system_msg" style="color:#bbbbbb">Welcome to my "Chat box"!</div>'); }
websocket.onmessage = function(ev) {
var response = JSON.parse(ev.data);
var res_type = response.type; var user_message = response.message; var user_name = response.name; var user_color = response.color; switch(res_type){
case 'usermsg':
msgBox.append('<div><span class="user_name" style="color:' + user_color + '">' + user_name + '</span> : <span class="user_message">' + user_message + '</span></div>');
break;
case 'system':
msgBox.append('<div style="color:#bbbbbb">' + user_message + '</div>');
break;
}
msgBox[0].scrollTop = msgBox[0].scrollHeight; };

websocket.onerror = function(ev){ msgBox.append('<div class="system_error">Error Occurred - ' + ev.data + '</div>'); };
websocket.onclose = function(ev){ msgBox.append('<div class="system_msg">Connection Closed</div>'); };
$('#send-message').click(function(){
send_message();
});

$( "#message" ).on( "keydown", function( event ) {
if(event.which==13){
send_message();
}
});

function send_message(){
var message_input = $('#message'); var name_input = $('#name');
if(message_input.val() == ""){ alert("Enter your Name please!");
return;
}
if(message_input.val() == ""){ alert("Enter Some message Please!");
return;
}
var msg = {
message: message_input.val(),
name: name_input.val(),
color : '<?php echo $colors[$color_pick]; ?>'
};
websocket.send(JSON.stringify(msg));
message_input.val(''); }
</script>


Ok All set, Now need to run the server.php file using following php-cli utility,make sure you have php cli utility installed in your system:

php -q c:\xampp\htdocs\php-ws\server.php


Now you may access the front index.php file via the browser url like following and see a chatbox and connection status, you may use the same url or different browser to check the chat system is working or not.
51 views · 3 months ago


Today’s digital transformation has significantly empowered every company to produce accurate information at all touch points. Whether it’s a large-scale enterprise or a small private venture, every organization irrespective of all sizes needs proper web app development services to build a sophisticated database for storing and managing its data. Examples of web applications include customer relationship management (CRM) systems, project management tools, and e-commerce platforms. These custom software developers play a crucial role in tailoring web applications to meet specific business needs, ensuring seamless integration and optimal functionality.

A database is a set of a vast range of structured & unstructured data stored in a system and adequately managed through DBMS or Database Management System. The data stored in the database is highly sensitive, hence companies need to be careful while accessing any data or information.

When considering the development of web applications, partnering with a reputable web development firm is essential to ensure the seamless integration and efficient management of databases. A skilled web development firm possesses the expertise to optimize database systems, enhancing data organization, security, and retrieval processes for an enhanced user experience. In this article, we will delve into the top database solutions for web applications in 2024 and explore the advantages they bring to the forefront of modern software development.

Types of Databases For Web Applications

Depending on your business model, industry domain, and other factors, your business application system will have certain requirements. Different databases types are used for different enterprise requirements. However, the database is technically divided into two types: SQL & NoSQL.

SQL or Structured Query Language is a relational database that comes with a relational structure. This is used for managing structured data only. On the other hand, the NoSQL database doesn’t have any relational structure & they are used to store unstructured data types. For your convenience, we have shared a complete comparison of both databases below.

SQL Databases
NoSQL Databases
Mix of proprietary & open-source
Open source database
Comes with rational structure
No rational structure
Ideal for managing structured data
Best for storing unstructured & semi-structured data
Vertically scalable
Horizontally scalable
Examples: MySQL, PostgreSQL, Oracle, etc
Examples: MongoDB, Cassandra, Firebase, etc

Enterprises have deeply relied on SQL to manage all their databases in web apps, but as cloud, microservices & distributed applications become popular, there are NoSQL options also available. Before you choose the right database, you must consider a number of factors such as size, structure & scalability requirements. Apart from that, you need to consider some of the following questions also:
* What type of data structure do you need?
* What is the amount of data you want to store?
* What is your total budget?
* Does it allow for support contracts & software licenses?
* What is the requirement for your data security?
* What third-party tools do you want to add to your database?

Best Databases For Web Applications In 2024

Finding out the right database option for a web app development may impact the scalability and success of any project. With too many options available, it’s quite challenging to select which one is the best for you. 2024’s widely-popular databases include:

1. MySQL:

MySQL is one of the best open-source relational databases developed by Oracle Corporation in 1995. According to the Stack Overflow developer survey, this database was used by 46.8% as of 2022. The robustness, maturity, and stability of this database make it perfect for web applications. Moreover, MySQL database uses a structured language & written in C & C++.
Latest version: MySQL 8.0.33

Key features of MySQL database include:
* Easy to deploy & manage
* It supports Consistency, Atomicity, Isolation & Durability
* It’s an RDBMS or Relational Database Management System
* Provides fast-loading utilities with several memory caches to maintain servers
* Offers top-notch results without compromising any functionality
* Contains solid Data Security layers to offer complete security solutions

2. PostgreSQL:

Launched in 1996, PostgreSQL is also a very popular database used as a data warehouse or primary data store for web, analytics, geospatial and mobile applications. This is also an open-source SQL-based RDBMS (relational database management system) that supports C, C++, C#, Ruby, Java, Python, and other programming languages. This agile database is compatible with different OSs such as Windows, Linux, Unix, MacOSX, etc.
Latest version: PostgreSQL 15.3

Key features of the PostgreSQL database include
* Houses different constraints such as primary keys, foreign keys, exclusion constraints, explicit locks, advisory locks, etc
* Supports different SQL features like SQL Sub-selects, Multi-Version Concurrency Control,
* Streaming Replication, complex queries, etc.
* Compatible with different data types like Structured, Customizations, Primitives, Geometry & Documents.
* Supports MVCC or multi-version concurrency control

3. Microsoft SQL Server:

Launched in 1989, Microsoft SQL Server is a powerful RDBMS used for transaction processing, analytics applications, and business intelligence in IT environments. It comes with built-in intelligence & enables businesses to boost their performance, security, and availability seamlessly. MS SQL Server comes in different editions with authentication & security features.
Latest version: Microsoft SQL Server 2022

Key features of the Microsoft SQL Server database include:
* Available on both Linux & Windows platforms
* Supports semi-structured, structured, and spatial data
* It has a custom-built graphical integration
* Helps users build different designs and tables without syntax
* Comes with several features for protection, monitoring, and data classification
* Gives alerts on security gaps, misconfigurations & suspicious activities

4. MongoDB:

MongoDB is a document-oriented open-source NoSQL database used for high-volume data storage. Written in JavaScript, C++, and Python, this is a very flexible and scalable database platform that removes relational DB approaches. MongoDB offers a high level of flexibility through load balancing and horizontal scaling capacities. This is a perfect option for web apps that need high performance.
Latest version: MongoDB 6.0.5

Key features of the MongoDB database include:
* Effectively supports ad hoc queries
* Highly scalable & flexible database
* Offers schema-less database
* Appropriate indexing for query executions
* Replication for data availability & stability

5. Oracle:

Oracle is a very popular RDBMS that is known for its high-performance and cost-optimization solutions. This is a commercial relational database written in C, C++ & Java. Oracle comes with a relational database architecture that offers an easy, scalable, performant solution for accessing, defining, and managing data.
Latest version: Oracle 21c

Key features of the Oracle database include:
* Executes fast backup & recovery
* Provides multiple database support
* Offers superior scalability
* Offers better user controls and identity management
* Utilizes a single database for every data type

6. Redis:

Redis stands for Remote Dictionary Server and is a widely-used open-source database used for web applications and cache management. Redis can also be used with different streaming solutions like Amazon Kinesis & Apache Kafka to analyze & process real-time data.

This database also supports different data structures like lists, streams, bitmaps, strings, maps, and so on. Because of its high performance, Redis is vastly used in many sectors such as IoT, Gaming, Financial Services, etc.
Latest version: Redis 7.0.11

Key features of the Redis database include:
* Provides premium speed with improved caching & in-memory capabilities.
* Supports a variety of data structures (strings, hashes, lists, bitmaps, HyperLogLogs, etc)
* Compatible with different languages (Java, PHP, Python, C, C#, C++, etc)
* Offers quick access to data for training, deploying, and developing applications

7. Cassandra:

Released in 2008, Cassandra is a distributed open-source NoSQL database that effectively manages vast amounts of data. It provides excellent scalability that supports multi-datacenter replication and automatic data replication. Cassandra database is ideal for applications that need prompt data access with high performance.
Latest version: Cassandra 4.1.0

Key features of the Cassandra database include:
* Easy to scale
* Highly scalable & comes with strong architecture
* Offers flexibility for data distribution
* Faster linear-scale performance
* Very flexible data storage
* Supports properties like Consistency, Atomicity, Isolation, and Durability

How Much Does The Web Application Database Cost?

In general, the average web app development cost ranges from $5,000 to $100,000. However, this cost depends on too many parameters like web app database complexity, features & functionalities, backend infrastructure, etc.

If you want to get a proper estimation of your web database application cost, you can take advantage of a web app cost calculator. For your convenience, we have listed the average web application development costs based on their categories.
Factors
Basic Web Apps
Medium Apps
Complex Apps
Highly Complex Apps
Estimated cost
$3,000 to $15,000
$15,000 to $60,000
$60,000 to $2,50,000
More than $250,000
Timeline
    . to 5 weeks
    . to 20 weeks
    . to 25 weeks
More than 9 months
Features
Simple landing page
Static content
Landing page
Database integration
Admin panel
User accounts
Online payment options
Third-party integrations
Landing page
Huge database integration
Admin panel
Multipleuser accounts
Online Payment options
Third-party integrations
Personalized features
Landing page
Top-notch database integration
Admin panel
Customized features
Examples
Online brochures
Portfolio
websites
MVP
Web portals
E-commerce websites
Online gaming sites with animation
Web applications for businesses
Automated billing systems
Human resources management system (HRMS)
Complex ecommerce websites
Custom web apps
On-demand web apps
App for complex businesses
High-end features with AI/ML integration
Custom web apps

Final Words

In the past, the process of selecting a database web application was straightforward. However, in this modern era of software development, this process has become very intrinsic as too many options are available today and the business requirements have also transformed.

For a business that works with small apps, NoSQL databases like MongoDB can be the best choice & for managing large & complex applications, databases like MySQL, MS SQL Server, and PostgreSQL can be the right choice. Would you like to know more about web applications with databases? Talk to our experts today.
8176 views · 3 years ago


Welcome back! If you're new to this series have a look at Part 1 here

Today we are going to beef things up a bit and we will focus on the backend and some key CMS functionality.

It's time to get excited, this is where you'll start to see your barebones structure morph into something extraordinary!

Tired of my intro? That's ok! Let's jump into it!

Getting the DB on board


Before we delve into this, it's imperative that we take a minute and plan things out.

The database tables that are vital to any CMS are the menu, the user table, and the content table.

Our menu table will start of as follows:

CREATE TABLE 'mydbname'.'menus' ( 'ID' INT(11) NOT NULL AUTO_INCREMENT , 'menuname' VARCHAR(100) NOT NULL , 'item' VARCHAR(50) NOT NULL , 'itemlink' VARCHAR(100) NOT NULL , PRIMARY KEY ('ID')) ENGINE = MyISAM COMMENT = 'menu table';


Let's break this down a bit.

In the SQL above, we're creating a new table called menus.

Essentially our structure looks like this:

ID | Menuname | Item | Itemlink

Our ID field is our unique identifier (our PRIMARY KEY).

Tip: Remember, you can use raw SQL or a tool like PhpMyAdmin to create your db tables/execute SQL queries.

Next up is our user table.

CREATE TABLE 'mydbname'.'users' ( 'ID' INT(11) NOT NULL AUTO_INCREMENT , 'username' VARCHAR(100) NOT NULL , 'password' VARCHAR(50) NOT NULL , 'email' VARCHAR(100) NOT NULL , PRIMARY KEY ('ID')) ENGINE = MyISAM COMMENT = 'user table';


Visually represented this structure looks like this:

ID | Username | Password | Email

Our ID field is our unique identifier.

And finally, our content table modifications. You probably remember creating a rudimentary content table in Part 1 of the series.

ALTER TABLE 'mydbname'.'content' ADD content_type VARCHAR(50);


Yep, you guessed right, in the above statement we are altering our content table and adding a new field called content type.

Our new table structure now looks like this:

ID | Title | Content | Author | Content Type

Planning to Add to the Backend


Next , we're going to add a menu section, an add user section, and we'll also modify our content section.

Let's do this! reate a file called menus.php in your backend folder.

Next, code a HTML form to save your menu data.

The form needs the following fields:

Menu Name (we called this menuname in our db table).

Menu Item Name (we called this item in our db table).

Menu Link (we called this itemlink in our db table).

Try to follow Part 1 to do this on your own.

If you get a little stuck, that's ok. You can also follow the example below:

<form method="post" action="<?php $_SERVER['PHP_SELF'];?>"/>

<input type="text" name="menuname" class="mytextbox" placeholder="Menu Name" required />

<input type="text" name="item" class="mytextbox" placeholder="Item" required />

<input type="text" name="itemlink" class="mytextbox" placeholder="Item Link" required />

<input type="submit" value="Save Menu Item" name="savemenu" class="mybutton"/>

</form>


Notice the use of CSS classes? The gravy!

This will come in handy in our next tutorial.

Next, let's add the form processing code as we need to save these fields to the database. Remember to use the sanitization technique you learned in Part 2.

Add this above your <form> tag.

<?php

if(isset($_POST['savemenu'])){

include('../includes/conn.php');

if ($letsconnect->connect_error) {

die("Your Connection failed: " . $letsconnect->connect_error);

}else{

$menuname = $letsconnect ->real_escape_string($_POST['menuname']);

$item = $letsconnect -> real_escape_string($_POST['item']);

$itemlink = $letsconnect->real_escape_string($_POST['itemlink']);

$sql = "INSERT INTO menus(menuname,item,itemlink) VALUES ('".$menuname."', '".$item."', '".$itemlink."')";

if (mysqli_query($letsconnect, $sql)) {

echo "Your data was saved successfully!";

} else { echo "Error: " . $sql . "" . mysqli_error($letsconnect);

} $letsconnect->close();

}

}

?>


Ok phew, the menu data capturing section is done.

Let's move on to the user data capturing section, and modify the content capturing screen.

Repeat the steps above and create these two screens. Remember to keep an eye out for our database field names that we defined earlier! If you get stuck, look at the end result below:

Create adduser.php in your backend folder.

Create your data capturing form.


<form method="post" action="<?php $_SERVER['PHP_SELF'];?>"/>

<input type="text" name="username" class="mytextbox" placeholder="Username" required/>

<input type="password" name="password" class="mytextbox" placeholder="Password" required />

<input type="email" name="email" class="mytextbox" placeholder="Email" required />

<input type="submit" value="Save Menu Item" name="saveuser" class="mybutton"/>

</form>


Add your PHP processing code, remember the security!

Add this above your <form> tag.

<?php

if(isset($_POST[‘saveuser])){

include('../includes/conn.php');

if ($letsconnect->connect_error) {

die("Your Connection failed: " . $letsconnect->connect_error);

}else{

$menuname = $letsconnect -> real_escape_string($_POST[‘username']);

$item = $letsconnect -> real_escape_string($_POST[‘password']);

$itemlink = $letsconnect -> real_escape_string($_POST[‘email']);

$sql = "INSERT INTO menus(username,password,email) VALUES ('".$username."', '".$password."', '".$email."')";

if (mysqli_query($letsconnect, $sql)) {

echo "Your data was saved successfully!";

} else { echo "Error: " . $sql . "" . mysqli_error($letsconnect);

} $letsconnect->close();

}

}

?>


Please note that I will be covering Password security in the tutorials that follow.

Make sure that you are using your localhost server to complete this tutorial series. Do not publish your work until you complete this series.

Lastly, let's move to our content capturing screen which is currently found in index.php in the backend folder.

We will be changing this to a more professional dashboard in the tutorials that follow!
Our current file looks like this:


<html>

<head><title>Backend - Capture Content</title></head>

<body>

<?php

if(isset($_POST['savedata'])){

include('../includes/conn.php');

if ($letsconnect->connect_error) {

die("Your Connection failed: " . $letsconnect->connect_error);

}else{

$title = $letsconnect -> real_escape_string($_POST['title']);

$content = $letsconnect -> real_escape_string($_POST['content']);

$author = $letsconnect -> real_escape_string($_POST['author']);

$sql = "INSERT INTO content (title,content,author) VALUES ('".$title."', '".$content."', '".$author."')";

if (mysqli_query($letsconnect, $sql)) {

echo "Your data was saved successfully!";

} else { echo "Error: " . $sql . "" . mysqli_error($letsconnect);

} $letsconnect->close();

}

}

?>

<form action="<?php $_SERVER[‘PHP_SELF'];?>" method="post">

<input type="text" name="title" placeholder="Content Title here" required/>

<textarea name="content">Content Here</textarea>

<input type="text" name="author" placeholder="Author" required/>

<input type="submit" value="Save My Data" name="savedata"/>

</form>

</body>

</html>


We need to modify this slightly to include our new field, content_type.

Add the input field in your <form> above the submit button.


<input type="text" name="content_type" placeholder="Content Type" required/>;


Next, add the content_type to the sanitization lineup.

$content_type = $letsconnect->real_escape_string($_POST['content_type']);


Lastly, store this variable to the database by modifying the $sql.

$sql = "INSERT INTO content (title,content,author,content_type) VALUES ('".$title."', '".$content."', '".$author."', '".$content_type."')";


Conclusion


Chopping and changing is not always as daunting. Find a rhythm. There are many ways to make cumbersome coding a breeze and we will delve into that in the tutorials to come.

Challenge


Think of ways to test what we just did through retrieving and echoing data from the database.

Next Up: #CodeWithMe Part 5 Building a good base Continued

4292 views · 3 years ago
Using AI for Weather Forecasting

Technology is constantly changing the way we interact, research, and react. One such way artificial intelligence is impacting our daily lives, and we may not even realize it is in weather forecasting.


The forecast we usually have been receiving in our phones and in older times primarily in newspapers, was based on data collected via satellites, radar system and weather balloons. In recent times there has been the addition of IoT based sensors as well. However, with the advent of Artificial Intelligence (AI) finding its way in numerous areas, AI has taken a role in improving the accuracy of weather as well.

The Dataset expansion

A significantly enormous set of data is available - from the weather satellites in space, to the private and government owned weather stations which are gaining real-time data. IBM for instance has more the 0.25 million weather stations that help IBM collect real-time data. Additionally, as we are in the age of Internet of Things (IOT), each small device to big device- cellphones, solar panels and vehicles everything has become or is yet to become yet another data source. Companies like GE have installed IOT street lights, which help in monitoring air quality and humidity. These are some of the few sources which help us in collecting the vast amount of data necessary for building on the AI technology, in future these sources and the amount of available data would grow exponentially.

Google and Weather forecast

Using the AI technology Google is able to develop a weather forecast tool, it has been trained to predict rainfalls accurately as much as six hours before. The underlying technology on which this prediction is build upon is U-Net convolutional neural network which is originally used in biomedical research. It works by taking satellite images as input and uses AI technology to transform these images into high resolution images. The only off-set is this is not real-time prediction and the delay due to complex calculations results in using six-hour old data and hence can only predict six-hours before.

IBM and its efforts in weather prediction

The quest for IBM to venture into weather forecasting began with IBM acquiring The Weather Company. IBM plans on using the large amount of weather data available coupled with IBM Watson and the cloud platform to enhance weather forecasting. In 2019 IBM developed Global High-Resolution Atmospheric Forecasting System (GRAF) in order to forecast weather conditions 12 hours prior to a greater degree of accuracy. The radius encompassed by the GRAF is also more narrowed down up to 3 kilometers as opposed to generally being 10-15 kilometers. Another of its marvel is that it gives accurate predictions down to each hour and not just daily.

Artificial Intelligence and Panasonic

Panasonic is the company behind TAMDAR, the weather sensor installed on commercial airplanes. With this advantage of extensive amount of data from in-flight sensors as well as publicly available data Panasonic developed Global 4D Weather. Proving to their claim of being the most advanced global forecasting platform globally they were able to timely predict Hurricane Irma in its early days.

Uses of Weather Forecasting


Sales

Everyday life decisions are affected by weather, it makes us choose in the way we travel, things we eat and things we buy to wear. The rise in temperature may increase sales of chilled drinks, if the company is fully aware of the forecast it would be able to manage productions as per demand. AI can help brands in maximizing sales based on weather forecasts and in minimizing waste.

Natural Disasters

The Panasonic Global 4D weather predicting Hurricane Irma is just another example where timely prediction can save millions of lives in face of situations like floods and Hurricanes. Companies like IBM combine weather forecasting data with utilities distribution network, which enables them to narrow down areas with likely outages. This enables utilities to place their workforce timely so the repair process catering to damage repairs post disasters is shortened. This in turn brings huge benefits to the overall economy.

Agriculture

The weather and agriculture have the most obvious correlation, each process in farming from sowing to reaping all depends on the weather. As farmers cultivate on huge farming lands, accurate information about each part of the land can help farmers in improving their crops and yield by manifolds. Weather conditions can lead to almost 90 percent of crop losses, 25 percent of these losses can be avoided using accurate AI prediction models to forecast weather and in turn improve the yield.

Transportation

Sea travel has always been eventful, timely prediction of storms by using machine learning techniques and hyper-local data allows companies to plan shipments accordingly and avoid severe weather conditions that usually result in delays. Tools like IBM’s Operations Dashboard for Ground Transportation equips in enhancing productivity based on weather predictions.

Another of the implementation of AI in transportation industry corelating to weather is fuel consumption. For instance, using weather prediction models to reduce airplane fuel consumption during its ascent.

To conclude Artificial Intelligence has a key role to play in weather forecasting, weather direct or indirectly impacts each sector in the economy. As the amount of information available to improve predictions increases exponentially it gives a chance to AI to improve accuracy even further. As we continue narrowing down weather conditions precise to time and location the benefits of such advancements across all industries are innumerable.

SPONSORS

The Ultimate Managed Hosting Platform