PHP & Web Development Blogs

Search Results For: build
Showing 16 to 20 of 24 blog articles.
6780 views · 5 years ago
Custom extension to Laravel Application class

Hello folks! This post is for those of you using Laravel. This beautiful framework makes web development super-easy compared to most of competitors. In the heart of Laravel is the Application class, which is responsible for bootstrapping, registering services and also serves as a dependency injection container. What I do with my Laravel apps, is that I take a slight detour from the common path by adding a custom Application class. While this is not really necessary, I find this approach nice, and will try to share my thought below.

It's normal practice in Laravel world to build all kinds of objects like this:

$cache = app("cache");


I find it a bit confusing to call app("cache"") and expect a Cache\Repository instance as result. If I pass the result of this call to a function that requires a Cache\Repository as parameter, I will probably have a code inspection warning from IDE. Moreover, if I want proper autocompletion, I will have to add additional comment:


$cache = app("cache");


This is where a custom application class might be handy:

namespace App;
class MyApp extends Application
{
public function cacheRepository(): Repository
{
return $this->make(Repository::class);
}
}


This way I get a TypeError in case of a misconfiguration, and I have a type-hint which allows the IDE to recognize the return value. Bye-bye nasty comment lines and IDE warnings! I make a method per service, with type-hints, like dbConnection() or viewFactory() - works really well for me!

I also thought that, if I have a custom class, then all the custom setup that normally you have in bootstrap/app.php, should reside in that custom class:

namespace App;
class MyApp extends Application
{
public function __construct()
{
define('LARAVEL_START', microtime(true));
define("APP_ROOT", realpath(__DIR__ . "/../"));
parent::__construct(APP_ROOT);
$this->setUp();
}
private function setUp()
{
$this->singleton(
Contracts\Http\Kernel::class,
\App\Http\Kernel::class
);
}
}


Then your bootstrap/app.php becomes just this:

return new \App\MyApp;


The Laravel app() function will also return an instance of MyApp from now on. However, it's @phpdoc says it returns \Illuminate\Foundation\Application, so for better clarity, I also added my own accessor method:

namespace App;
class MyApp extends Application
{
public static function app(): self
{

$ret = parent::getInstance();
return $ret;
}
}


I tend to limit the use of global/static functions and methods, but sometimes it can be handy, and whenever I need an instance of MyApp, I just call MyApp::app(). The IDE wil be aware of the return type due to the type-hint, so I get everything I want for clean and clear development.

With your projects in Laravel, you may or may not want to follow this particular advice, but just be aware that extending a framework built-in classes for your team's comfort, is definitely something that can make your life easier. See you around, don't forget to leave comments!
6120 views · 5 years ago
Press Release

To say that we have been hard at work here at Nomad PHP, or that I'm excited about these three announcements would be a tremendous understatement. Over the past several months, behind the scenes, we've been working to bring even more features and benefits to Nomad PHP - these have already included unlimited streaming of all past meetings and access to PHP Architect.

Available today, however, you'll also have access to online, live workshops - as well as soon have the ability to stream select PHP conferences live, and finally to prove the knowledge you have gained through our online certification.

Online, Live Workshops

Like our online meetings, we are excited to announce that available today you can participate in online, live, and interactive workshops. Our first workshop will feature Michael Stowe, author of Undisturbed REST: a guide to Designing the Perfect API as he demonstrates how to build the perfect API using modern technologies and techniques.

Additional workshops will be announced as we continue, with a minimum of one workshop per quarter. These workshops will be part of your Nomad PHP subscription, and will be recorded for later viewing.

Nomad PHP Certification

With the many changes impacting the PHP ecosystem, we're proud to announce the ability to prove your knowledge with our online certification. Each certification is made up numerous, randomly selected questions to be completed within a specific time frame. Depending on the exam it may or may not be proctored, but all exams monitor user activity to ensure compliance.

To pass the exam, a passing grade (specified on each exam) must be completed for each section within the allotted time frame. Failure to complete or pass any section will result in a failing grade for the entire exam.

Upon completion, you will receive a digital certification with verification to post on LinkedIn or your website, as well as having your Nomad PHP updated to show the passed certification.

Initial certification exams will include PHP Developer Level I, PHP Engineer Level II, and API Specialist Level I. The PHP Developer exam will cover core components of PHP, the Engineer will cover a broad spectrum of topics including modern technologies, and the API Specialist will cover REST design and architecture practices.

All three exams will be available by January 31, 2019, and will be included with a Nomad PHP subscription.

Stream Select PHP Conferences Live

One of the primary goals of Nomad PHP is to bring the community together, and allow users all over the country to participate in conference level talks. What better way to do this than to bring community conferences online?

Like our traditional talks, these conferences and select conference sessions will be live-streamed as part of your Nomad PHP subscription, allowing you to participate in real-time with in-person conference attendees.

The first conference to be streamed will be DayCamp4Developers: Beyond Performance on January 18, 2018. Additional conferences to be streamed will be announced shortly.

Community and Corporate Sponsorships

With these new additions to Nomad PHP, now is the perfect time to take advantage of our new Community and Corporate sponsorships.

Your support of Nomad PHP not only makes all the above possible, but allows Nomad PHP to continue to serve and give back the community. We're proud, that despite operating at a loss, to have already contributed over$4,000 to the PHP community in the last 5 months.

To learn more about the sponsorship and community opportunities we have available, please visit our Advertising section.

Other Ways to Support Nomad PHP

Of course, while financial support helps us keep afloat and do more for the community, there are even more, and just as important ways to support Nomad PHP. Please consider linking to Nomad PHP, or sharing the service with your friends.
20823 views · 5 years ago
Making Charts and Graphs using Laravel

Installing composer

Composer is a package management tool for PHP. Laravel requires composer for installation. We can download composer from https://getcomposer.org/download/

After installation that you can test whether composer installed or not by command
composer

Installing Laravel

The current stable version of laravel is laravel 5.6. We can install laravel package with three ways.

In command prompt or terminal by running composer global require "laravel/installer" and then Laravel new

or

We can create the project with Composer by running composer create-project --prefer-dist laravel/laravel

or

Directly clone from github
git clone https://github.com/laravel/laravel/tree/master and after that composer update

Laravel local development server

Run the below command in command prompt or terminal
PHP artisan serve


Above command will start to local development servehttp://localhost:8000 or if you want to change default port:

php artisan serve --port 


Generating charts and graphs

We are using consoletvs package for generating charts. So for installation we can first move inside to our project using command prompt or terminal. We are following the below steps to install

Step 1:

First we need to install ConsoleTVs/Charts composer package inside our laravel project.
composer require consoletvs/charts


Step 2:

After successfully installation of above package, open app/config.php and add service provider.
In config/app.php


'providers' => [
....
ConsoleTVs\Charts\ChartsServiceProvider::class,
],


After the service provider we need to add alias
'aliases' => [
....
'Charts' => ConsoleTVs\Charts\Facades\Charts::class,
]


Step 3

We need to configure of database for application. We can configure in either .env file or config/database.php file.


Step 4

We can migrate our default tables that is user. We can find the table in database/migration folder.

Step 5

We can generate dummy records for demo in users table. For creating dummy records, we need to run the below command in command prompt or terminal
php artisan tinker>>> factory(App\User::class, 20)->create();

the above command will create a set of 20 records.

If we need to add more records we need to run the above command or we can increase the count as much as we want. For example
php artisan tinker>>> factory(App\User::class, 2000)->create();


Step 6Creating controller

For creating controller we need to run below command in terminal or command prompt
php artisan make controller:<controller_name>


Step 7Adding the routes

We can add the routes for navigating our application. You can find routes file inside routes folder. Before 5.4 we can find routes.php file itself, now its web.php. If you are using laravel 5.2 routes.php will inside app/http folder.

So inside web.php:

Route::get('create-chart/{type}','ChartController@makeChart');


Here type will be the parameter we are passing and it will focus to makeChart() function inside chartcontroller

Step 8

Import charts to controller, for that in the namespace section add:

Use charts;


Step 9

We can put the below code into chartController

public function makeChart($type)
{
switch ($type) {
case 'bar':
$users = User::where(DB::raw("(DATE_FORMAT(created_at,'%Y'))"),date('Y'))
->get();
$chart = Charts::database($users, 'bar', 'highcharts')
->title("Monthly new Register Users")
->elementLabel("Total Users")
->dimensions(1000, 500)
->responsive(true)
->groupByMonth(date('Y'), true);
break;
case 'pie':
$chart = Charts::create('pie', 'highcharts')
->title('HDTuto.com Laravel Pie Chart')
->labels(['Codeigniter', 'Laravel', 'PHP'])
->values([5,10,20])
->dimensions(1000,500)
->responsive(true);
break;
case 'donut':
$chart = Charts::create('donut', 'highcharts')
->title('HDTuto.com Laravel Donut Chart')
->labels(['First', 'Second', 'Third'])
->values([5,10,20])
->dimensions(1000,500)
->responsive(true);
break;
case 'line':
$chart = Charts::create('line', 'highcharts')
->title('HDTuto.com Laravel Line Chart')
->elementLabel('HDTuto.com Laravel Line Chart Lable')
->labels(['First', 'Second', 'Third'])
->values([5,10,20])
->dimensions(1000,500)
->responsive(true);
break;
case 'area':
$chart = Charts::create('area', 'highcharts')
->title('HDTuto.com Laravel Area Chart')
->elementLabel('HDTuto.com Laravel Line Chart label')
->labels(['First', 'Second', 'Third'])
->values([5,10,20])
->dimensions(1000,500)
->responsive(true);
break;
case 'geo':
$chart = Charts::create('geo', 'highcharts')
->title('HDTuto.com Laravel GEO Chart')
->elementLabel('HDTuto.com Laravel GEO Chart label')
->labels(['ES', 'FR', 'RU'])
->colors(['#3D3D3D', '#985689'])
->values([5,10,20])
->dimensions(1000,500)
->responsive(true);
break;
default:
break;
}
return view('chart', compact('chart'));
}


Step 10

Create a blade file. Blade is the view file used inside the laravel. You can add new blade file with any name with an extension of .blade.php
Here we are creating chart.blade.php

<!DOCTYPE html>
<html lang="en">
<head>
<meta charset="utf-8">
<meta http-equiv="X-UA-Compatible" content="IE=edge">
<meta name="viewport" content="width=device-width, initial-scale=1">
<title>My Charts</title>
{!! Charts::styles() !!}
</head>
<body>

<div class="app">
<center>
{!! $chart->html() !!}
</center>
</div>

{!! Charts::scripts() !!}
{!! $chart->script() !!}
</body>
</html>


Step 11

We can run our laravel application in local development server by php artisan serve command:

http://localhost:8000/create-chart/bar
http://localhost:8000/create-chart/pie
http://localhost:8000/create-chart/donut
http://localhost:8000/create-chart/line
http://localhost:8000/create-chart/area
http://localhost:8000/create-chart/geo


In the above example we was creating line chart, geo chart, bar chart, pie chart, donut chart, line chart and area chart. We can also create gauge chart, progressbar chart, areaspline chart, scatter chart, percentage chart etc using consoletvs charts composer package.

There are a lot of jQuery libraries also available like amcharts, chartjs, highcharts, google, material, chartist, fusioncharts, morris, plottablejs etc. However, using this plugin we can easily create charts without having to use jQuery, another advantage to building it in with Laravel.
12576 views · 5 years ago
Creating a PHP Daemon Service

What is a Daemon?

The term daemon was coined by the programmers of Project MAC at MIT. It is inspired on Maxwell's demon in charge of sorting molecules in the background. The UNIX systems adopted this terminology for daemon programs.

It also refers to a character from Greek mythology that performs the tasks for which the gods do not want to take. As stated in the "Reference System Administrator UNIX", in ancient Greece, the concept of "personal daemon" was, in part, comparable to the modern concept of "guardian angel." BSD family of operating systems use the image as a demon's logo.

Daemons are usually started at machine boot time. In the technical sense, a demon is considered a process that does not have a controlling terminal, and accordingly there is no user interface. Most often, the ancestor process of the deamon is init - process root on UNIX, although many daemons run from special rcd scripts started from a terminal console.

Richard Stevenson describes the following steps for writing daemons:
    . Resetting the file mode creation mask to 0 function umask(), to mask some bits of access rights from the starting process.
    . Cause fork() and finish the parent process. This is done so that if the process was launched as a group, the shell believes that the group finished at the same time, the child inherits the process group ID of the parent and gets its own process ID. This ensures that it will not become process group leader.
    . Create a new session by calling setsid(). The process becomes a leader of the new session, the leader of a new group of processes and loses the control of the terminal.
    . Make the root directory of the current working directory as the current directory will be mounted.
    . Close all file descriptors.
    . Make redirect descriptors 0,1 and 2 (STDIN, STDOUT and STDERR) to /dev/null or files /var/log/project_name.out because some standard library functions use these descriptors.
    . Record the pid (process ID number) in the pid-file: /var/run/projectname.pid.
    . Correctly process the signals and SigTerm SigHup: end with the destruction of all child processes and pid - files and / or re-configuration.

How to Create Daemons in PHP

To create demons in PHP you need to use the extensions pcntl and posix. To implement the fast communication withing daemon scripts it is recommended to use the extension libevent for asynchronous I/O.

Lets take a closer look at the code to start a daemon:
umask(0);
$pid = pcntl_fork(); 
if ($pid < 0) {
print('fork failed');
exit 1;
}


After a fork, the execution of the program works as if there are two branches of the code, one for the parent process and the second for the child process. What distinguishes these two processes is the result value returned the fork() function call. The parent process ID receives the newly created process number and the child process receives a 0.
if ($pid > 0) { echo "daemon process started
";
exit; }

$sid = posix_setsid(); if ($sid < 0) {
exit 2;
}

chdir('/'); file_put_contents($pidFilename, getmypid() );
run_process();


The implementation of step 5 "to close all file descriptors" can be done in two ways. Well, closing all file descriptors is difficult to implement in PHP. You just need to open any file descriptors before fork(). Second, you can override the standard output to an error log file using init_set() or use buffering using ob_start() to a variable and store it in log file:
ob_start();
var_dump($some_object);
$content = ob_get_clean();
fwrite($fd_log, $content); 


Typically, ob_start() is the start of the daemon life cycle and ob_get_clean() and fwrite() calls are the end. However, you can directly override STDIN, STDOUT and STDERR:
ini_set('error_log', $logDir.'/error.log');
fclose(STDIN); 
fclose(STDOUT);
fclose(STDERR);
$STDIN = fopen('/dev/null', 'r');
$STDOUT = fopen($logDir.'/application.log', 'ab');
$STDERR = fopen($logDir.'/application.error.log', 'ab');


Now, our process is disconnected from the terminal and the standard output is redirected to a log file.

Handling Signals

Signal processing is carried out with the handlers that you can use either via the library pcntl (pcntl_signal_dispatch()), or by using libevent. In the first case, you must define a signal handler:
function sig_handler($signo)
{
global $fd_log;
switch ($signo) {
case SIGTERM:
fclose($fd_log); unlink($pidfile); exit;
break;
case SIGHUP:
init_data(); break;
default:
}
}

pcntl_signal(SIGTERM, "sig_handler");
pcntl_signal(SIGHUP, "sig_handler");


Note that signals are only processed when the process is in an active mode. Signals received when the process is waiting for input or in sleep mode will not be processed. Use the wait function pcntl_signal_dispatch(). We can ignore the signal using flag SIG_IGN: pcntl_signal(SIGHUP, SIG_IGN); Or, if necessary, restore the signal handler using the flag SIG_DFL, which was previously installed by default: pcntl_signal(SIGHUP, SIG_DFL);

Asynchronous I/O with Libevent

In the case you use blocking input / output signal processing is not applied. It is recommended to use the library libevent which provides non-blocking as input / output, processing signals, and timers. Libevent library provides a simple mechanism to start the callback functions for events on file descriptor: Write, Read, Timeout, Signal.

Initially, you have to declare one or more events with an handler (callback function) and attach them to the basic context of the events:
$base = event_base_new();
$event = event_new();
$errno = 0;
$errstr = '';
$socket = stream_socket_server("tcp://$IP:$port", $errno, $errstr);
stream_set_blocking($socket, 0); event_set($event, $socket, EV_READ | EV_PERSIST, 'onAccept', $base);


Function handlers 'onRead', 'onWrite', 'onError' must implement the processing logic. Data is written into the buffer, which is obtained in the non-blocking mode:
function onRead($buffer, $id)
{
while($read = event_buffer_read($buffer, 256)) {
var_dump($read);
}
}


The main event loop runs with the function event_base_loop($base);. With a few lines of code, you can exit the handler only by calling: event_base_loobreak(); or after the specified time (timeout) event_loop_exit();.

Error handling deals with failure Events:
function onError($buffer, $error, $id)
{
global $id, $buffers, $ctx_connections;
event_buffer_disable($buffers[$id], EV_READ | EV_WRITE);
event_buffer_free($buffers[$id]);
fclose($ctx_connections[$id]);
unset($buffers[$id], $ctx_connections[$id]);
}


It should be noted the following subtlety: Working with timers is only possible through the file descriptor. The example of official the documentation does not work. Here is an example of processing that runs at regular intervals.
$event2 = event_new();
$tmpfile = tmpfile();
event_set($event2, $tmpfile, 0, 'onTimer', $interval);
$res = event_base_set($event2, $base);
event_add($event2, 1000000 * $interval);


With this code we can have a working timer finishes only once. If we need a "permanent" Timer, using the function onTimer we need create a new event each time, and reassign it to process through a "period of time":
function onTimer($tmpfile, $flag, $interval)
{
$global $base, $event2;

if ($event2) {
event_delete($event2);
event_free($event2);
}

call_user_function(‘process_data’,$args);

$event2 = event_new();
event_set($event2, $tmpfile, 0, 'onTimer', $interval);
$res = event_base_set($event2, $base);
event_add($event2, 1000000 * $interval);
}


At the end of the daemon we must release all previously allocated resources:
event_delete($event);
event_free($event);
event_base_free($base);

event_base_set($event, $base);
event_add($event);


Also it should be noted that for the signal processing handler is set the flag EV_SIGNAL: event_set($event, SIGHUP, EV_SIGNAL, 'onSignal', $base);

If needed constant signal processing, it is necessary to set a flag EV_PERSIST. Here follows a handler for the event onAccept, which occurs when a new connection is a accepted on a file descriptor:
function onAccept($socket, $flag, $base) {
global $id, $buffers, $ctx_connections;
$id++;
$connection = stream_socket_accept($socket);
stream_set_blocking($connection, 0);
$buffer = event_buffer_new($connection, 'onRead', NULL, 'onError', $id);
event_buffer_base_set($buffer, $base);
event_buffer_timeout_set($buffer, 30, 30);
event_buffer_watermark_set($buffer, EV_READ, 0, 0xffffff); event_buffer_priority_set($buffer, 10); event_buffer_enable($buffer, EV_READ | EV_PERSIST); $ctx_connections[$id] = $connection;
$buffers[$id] = $buffer;
}


Monitoring a Daemon

It is good practice to develop the application so that it was possible to monitor the daemon process. Key indicators for monitoring are the number of items processed / requests in the time interval, the speed of processing with queries, the average time to process a single request or downtime.

With the help of these metrics can be understood workload of our demon, and if it does not cope with the load it gets, you can run another process in parallel, or for running multiple child processes.

To determine these variables need to check these features at regular intervals, such as once per second. For example downtime is calculated as the difference between the measurement interval and total time daemon.

Typically downtime is determined as a percentage of a measurement interval. For example, if in one second were executed 10 cycles with a total processing time of 50ms, the time will be 950ms or 95%.

Query performance wile be 10rps (request per second). Average processing time of one request: the ratio of the total time spent on processing requests to the number of requests processed, will be 5ms.

These characteristics, as well as additional features such as memory stack size queue, number of transactions, the average time to access the database, and so on.

An external monitor can be obtain data through a TCP connection or unix socket, usually in the format of Nagios or zabbix, depending on the monitoring system. To do this, the demon should use an additional system port.

As mentioned above, if one worker process can not handle the load, usually we run in parallel multiple processes. Starting a parallel process should be done by the parent master process that uses fork() to launch a series of child processes.

Why not run processes using exec() or system()? Because, as a rule, you must have direct control over the master and child processes. In this case, we can handle it via interaction signals. If you use the exec command or system, then launch the initial interpreter, and it has already started processes that are not direct descendants of the parent process.

Also, there is a misconception that you can make a demon process through command nohup. Yes, it is possible to issue a command: nohup php mydaemon.php -master >> /var/log/daemon.log 2 >> /var/log/daemon.error.log &

But, in this case, would be difficult to perform log rotation, as nohup "captures" file descriptors for STDOUT / STDERR and release them only at the end of the command, which may overload of the process or the entire server. Overload demon process may affect the integrity of data processing and possibly cause partial loss of some data.

Starting a Daemon

Starting the daemon must happen either automatically at boot time, or with the help of a "boot script."

All startup scripts are usually in the directory /etc/rc.d. The startup script in the directory service is made /etc/init.d/ . Run command start service myapp or start group /etc/init.d/myapp depending on the type of OS.

Here is a sample script text:
#! /bin/sh
#
$appdir = /usr/share/myapp/app.php
$parms = --master –proc=8 --daemon
export $appdir
export $parms
if [ ! -x appdir ]; then
exit 1
fi

if [ -x /etc/rc.d/init.d/functions ]; then
. /etc/rc.d/init.d/functions
fi

RETVAL=0

start () {
echo "Starting app"
daemon /usr/bin/php $appdir $parms
RETVAL=$?
[ $RETVAL -eq 0 ] && touch /var/lock/subsys/mydaemon
echo
return $RETVAL
}

stop () {
echo -n "Stopping $prog: "
killproc /usr/bin/fetchmail
RETVAL=$?
[ $RETVAL -eq 0 ] && rm -f /var/lock/subsys/mydaemon
echo
return $RETVAL
}

case in
start)
start
;;
stop)
stop
;;
restart)
stop
start
;;
status)
status /usr/bin/mydaemon
;;
*)
echo "Usage:
php
if (is_file('app.phar')) {
unlink('app.phar');
}
$phar = new Phar('app.phar', 0, 'app.phar');
$phar->compressFiles(Phar::GZ);
$phar->setSignatureAlgorithm (Phar::SHA1);
$files = array();
$files['bootstrap.php'] = './bootstrap.php';
$rd = new RecursiveIteratorIterator(new RecursiveDirectoryIterator('.'));
foreach($rd as $file){
if ($file->getFilename() != '..' && $file->getFilename() != '.' && $file->getFilename() != __FILE__) {
if ( $file->getPath() != './log'&& $file->getPath() != './script'&& $file->getPath() != '.')
$files[substr($file->getPath().DIRECTORY_SEPARATOR.$file->getFilename(),2)] =
$file->getPath().DIRECTORY_SEPARATOR.$file->getFilename();
}
}
if (isset($opt['version'])) {
$version = $opt['version'];
$file = "buildFromIterator(new ArrayIterator($files));
$phar->setStub($phar->createDefaultStub('bootstrap.php'));
$phar = null;
}
 {start|stop|restart|status}"
;;

RETVAL=$?
exit $RETVAL


Distributing Your PHP Daemon

To distribute a daemon it is better to pack it in a single phar archive module. The assembled module should include all the necessary PHP and .ini files.

Below is a sample build script:
#php app.phar
myDaemon version 0.1 Debug
usage:
--daemon – run as daemon
--debug – run in debug mode
--settings – print settings
--nofork – not run child processes
--check – check dependency modules
--master – run as master
--proc=[8] – run child processes


Additionally, it may be advisable to make a PEAR package as a standard unix-console utility that when run with no arguments prints its own usage instruction:
[NMD%%CODE%%]


Conclusion

Creating daemons in PHP it is not hard but to make them run correctly it is important to follow the steps described in this article.

Post a comment here if you have questions or comments on how to create daemon services in PHP.
17847 views · 5 years ago
Creating a Virus with PHP

In his talk, “Writing Viruses for Fun, Not Profit,”Ben Dechrai (after making the viewer take a pledge to only use this knowledge for good and not evil) walks through how many viruses operate, and just how easy it is to build your own self-replicating virus in PHP.

The danger of many of these viruses according to Ben is that the most dangerous viruses often escape detection by not looking like a virus. Instead they encrypt their code to hide their true intent, while also constantly adapting and evolving.

Perhaps even more dangerously, they act like they’re benign and don’t actually do anything - often times laying dormant until called upon by the malicious actor.

Creating the Virus

What’s scary is just how simple it was for Ben to create such a virus, one that mutated ever so slightly as it infected every other file on the server. Opening up unlimited possibilities from scraping customer data, to DDOS attacks, to simply hijacking your domain.


But those attacks are just the start as Ben demonstrated how easy it is to write new files, delete files, 
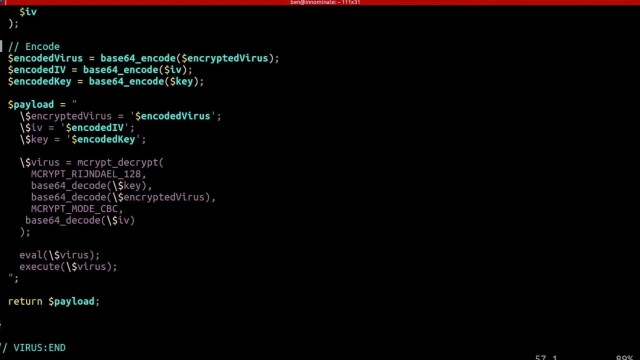
eval() and execute foreign code - which could even be extended to accessing the underlying server itself if shell_exec() is enabled.

To add to the problem, Ben shares how challenging it can be to identify malicious code on your server as many of these attacks are far more sophisticated than the the virus he created in a matter of minutes - hiding themselves and often appearing as if they are part of the original source code.

Deploying the Virus

To drive his point home, Ben demonstrates how even seemingly secure systems can be vulnerable - as all it takes is one tiny misstep within your application.

He highlights this by building what should be a secure photo gallery - one that checks the extension and mime-type of the image - and even stores it outside of the public directory. He goes even farther by adding additional sanity checks with a PHP script that then renders the image.

After walking through the code and it’s security features, he then downloads a simple image from the internet. Opening his editor he quickly injects the virus (written in PHP) into the image and uploads it, passing all of the server checks.

Surely, since it passed these checks the system is secure, right? Ben loads the gallery to proudly show off the image - which is just that… an image, with nothing special or out of the ordinary.
Except that when he opens the image gallery files, each has been infected with the malicious code.

The culprit that allowed for Ben to hijack an entire system and execute foreign code, create new files, and even hijack the entire site? When displaying the image the file was included using PHP’s include() function, instead of pulling in the data using file_get_contents() and echoing it out.

Such a simple mistake provided Ben, if he was a malicious hacker, complete access to all of the files on the system.

Protecting Yourself

Security always exists in layers - and this could have been prevented by including a few more layers, such as using an open source library to rewrite the image, reviewing the image source before pulling it in, or again not giving it executable access by using the PHP include() function.

But what’s terrifying is how simple it is to hijack a site, how easy it is to get access to your system and private data, and how easy it is to overlook security vulnerabilities - especially with open source tooling and those that take plugins.

As Ben explains, sometimes the core code itself is really secure, but then you get two different plugins that when used together accidentally create a security vulnerability. That by itself is one of the most challenging as you can audit each plugin individually, and still not know you’re opening up your system to malicious actors.

This is why it's not just important to stay up to date on the latest security measures and best practices, but to be constantly thinking like a hacker and testing your code for vulnerabilities.

Learn More

You can watch thefull video to learn more how viruses operate, how to quickly build your own PHP virus (but you must promise to use it for good), and what to watch for in order to protect yourself, your customers, and your architecture.

SPONSORS

PHP Tutorials and Videos