Learn from your fellow PHP developers with our PHP blogs, or help share the knowledge you've gained by writing your own.

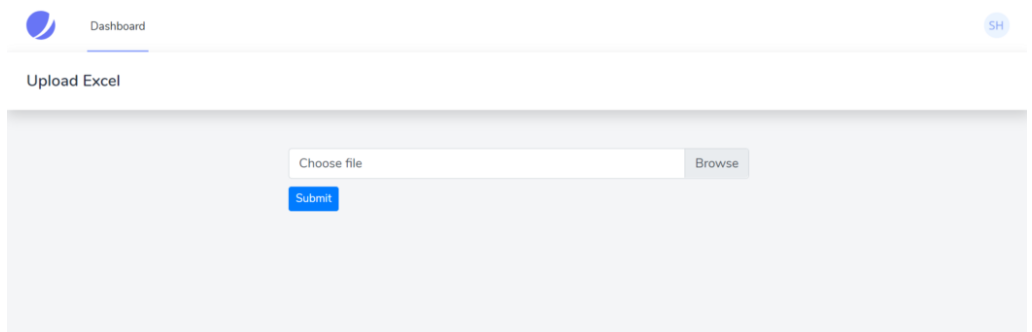
<form method="post" enctype="multipart/form-data"> @csrf <div class="custom-file"> <input type="file" accept=".csv" name="excel" class="custom-file-input" id="customFile" /> <label class="custom-file-label" for="customFile">Choose file</label	> </div> <div> <button type="submit" class="btn btn-primary btn-sm" style="margin-top: 10px"	>Submit> </div>

</form>
php artisan make:controller UploadController
Route::post('/upload', [UploadController::class, 'upload'])->name('upload')->middleware('auth');
<form method="post" action="{{route('upload')}}" enctype="multipart/form-data">
$file = $request->file('excel');
if (($handle = fopen($file, "r")) !== FALSE) { while (($data = fgetcsv($handle, 1000, ",")) !== FALSE) { ..... }

}
{ "name": "test", "job": "test"

}
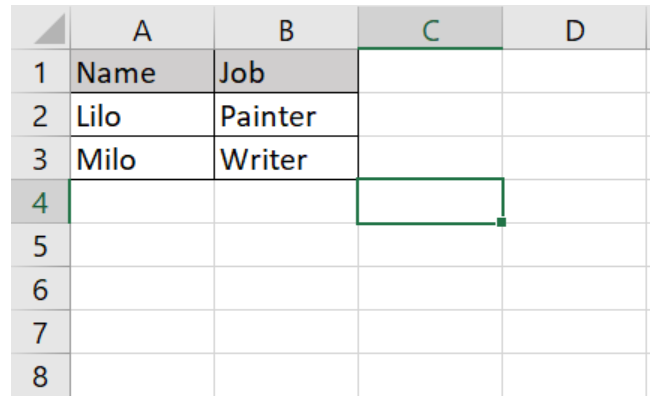
if (($handle = fopen($file, "r")) !== FALSE) { while (($data = fgetcsv($handle, 1000, ",")) !== FALSE) { Http::post('https://reqres.in/api/users', [ 'name' => $data[0], 'job' => $data[1], ]); }

}
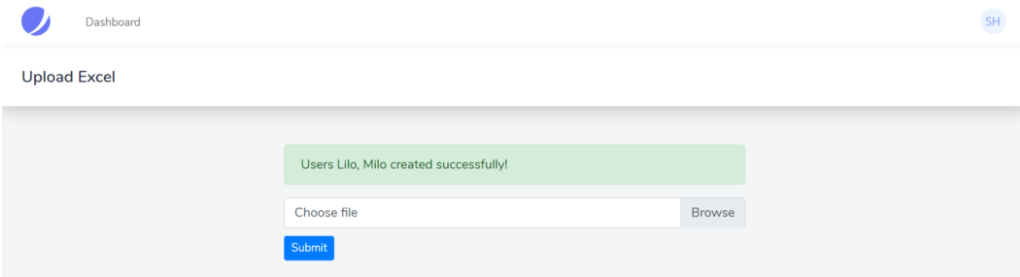
public function upload(Request $request){ $file = $request->file('excel'); if($file){ $row = 1; $array = []; if (($handle = fopen($file, "r")) !== FALSE) { while (($data = fgetcsv($handle, 1000, ",")) !== FALSE) { if($row > 1){ Http::post('https://reqres.in/api/users', [ 'name' => $data[0], 'job' => $data[1], ]); array_push($array,$data[0]); } $request->session()->flash('status', 'Users '.implode($array,", ").' created successfully!'); $row++; } } }else{ $request->session()->flash('error', 'Please choose a file to submit.'); } return view('dashboard');

}
<div class="container max-w-7xl mx-auto sm:px-6 lg:px-8" style="width: 50%"> @if (session('status')) <div class="alert alert-success"> {{ session('status') }} </div> @endif @if (session('error')) <div class="alert alert-error"> {{ session('error') }} </div> @endif <form action="{{route('upload')}}" method="post" enctype="multipart/form-data"> @csrf <div class="custom-file"> <input type="file" accept=".csv" name="excel" class="custom-file-input" id="customFile" /> <label class="custom-file-label" for="customFile">Choose file</label> </div> <div> <button type="submit" class="btn btn-primary btn-sm" style="margin-top: 10px">Submit</button> </div> </form>

</div>


CREATE TABLE 'mydbname'.'menus' ( 'ID' INT(11) NOT NULL AUTO_INCREMENT , 'menuname' VARCHAR(100) NOT NULL , 'item' VARCHAR(50) NOT NULL , 'itemlink' VARCHAR(100) NOT NULL , PRIMARY KEY ('ID')) ENGINE = MyISAM COMMENT = 'menu table';
CREATE TABLE 'mydbname'.'users' ( 'ID' INT(11) NOT NULL AUTO_INCREMENT , 'username' VARCHAR(100) NOT NULL , 'password' VARCHAR(50) NOT NULL , 'email' VARCHAR(100) NOT NULL , PRIMARY KEY ('ID')) ENGINE = MyISAM COMMENT = 'user table';
ALTER TABLE 'mydbname'.'content' ADD content_type VARCHAR(50);
<form method="post" action="<?php $_SERVER['PHP_SELF'];?>"/>

<input type="text" name="menuname" class="mytextbox" placeholder="Menu Name" required />

<input type="text" name="item" class="mytextbox" placeholder="Item" required />

<input type="text" name="itemlink" class="mytextbox" placeholder="Item Link" required />

<input type="submit" value="Save Menu Item" name="savemenu" class="mybutton"/>

</form>
<form> tag.<?php
if(isset($_POST['savemenu'])){
include('../includes/conn.php');
if ($letsconnect->connect_error) {
die("Your Connection failed: " . $letsconnect->connect_error);
}else{
$menuname = $letsconnect ->real_escape_string($_POST['menuname']);
$item = $letsconnect -> real_escape_string($_POST['item']);
$itemlink = $letsconnect->real_escape_string($_POST['itemlink']);
$sql = "INSERT INTO menus(menuname,item,itemlink) VALUES ('".$menuname."', '".$item."', '".$itemlink."')";
if (mysqli_query($letsconnect, $sql)) {
echo "Your data was saved successfully!";
} else { echo "Error: " . $sql . "" . mysqli_error($letsconnect);
} $letsconnect->close();
}
}
?>
<form method="post" action="<?php $_SERVER['PHP_SELF'];?>"/>

<input type="text" name="username" class="mytextbox" placeholder="Username" required/>

<input type="password" name="password" class="mytextbox" placeholder="Password" required />

<input type="email" name="email" class="mytextbox" placeholder="Email" required />

<input type="submit" value="Save Menu Item" name="saveuser" class="mybutton"/>

</form>
<form> tag.<?php
if(isset($_POST[‘saveuser])){
include('../includes/conn.php');
if ($letsconnect->connect_error) {
die("Your Connection failed: " . $letsconnect->connect_error);
}else{
$menuname = $letsconnect -> real_escape_string($_POST[‘username']);
$item = $letsconnect -> real_escape_string($_POST[‘password']);
$itemlink = $letsconnect -> real_escape_string($_POST[‘email']);
$sql = "INSERT INTO menus(username,password,email) VALUES ('".$username."', '".$password."', '".$email."')";
if (mysqli_query($letsconnect, $sql)) {
echo "Your data was saved successfully!";
} else { echo "Error: " . $sql . "" . mysqli_error($letsconnect);
} $letsconnect->close();
}
}
?>
Please note that I will be covering Password security in the tutorials that follow.
<html>

<head><title>Backend - Capture Content</title></head>

<body>

<?php

if(isset($_POST['savedata'])){

include('../includes/conn.php');

if ($letsconnect->connect_error) {

die("Your Connection failed: " . $letsconnect->connect_error);

}else{

$title = $letsconnect -> real_escape_string($_POST['title']);

$content = $letsconnect -> real_escape_string($_POST['content']);

$author = $letsconnect -> real_escape_string($_POST['author']);

$sql = "INSERT INTO content (title,content,author) VALUES ('".$title."', '".$content."', '".$author."')";

if (mysqli_query($letsconnect, $sql)) {

echo "Your data was saved successfully!";

} else { echo "Error: " . $sql . "" . mysqli_error($letsconnect);

} $letsconnect->close();

}

}

?>

<form action="<?php $_SERVER[‘PHP_SELF'];?>" method="post">

<input type="text" name="title" placeholder="Content Title here" required/>

<textarea name="content">Content Here</textarea>

<input type="text" name="author" placeholder="Author" required/>

<input type="submit" value="Save My Data" name="savedata"/>

</form>

</body>

</html>
<form> above the submit button.<input type="text" name="content_type" placeholder="Content Type" required/>;
$content_type = $letsconnect->real_escape_string($_POST['content_type']);
$sql = "INSERT INTO content (title,content,author,content_type) VALUES ('".$title."', '".$content."', '".$author."', '".$content_type."')";

Your biggest asset is also your biggest risk... your developers
 g10dra 116,108
  mike 78,319
  crocodile2u 77,820
  harikrishnanr 62,216
  calevans 37,751
  MindNovae 28,666
  dmamontov 19,342
  tanja 16,677
  damnjan 13,084
  ahmedkhan
 SPONSORS

SPONSORS