PHP & Web Development Blogs

Search Results For: website
Showing 6 to 10 of 15 blog articles.
5512 views · 2 years ago
Create your first PHP app

PHP is an incredibly powerful programming languaage, one that powers roughly 80% of the web! But it's also one of the easier languages to learn as you can see your changes in real time, without having to compile or wait for the code to repackage your app or website.

Defining a PHP script


To get started, create a file called "myfirstpage.php." You can actually call it anything you'd like, but the important part here is the extension: .php. This tells the server to treat this page as a PHP script.

Now let's go ahead and create a basic HTML page:


<html>

<head>

<title>Hello</title>

</head>

<body>

Hello

</body>

</html>


Go ahead and save your page and upload it to any host that supports PHP. Now visit your page and you should see a page that outputs "Hello."

Echo content


Now let's add some PHP code to our script. To signal the server to render PHP code we first open with the <?php tag, then we write our PHP code, and finally close it with the ?> tag. This is important as if we were creating an XML file and forgot to escape the opening XML tag which also has a question mark, we would run into a fatal error.

Now let's write some PHP code that tells the server to echo specific output. To echo or print the content on the page we can use the echo statement in our PHP code by placing the text we want to echo in single quotes and then end the command with a semi colon. Let's echo out "there!":


<html>

<head>

<title>Hello</title>

</head>

<body>

Hello <?php echo 'there!'; ?>

</body>

</html>


Now upload your script and test it on your webhost. You should now see "Hello there!" on your screen. Now this isn't as exciting since we could do the same thing in HTML without PHP, so let's create dynamic content based on the URL string.

Using $_GET

PHP allows you to interact with your visitors and handle incoming data. This means that you can use either the URL (querystring) or forms to retrieve user input. There are additional ways to access data as well, but we will not be covering those in this introduction.

In your browser, add the following to the end of your url: ?name=yourname


The full URL should now look like myfirstpage.php?name=yourname

You'll notice when you visit this page nothing happens - so let's change that! To access the value of name in the querystring, we can use $_GET['name'] like so:


<html>

<head>

<title>Hello</title>

</head>

<body>

Hello <?php echo $_GET['name']; ?>

</body>

</html>


You'll notice that unlike the text "there!" that the GET is not in quotes - this is because this is a variable and by not placing it in quotes we're telling PHP to render this as a variable and not as text. If we leave the single quotes, instead of saying "Hello yourname" it would say "Hello $_GET['name']."

Using logic and defining variables


Along with getting user input, you can also create conditions to determine what content should be output. For example, we can determine whether or not to say "Good morning" or "Good evening" depending on the time, along with your name using the querystring.

To do this, we'll be using if, elseif, and else along with the PHP date() function. You can learn more about how to use different date formats to output the date here, but we'll be using the date() function to get back the hour of the day (based on the server's time) between 0 (midnight) and 23 (11pm). We'll then use greater than (>) to determine what to assign to our $time variable which we'll output with the user's name.


<html>

<head>

<title>Hello</title>

</head>

<body>

<?php

if(date("G") > 18) {

$time = 'evening';

} elseif (date("G") > 12) {

$time = 'afternoon';

} else {

$time = 'morning';

}

echo 'Good '.$time.' '.$_GET['name'];

?>

</body>

</html>


Now upload your script again to the web server and refresh the page. Depending on the time of the server you should see either Good morning, Good afternoon, or Good evening followed by your name.

If you get an error, or the page is blank, make sure you have closed all of your quotes and have a semicolon after your statements/ commands. Missing a quote or semicolon is one of the most common causes of PHP errors.

You may also receive an error if the timezone has not been set on your server. To resolve this (or change the timezone/ output of the script) try adding this line as the first line following the opening PHP bracket (<?php):


date_default_timezone_set('America/Los_Angeles');


With that you have created your first PHP script and have already taken advantage of many of the fundamentals used in every PHP program. While there is more to learn you are well on your way, and have a great start on defining variables, using user input, and taking advantage of PHP's built in functions.


Want more? Go even further with our Beginning PHP video training course!
6758 views · 2 years ago
10 SEO Best Practices for Web Developers

You've built an amazing website, but how do you make sure people can find your site via search engines? In this article we cover 10 best practices to make sure your article not only stands out, but ranks well with search engines.

1. Take time to research keywords


To determine the best keywords for your site, you'll need to do some keyword research. This usually consists of combing through your competitors' sites for the keywords that are driving them the most traffic. There are several ways you can get started with keyword research. One recommended way is to create a spreadsheet with your competitors' sites listed and add keywords that you can copy and paste your competitors' keywords into Google's Keyword Tool and Google Webmaster Tools Keyword Analyzer tool. Analyze your competition's site's website titles to find out what keywords they are using tools such as Ahrefs, Moz, SpyFu, or SEMrush to find out what keywords others are using on your competitor's site.

2. Focus on your Title tag


This is the headline for every article. It needs to be bold and attention grabbing so it can catch the eye of potential users. Pick it somewhere around 60-90 characters to make sure it is displayed properly in search engines as well as readable in the browser tab. As you write your title, focus on the unique keywords your readers are likely to search for. Also make sure that the keywords you select are relevant to your page. Another good practice is to make the title tag and your header (h1) the same.

3. Carefully craft your H1, H2, H3 tags


Careful usage of header tags helps search engines identify keywords within your page. To get the best results from your header tags, use H1, H2, and H3 in order with keywords in your H2 and H3 headers that support your H1 tag. Remember, your H1 tag should mimic your title tag, whereas the H2 and H3 can expand and add additional context. You can also utilize multiple H2 and H3 tags, however be sure that these headers are supporting the H1 tag and relevant to the content on your page. Using irrelevant header keywords can actually work to your disadvantage.

4. Avoid loading content with JavaScript


Despite it's popularity, JavaScript is not yet well supported by search engines and can mask important content. Progressive Web Apps in particular can suffer as key content is loaded after the page is spidered, or in the case of many search engines that do not yet index JavaScript not loaded at all. This is also the case for many social media sites, meaning that content loaded dynamically is not evaluated or pulled in, resulting in the default skeleton of your site being what shows up in search engines and in link previews.

5. Carefully name images


In the past search engines would evaluate your images based on their alt tag, however as more and more developers loaded irrelevant keywords into this hidden image text search engines instead added more emphasis to the actual name of the image itself. This means using generic image names such as 1.jpg can actually hurt your site ranking as search engines might be looking for seokeywords.jpg. Now, just because you're carefully naming your images with relevant keywords describing the image doesn't mean you should ignore the alt tag. Be sure to continue to include alt tags for older search engines, in the case the image doesn't load, and for accessibility (ie screen readers).

6. Work to improve your page load time


It’s not a secret that faster sites rank higher in search engines. Most search engines use the PageSpeed Index from Google to determine the speed of websites. One thing Google looks at is how fast images are loading. For this reason, we recommend taking a look at how long it takes for the first image to load on your site or even take advantage of lazy loading for non-critical images. You want images to be loading within 30 seconds at the absolute latest, before the user can actually click on the page. You also need to make sure that if you're using multiple images that they load as one group. Next, take a look at how long it takes to load a webpage. Are pages taking longer than three seconds to load on your site? You want to have pages that load fast for users, but your code and templates can easily be causing this to happen.

7. Optimize text throughout your page


Beyond your title tag, headers, and images it's important to work keywords into your standard content, while also working to avoid overloading keywords. To help prevent overloading and increase search engine rankings across multiple keywords you can use alternative phrases. In the case of "PHP training" an alternative phrase might be "PHP tutorials" or "PHP course." This both helps support the primary keyword, while also allowing the page to rank for these keywords as well. Remember to use the tools referenced above to find the keywords that are right for your site, and then work them in to natural sentences without forcing keywords or becoming overly repetitive. Also keep in mind, just as important as the content and keywords on the page are to search engines, how users engage with that content is also critical. If your page experience's high bounce rates or low engagement with the content, it is likely to be deprioritized by search engines, meaning a page highly optimized for search engines but not humans may enjoy a higher ranking, but only for a short time before it is heavily penalized.

8. Build your Domain and Page Authority


Domain and Page Authority are determined not just by the number of back-links (or sites linking to your domain or page), but also the quality of the sites and pages linking to you. One practice that has made obtaining a better DA or PA harder has been purchasing or acquiring bulk back-links. Note this practice is actually against Google's TOS and may result in your entire site being banned from their search results! Because of this practice, it's important to focus on high quality sites and work to get back-links naturally either through partnerships or syndicated content (such as blog posts). You can also check your DA here or using one of the many tools referenced above.

9. Take advantage of social media


Speaking of back-links, social media can be a powerful tool for increasing page visibility while also improving your search engine rankings! Remember, most social sites do not support or read JavaScript, so ensure your content is available on the page. If you do have a progressive web app with JavaScript loading your content, look into using Headless Chrome to render a JavaScript free version of your site for specific bots (note - the content MUST be the same content a user would see or your site may be blocked). There are also numerous tools to allow you to build the content via JavaScript on the server backend before passing it to your readers. To help get even more exposure, consider adding social share links or tools like AddThis.

10. Good SEO takes time


The truth is that there really aren't any special secrets or ingredients to ranking well in search engines (well not that Google has publicly shared). Instead it's about properly formatting your page, making sure it's readable to search engines, and providing content that your readers will engage with. As you provide more valuable content, and more people like and link to your content - your site's Domain Authority will gradually increase, giving your site and pages more powerful - resulting in a higher ranking.
5299 views · 3 years ago
Top 12 PHP Libraries to Leverage Your Web App Development


PHP, by all means, is an immensely powerful language!


We may fall short of words, but there won't come any end to its qualities. The endless functionalities and possibilities of this server-side scripting language have managed to get it a strong and supportive community of PHP programmers on a global level. At present, PHP powers more than half on websites and applications on the internet.


Do you know what makes PHP so praiseworthy?


It is the simplicity, easy programming structure, and developer-friendly web functionalities that are to be credited to turn PHP into one of the top programming languages. You can create highly interactive and dynamic websites and applications with desired results by making use of PHP.


However, coding often could be a tough and tedious task to accomplish. As a solution to this, you get built-in PHP libraries that optimize the process of coding for maximum productivity.


But what are these libraries?


That's exactly what you will find out as you move ahead in this article, a list of top 12 PHP libraries capable of leading the development process in an intended manner.


So, without waiting any further, let's move ahead to learn about PHP libraries in-depth.


PChart


PChart is a PHP library assisting with the generation of text data in the form of something more appealing to the eyes and known as visual charts.


You can use this library to represent data as bar charts, pie charts, and many more different formats. The PHP script here utilizes SQL queries to put data in the impressive charts or graphs form.


Mink


Another well-known in the list of PHP libraries is Mink. It allows you to keep an eye on if a proper interaction is happening between your web apps and the browser. Eliminating the API differences between the two types of browser emulators, Mink offers an authentic testing environment for you. It also supports PHPUnit, Behat, and Symfony2.


Monolog


Monolog is a PHP logging library that helps you with saving logs to the specified locations by sending them to set files, sockets, inboxes, databases, or other web services. The use of the PSR-3 interface permits to type-hint logs in counter to your libraries that maintain optimum interoperability.


Hoa


This modular, extensible, and structured set of PHP libraries we know as Hoa establishes a link between the research and the industry.


It recommends essential paradigms, mechanisms, and algorithms for building the reliability of a site. Many PHP developers in different parts of the world use Hoa for ideal PHP development.


Guzzle


Guzzle is an HTTP client library for PHP that enables you to send HTTP requests to combine with web services.


It offers a simple interface that makes the development of query strings, POST requests, HTTP cookies, and many other attributes possible. You can also use Guzzle to send synchronous and asynchronous requests from the similar interface.


Ratchet


If your need is to develop real-time, two-directional apps between clients and servers over WebSockets, Ratchet is the PHP library you need to do it effectively.


Creating event-driven apps with Ratchet is a rapid, simple, and easy job to do!


Geocoder


Geocoder is a library to create applications that are very well geo-aware.


With Geocoder, there is an abstraction layer that helps with geocoding manipulations.


It is further split into two parts, known as HttpAdapter and Provider.


ImageWorkshop


ImageWorkshop is an open-source PHP library letting you work over the manipulation of images with layers. You can crop, resize, add watermarks, create thumbnails, and so much more. You can also enhance the images on the sites.


PhpThumb


phpThumb is the library specialized at handling the work associated with creating thumbnails with minimal coding. Accepting every image source type and image formats, it makes you do a lot ranging from rotating or cropping to watermarking or defining the image quality.


Parody


This simple library we know as Parody is used to copy classes and objects. It also provides results for method calls, acquiring properties, instantiating objects, and more. Sequential method chaining is used by Parody to produce defining class structures.


Imagine


This object-oriented PHP library is meant for working with images along with manipulating them. The often adopted operations such as resizing, cropping, and applying filters happen instantly and relatively well with Imagine.


With Imagine, you get a color class that forms the RGB values of any given color. Draw shapes like arc, ellipse, line, etc. with the features available.


PhpFastCache


PhpFastCache is an open-source PHP library that makes caching feasible. Coming as a single-file, it can be integrated within a matter of minutes.


Caching methods supported by PhpFastCache involve apc, memcache, memcached, wincache, pdo, and mpdo.


The Bottom Line


It's not about what extra difference these libraries make; it's about what significant individual contributions these libraries make for a final desired PHP app or website.


A PHP programmer, too, agrees with these libraries' benefits.


It's your time now to try and believe!
4407 views · 3 years ago


People that visit your website face an invisible threat each time they log on. Small businesses are especially vulnerable to digital data breaches, and that can change the way your customers feel about you. But, although you cannot stop hackers from trying, there are things you can do as a business owner to make your website a safer experience for everyone. Keep reading for tips.

Mature digitally.


You may be ahead of the times when it comes to products and services, but, chances are, your website hasn't fully kept up. It's time to learn all you can about the internet and digital security. If you are already somewhat tech savvy, a PHP Security Course from Nomad PHP can help you better understand everything from cryptography to website error messages.

Adapting to today's digital environment means transforming your website to quickly and easily identify threats via machine learning and network monitoring. And, as Upwork explains, digital maturity not only keeps your website safe, but adopting this mindset can also increase your efficiency and accuracy by reducing human errors.

Understand the threats.


It is not enough to simply keep up with your website, you also have to understand the types of threats that are out there. You're likely familiar with ransomware and phishing, but, it's also a good idea to know how a website can get hacked. Your site's content management system and vulnerabilities within your operating system are all weak points that hackers can easily identify.

Insist on security measures.


When customers log into your website, they input their credentials. Each time they do so, you can best protect their information by keeping your systems up to date. You'll also want to ensure that your site is hosted on a secure service and that you have an SSL certificate installed.

If you are not already, have your IT department or managed IT services perform regular website security checks. PhoenixNAP, an IT services provider, notes that those websites working via WordPress should also be safely outfitted with the most recent security plug-ins.

Eliminate spam.


If your website allows for comments that are not manually approved, anyone on the internet can post. This leaves it open for hackers and other unscrupulous individuals to comment with spam and malicious links that your customers may inadvertently click on. While many of these simply exist as a way for the commenter to drive traffic to another website, others are designed to draw your readers' attention, gain their trust, and access their personal information.

Prioritize passwords.


Your customers' passwords are the keys by which they open the door to your website. Unfortunately, many people do not treat them with as much care as they do the keys they use in the non-digital world.

It's true, passwords can be a pain, but you are not doing yourself or your customers any favors by allowing simple one-word passcodes to access your site. Instead, design your site to require a strong password. How-To Geek asserts that this will have a minimum of 12 characters and include a combination of upper and lower case letters, symbols, and numbers.

While you will likely rely on your IT experts to secure your website, the truth is that it is ultimately up to you to ensure this is done. So even if you are not a digital mastermind, knowing all you can about web security can help you be a better business owner. Your customers will be safer, and a secure website is just one way to strengthen your business's online presence and keep up with today's -- and tomorrow's -- technology.
8776 views · 3 years ago


Welcome back! If you’re new to this series have a look at Part 1 here


Today’s focus is on templating, the aesthetic that will make or break your web application.

Having a clean design with well defined CSS that’s responsive and user friendly goes a long way.

Developers often stick to their lane but delving into templating will bode in your favor, you can indeed
create a functional and launch-worthy application all on your own!

Let’s jump into it!

Structured structure


Everything you tackle should be found with ease down the line. Therefore careful planning is fundamental to the success and sustainability of your project. You’ll also find that clearly defining your work lends itself to more productivity overall as you spend less that explaining your work during a handover / looking for a specific piece of code or resource. You’ll probably end up spending more time on actual work.
Finding your own unique pattern with file structure and CSS identifiers will also work in your favor as something unique to your process will most likely be easier to remember and form a tactile relationship with.

Our project’s current structure looks like this:


>If you need to backtrack, Part 1 is a great place to start!

In part 1, we created our index.php which displays info from our database.

Let’s take this a step further and create a header and a footer for our index.php

Create a file called header.php and save this to your includes folder.

Next, create a file called footer.php and save this to your includes folder.

Your file structure should now look like this.


A header above all the rest


The header file will be a file we reuse throughout your web application. This file will contain important information that’s vital to the functionality and aesthetic of your website.
The type of info you’ll expect to see in a header.php file:
Script includes
Such as JQuery and important libraries
CSS includes
CSS files loaded from internal or external sources
Meta information
Contains important information that’s readable by search engines.
The basic structure of the beginning of your app, including your menu, and your logo.
For now, how header is going to have a basic layout.

Let’s get our HTML on!

<html>
<head>
<title>My Awesome CMS – Page Title</title>
</head>
<body>


A footer that sets the bar

Create a file called footer.php and save it to your includes folder (yourcms/includes/footer.php).

Add this code to your new file.

</body>
</html>


Next, let’s focus on the gravy… The CSS


CSS, when written beautifully, can truly set you apart.

You can tell your web application to load various styles to specific elements by defining unique identifiers.
Styles that are only used once are denoted with a # (a CSS “ID”) whereas styles that are reused multiple times are denoted with a . (a CSS “class”)

The best way to delve into the realm of CSS is to learn by experience.

Let’s create!


First, we need to create and load our CSS file. Remember our nifty new pal header.php? This created a convenient way to load our CSS file!

Add the following code to your header.php just above the </head> tag.

<link href=”../assets/css/style.css” type=”text/css” rel=”stylesheet”/> 


The ../ in the link to our stylesheet means we have to leave the current directory (the directory that header.php is in) and look for the assets/css/ directories.

Go ahead and create the css folder under your assets folder.

Next we’re going to create some simple CSS to test things out.

It’s time to add some style!


We are going to create two divs.
A div is a divider / section in HTML.
Add this to your index.php (located in your CMS’ root folder) above the <?php tag.

<div id="myfirstid"></div>
<div class="myfirstclass"></div>


Then, create a CSS file

Add this:

#myfirstid{
Background:lightblue;
Font-family:Arial;
Font-size:44px;
Font-weight: Bold;
}
.myfirstclass{
Font-size:15px;
Color: darkblue;
}


Save your newly created CSS to assets/css/ as style.css.

Pulling it all together, let’s see what we can do!


Let’s apply what we just learned to our index.php. But first, we should add our header.php and footer.php files.

Including everyone


Add this to the top of your index.php file:

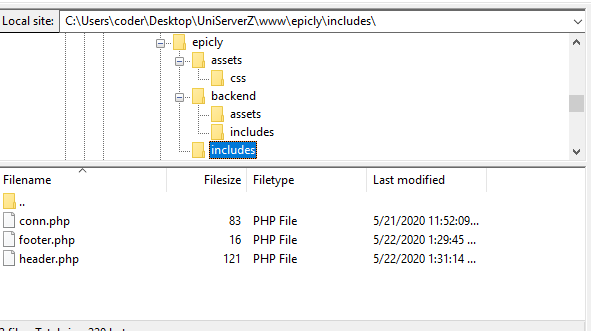
include(‘includes/header.php’);


Remove the <divs> we used for practice earlier, we have something better in store!

Add this to the bottom of your index.php:

include(‘includes/footer.php’);


Next, let’s modify our code so we can add some style to the data we retrieve from our database.

Modify the following line:
foreach($getmydata as $mydata){ echo "Title: "; echo $mydata['title']; echo "<br/>"; echo "Content: "; echo $mydata['content']; echo "<br/>"; echo "Author: "; echo $mydata['author']; echo "<br/>"; echo "<br/>";


as follows:
?>

<div id=”myfirstid”>
<?php
foreach($getmydata as $mydata){
echo "<div class=”myfirstclass”>Title: ";
echo $mydata['title'];
echo "<br/>";
echo "Content: ";
echo $mydata['content'];
echo "<br/>";
echo "Author: ";
echo $mydata['author'];
echo "</div><br/><br/>";
}?>
</div>
<?php


Your full index.php should now look like this:

<?php
include('includes/header.php');
include('includes/conn.php');

if ($letsconnect -> connect_errno) { echo "Error " . $letsconnect -> connect_error;

}else{

$getmydata=$letsconnect -> query("SELECT * FROM content");

?>
<div id="myfirstid">
<?php
foreach($getmydata as $mydata){
echo "<div class=”myfirstclass”>Title: ";
echo $mydata['title'];
echo "<br/>";
echo "Content: ";
echo $mydata['content'];
echo "<br/>";
echo "Author: ";
echo $mydata['author'];
echo "</div><br/><br/>";
}
?>
</div>
<?php
}

$letsconnect -> close();
include('includes/footer.php');
?>


Go ahead, test it out!

There’s a lot to unpack and I will break things down a little more during our next tutorial!

Challenge


Study the final index.php and try to form a few theories about why closing a php tag is necessary before adding raw html.

Next Up: #CodeWithMe Part 4: Building A Good Base

SPONSORS