PHP & Web Development Blogs

Search Results For: simple
Showing 26 to 30 of 30 blog articles.
17941 views · 5 years ago
Creating a Virus with PHP

In his talk, “Writing Viruses for Fun, Not Profit,”Ben Dechrai (after making the viewer take a pledge to only use this knowledge for good and not evil) walks through how many viruses operate, and just how easy it is to build your own self-replicating virus in PHP.

The danger of many of these viruses according to Ben is that the most dangerous viruses often escape detection by not looking like a virus. Instead they encrypt their code to hide their true intent, while also constantly adapting and evolving.

Perhaps even more dangerously, they act like they’re benign and don’t actually do anything - often times laying dormant until called upon by the malicious actor.

Creating the Virus

What’s scary is just how simple it was for Ben to create such a virus, one that mutated ever so slightly as it infected every other file on the server. Opening up unlimited possibilities from scraping customer data, to DDOS attacks, to simply hijacking your domain.


But those attacks are just the start as Ben demonstrated how easy it is to write new files, delete files, 
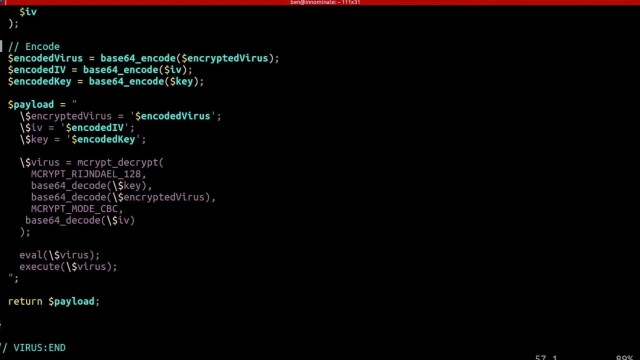
eval() and execute foreign code - which could even be extended to accessing the underlying server itself if shell_exec() is enabled.

To add to the problem, Ben shares how challenging it can be to identify malicious code on your server as many of these attacks are far more sophisticated than the the virus he created in a matter of minutes - hiding themselves and often appearing as if they are part of the original source code.

Deploying the Virus

To drive his point home, Ben demonstrates how even seemingly secure systems can be vulnerable - as all it takes is one tiny misstep within your application.

He highlights this by building what should be a secure photo gallery - one that checks the extension and mime-type of the image - and even stores it outside of the public directory. He goes even farther by adding additional sanity checks with a PHP script that then renders the image.

After walking through the code and it’s security features, he then downloads a simple image from the internet. Opening his editor he quickly injects the virus (written in PHP) into the image and uploads it, passing all of the server checks.

Surely, since it passed these checks the system is secure, right? Ben loads the gallery to proudly show off the image - which is just that… an image, with nothing special or out of the ordinary.
Except that when he opens the image gallery files, each has been infected with the malicious code.

The culprit that allowed for Ben to hijack an entire system and execute foreign code, create new files, and even hijack the entire site? When displaying the image the file was included using PHP’s include() function, instead of pulling in the data using file_get_contents() and echoing it out.

Such a simple mistake provided Ben, if he was a malicious hacker, complete access to all of the files on the system.

Protecting Yourself

Security always exists in layers - and this could have been prevented by including a few more layers, such as using an open source library to rewrite the image, reviewing the image source before pulling it in, or again not giving it executable access by using the PHP include() function.

But what’s terrifying is how simple it is to hijack a site, how easy it is to get access to your system and private data, and how easy it is to overlook security vulnerabilities - especially with open source tooling and those that take plugins.

As Ben explains, sometimes the core code itself is really secure, but then you get two different plugins that when used together accidentally create a security vulnerability. That by itself is one of the most challenging as you can audit each plugin individually, and still not know you’re opening up your system to malicious actors.

This is why it's not just important to stay up to date on the latest security measures and best practices, but to be constantly thinking like a hacker and testing your code for vulnerabilities.

Learn More

You can watch thefull video to learn more how viruses operate, how to quickly build your own PHP virus (but you must promise to use it for good), and what to watch for in order to protect yourself, your customers, and your architecture.
9195 views · 5 years ago
Type Arrays with Variadic Functions in PHP

It's a very common task to work with an array of values, each of the same type. Integers, strings, all kinds of objects etc. But PHP is still a weakly typed language, so it's hard to tell if an arbitrary array actually contains only values of a given type.
Of course, you can always use a class:
class IntArray {
private $values = [];
public function add(int $value) {
$this->values[] = $value;
}
}

Then, whenever you need an array of integers, you may write something like this:
class BatchProcessor
{
private $ids;
public function __construct(IntArray $ids) {
$this->ids = $ids;
}
}

Not bad. You'll need a class per type, though, and that may seem a bit of an overkill for such a simple task. Luckily, same result can be achieved differently, but with the same level of confidence in every value type:
class BatchProcessor
{
private $ids;
public function __construct(int ...$ids) {
$this->ids = $ids; }
}

Voila - no need for extra class! This approach uses the PHP 7's type hinting for scalar types, in conjunction with Variable length argument lists available since PHP 5.6. In fact, variable-length argument lists have been around since probably the very first version of the language, but in 5.6 they were revisited and got some nice syntactic sugar in form of "...", so you declare and call them as easy as this:
function func(...$args){...}
$args = [1, 2, 3];
func(...$args);

The approach can work with any type-hinting available in PHP, and I hope you find it somewhat useful! Comment, discuss share and ask questions - I'll be around.
4642 views · 5 years ago
PHP Basics

It's 2018, and you're a top-notch modern web developer, with a load of knowledge and tools right there at your disposal: Google and StackOverflow, debugger with a GUI, IDE with autocomplete, you name it. Occasionally, though, you still find yourself in a plain old text console on a remote server, or you have to do something without IDE, or there is no network connection... In such cases it might be helpful to feel comfortable in a simple terminal. In this post I'm going to list some switches for the PHP command that you can use to get information and some utilities.

Getting basic information about PHP


$ php -i
phpinfo()
PHP Version => 7.2.10-0ubuntu1

System => Linux awesome 4.18.0-10-generic #11-Ubuntu SMP Thu Oct 11 15:13:55 UTC 2018 x86_64
Build Date => Sep 13 2018 13:38:55
Server API => Command Line Interface
Virtual Directory Support => disabled
...


Full information about your PHP interpreter. Pipe the output to the Unix less command in order to get pagination and search: php -i | less. Type Q to exit the less shell. Some distros might lack less, in that case you may try php -i | more, which doesn't give you search but still has pagination.

Want a short summary of which PHP extensions you have? Just ask:

$ php -m
[PHP Modules]
calendar
Core
ctype
date
dom
ds
exif
...


More specific info about core and extensions' functions and classes


Full information about functions and classes provided by an extension:

$ php --re ds
Extension [ <persistent> extension #46 ds version 1.2.6 ] {

- Dependencies {
Dependency [ json (Required) ]
Dependency [ spl (Required) ]
}

- Classes [11] {
Interface [ <internal:ds> interface Ds\Hashable ] {

- Constants [0] {
}

- Static properties [0] {
}
...


Information on a specific class:

$ php --rc Ds\Vector
Class [ <internal:ds> <iterateable> final class Ds\Vector implements Ds\Sequence, Traversable, Countable, JsonSerializable, Ds\Collection ] {

- Constants [1] {
Constant [ public integer MIN_CAPACITY ] { 8 }
}

- Static properties [0] {
}
...


Same for a function:

$ php --rf fopen
Function [ <internal:standard> function fopen ] {

- Parameters [4] {
Parameter #0 [ <required> $filename ]
Parameter #1 [ <required> $mode ]
Parameter #2 [ <optional> $use_include_path ]
Parameter #3 [ <optional> $context ]
}
}


Utilities


Ever found yourself creating a dummy PHP file of just a few lines - only to be run once and then deleted? The -a switch might be what you're looking for:

$ php -a
Interactive mode enabled

php > var_dump(join(", ", [1, 2, 3]));
php shell code:1:
string(7) "1, 2, 3"
php >


It starts an interactive shell so you can type any PHP code and execute it straight away. Requires PHP to be compiled with readline support (most distros have that anyway).

Want a quick check for any parse/syntax errors in a PHP file? Use linter:

$ php -l test.php 
PHP Parse error: syntax error, unexpected 'array_shift' (T_STRING) in test.php on line 4
Errors parsing test.php


It has a web-server!


Yes! Just in case you missed it, as of PHP 5.4.0, the CLI SAPI provides a built-in web server. Want a quick look at a web page generated by an app? Here you go:

$ cd /my_application/document_root
$ php -S localhost:8000


Then open http://localhost:8000/ in your browser of choice and enjoy!

Hope you also have enjoyed this reading. Your feedback and questions are always appreciated!
19002 views · 5 years ago
Install Composer for PHP

Composer is a must-have tool for every PHP developer these days. This page is a simple breakdown of quick-install instructions.

How do I install composer?
   

. Use PHP to download the composer installer, place it in the current directory, and name it composer-setup.php


    . Use PHP to check the hash of the file you downloaded and compare it to the known value of the hash. You can always find the current value of the hash for the installer on the Composer Public Keys / Signatures page.
   
. Run the setup program to install composer. This does more than just download the latest copy of composer, it also sets up your local ~/.composer directory. This will install composer into the current directory. You can add the --install-dir=DIR to specify where you want composer installed. You can also specify --filename=composer to change the installed filename. You can use anything you like that doesn’t already exist in your specified directory, you don’t have to use the name composer. This is a great way to get rid of the .phar at the end of the name if you don’t like it.
   
. Use PHP to remove the installer from the current directory.

To install composer for PHP you use PHP to download the installer, set a few options, and then actually perform the install.

php -r "copy('https://getcomposer.org/installer', 'composer-setup.php');"

php -r "if (hash_file('SHA384', 'composer-setup.php') === '55d6ead61b29c7bdee5cccfb50076874187bd9f21f65d8991d46ec5cc90518f447387fb9f76ebae1fbbacf329e583e30') { echo 'Installer verified'; } else { echo 'Installer corrupt'; unlink('composer-setup.php'); } echo PHP_EOL;"

php composer-setup.php

php -r "unlink('composer-setup.php');"


Below is a version you can copy ‘n paste.

Breakdown:

Recommended Setup for Linux and macOS:

php -r "copy('https://getcomposer.org/installer', 'composer-setup.php');"

php -r "if (hash_file('SHA384', 'composer-setup.php') === '55d6ead61b29c7bdee5cccfb50076874187bd9f21f65d8991d46ec5cc90518f447387fb9f76ebae1fbbacf329e583e30') { echo 'Installer verified'; } else { echo 'Installer corrupt'; unlink('composer-setup.php'); } echo PHP_EOL;"

php composer-setup.php --install-dir=/usr/local/bin --filename=composer

php -r "unlink('composer-setup.php');"

WARNING: Line two IS WHERE IT compares the hasH of the installer you just downloaded to a hard-coded value. The value specified in the script is the value for the current version of the installer as of this writing. If it fails, check the Composer Public Keys / Signatures page and get the latest version. Plug it into the script below and try again.

Windows user, change the --installdir= to a directory in your path.

Recommended Setup for Windows

If you are running Microsoft Windows, the instructions above will work for you as long as you use the proper install paths. You can however download ComposerSetup.exe from the Composer Introduction page. Execute this and it will install composer and set your path so that you can run composer from anywhere. You will have to close your terminal window and open a new one after the install for the path to be updated.

That’s it, you should now have Composer installed.

Composer installation Resources

* Composer Homepage
* Composer Introduction
* Download Composer
* Composer Public Keys / Signatures
11950 views · 5 years ago
Five Composer Tips Every PHP Developer Should Know

Composer is the way that that PHP developers manage libraries and their dependencies. Previously, developers mainly stuck to existing frameworks. If you were a Symfony developer, you used Symfony and libraries built around it. You didn’t dare cross the line to Zend Framework. These days however, developers focus less on frameworks, and more on the libraries they need to build the project they are working on. This decoupling of projects from frameworks is largely possible because of Composer and the ecosystem that has built up around it.

Like PHP, Composer is easy to get started in, but complex enough to take time and practice to master. The Composer manual does a great job of getting you up and running quickly, but some of the commands are involved enough so that many developers miss some of their power because they simply don’t understand.

I’ve picked out five commands that every user of Composer should master. In each section I give you a little insight into the command, how it is used, when it is used and why this one is important.

1: Require

Sample:

$ composer require monolog/monolog


Require is the most common command that most developers will use when using Composer. In addition to the vendor/package, you can also specify a version number to load along with modifiers. For instance, if you want version 1.18.0 of monolog specifically and never want the update command to update this, you would use this command.

$ composer require monolog/monolog:1.18.0


This command will not grab the current version of monolog (currently 1.18.2) but will instead install the specific version 1.18.0.

If you always want the most recent version of monolog greater than 1.8.0 you can use the > modifier as shown in this command.

$ composer require monolog/monolog:>1.18.0


If you want the latest in patch in your current version but don’t want any minor updates that may introduce new features, you can specify that using the tilde.

$ composer require monolog/monolog:~1.18.0


The command above will install the latest version of monolog v1.18. Updates will never update beyond the latest 1.18 version.

If you want to stay current on your major version but never want to go above it you can indicate that with the caret.

$ composer require monolog/monolog:^1.18.0


The command above will install the latest version of monolog 1. Updates continue to update beyond 1.18, but will never update to version 2.

There are other options and flags for require, you can find the complete documentation of the command here.

2: Install a package globally

The most common use of Composer is to install and manage a library within a given project. There are however, times when you want to install a given library globally so that all of your projects can use it without you having to specifically require it in each project. Composer is up to the challenge with a modifier to the require command we discussed above, global. The most common use of this is when you are using Composer to manage packages like PHPUnit.

$ composer global require "phpunit/phpunit:^5.3.*"


The command above would install PHPUnit globally. It would also allow it to be updated throughout the 5.0.0 version because we specified ~5.3.* as the version number. You should be careful in installing packages globally. As long as you do not need different versions for different projects you are ok. However, should you start a project and want to use PHPUnit 6.0.0 (when it releases) but PHPUnit 6 breaks backwards compatibility with the PHPUnit 5.* version, you would have trouble. Either you would have to stay with PHPUnit 5 for your new project, or you would have to test all your projects to make sure that your Unit Tests work after upgrading to PHPUnit 6.

Globally installed projects are something to be thought through carefully. When in doubt, install the project locally.

3: Update a single library with Composer

One of the great powers of Composer is that developers can now easily keep their dependencies up-to-date. Not only that, as we discussed in tip #1, each developer can define exactly what “up-to-date” means for them. With this simple command, Composer will check all of your dependencies in a project and download/install the latest applicable versions.

$ composer update


What about those times when you know that a new version of a specific package has released and you want it, but nothing else updated. Composer has you covered here too.

$ composer update monolog/monolog


This command will ignore everything else, and only update the monolog package and it’s dependencies.

It’s great that you can update everything, but there are times when you know that updating one or more of your packages is going to break things in a way that you aren’t ready to deal with. Composer allows you the freedom to cherry-pick the packages that you want to update, and leave the rest for a later time.

4: Don’t install dev dependencies

In a lot of projects I am working on, I want to make sure that the libraries I download and install are working before I start working with them. To this end, many packages will include things like Unit Tests and documentation. This way I can run the unit Tests on my own to validate the package first. This is all fine and good, except when I don’t want them. There are times when I know the package well enough, or have used it enough, to not have to bother with any of that.

Many packages create a distribution package that does not contain tests or docs. (The League of Extraordinary Packages does this by default on all their packages.) If you specify the --prefer-dist flag, Composer will look for a distribution file and use it instead of pulling directly from github. Of course if you want want to make sure you get the full source and all the artifacts, you can use the --prefer-src flag.

5: Optimize your autoload

Regardless of whether you --prefer-dist or --prefer-source, when your package is incorporated into your project with require, it just adds it to the end of your autoloader. This isn’t always the best solution. Therefore Composer gives us the option to optimize the autoloader with the --optimize switch. Optimizing your autoloader converts your entire autoloader into classmaps. Instead of the autoloader having to use file_exists() to locate a file, Composer creates an array of file locations for each class. This can speed up your application by as much as 30%.

$ composer dump-autoload --optimize


The command above can be issued at any time to optimize your autoloader. It’s a good idea to execute this before moving your application into production.

$ composer require monolog/monolog:~1.18.0 -o


You can also use the optimize flag with the require command. Doing this every time you require a new package will keep your autoloader up-to-date. That having said, it’s still a good idea to get in the habit of using the first command as a safety net when you roll to production, just to make sure.

BONUS: Commit your composer.lock

After you have installed your first package with composer, you now have two files in the root of your project, composer.json and composer.lock. Of the two, composer.lock is the most important one. It contains detailed information about every package and version installed. When you issue a composer install in a directory with a composer.lock file, composer will install the exact same packages and versions. Therefore, by pulling a git repo on a production server will replicate the exact same packages in production that were installed in development. Of course the corollary of this is that you never want to commit your vendor/ directory. Since you can recreate it exactly, there is no need to store all of that code in your repo.

It is recommended that also commit your composer.json. When you check out your repo into production and do an install, composer will use the composer.lock instead of the composer.json when present. This means that your production environment is setup exactly like your development environment.

SPONSORS

The Ultimate Managed Hosting Platform