PHP & Web Development Blogs

Search Results For: class
Showing 11 to 15 of 31 blog articles.
12043 views · 5 years ago
Creating a Tiny Blog Management system in Laravel 5.7

Hey There,
I am expecting you are familiar with PHP. In this post I will be using the Laravel framework to create a small blog system. I am showing here very simple steps to create blogs, If you want this complete code then please message me.
What are major Prequisites for Laravel:
* PHP version >= 5.6
* Composer should be installed in system

Create a project with name tiny_blog with following command

composer create-project laravel/laravel --prefer-dist tiny_blog


enter into the laravel project

cd tiny_blog


create a migration file using following artisan command
<pre>php artisan make:migration create_blog_table</pre>
After this command you will found a new file created in database/migrations folder in your project, Just edit the file having 'create_blog_table' appended in its name

Now replace following code to create table schema with function up(), So now the method will look like following:

public function up()
{
Schema::create('blogs', function (Blueprint $table) {
$table->increments('id');
$table->integer('user_id');
$table->string('category');
$table->string('title');
$table->text('description');
$table->timestamps();
});

}


replace following snippet with down method, it will look like following:

public function down()
{
Schema::dropIfExists('blogs');
}


Its time to run the migration file we have created

php artisan migrate


After running,It will create the blogs table in database.Now time to create form and insert data into the table

Laravel itsef provide authentication , use following artisan command :

php artisan make:auth


Now start Larvel:

php artisan serve


it will start the laravel development server at http://127.0.0.1:8000


Now if you run that url the basic default ui will be created and login & register link you can see in Top right position of header

You can register and login now.this feature is provided by authentication module.
Now we need to create a controller for manage blogs with following command:

php artisan make:controller BlogController


will create a file namedBlogController.php in** app/HTTP/controllers** folder location

Now we need to create a Model also, use following command

php artisan make:model Blog


will create a file namedBlog.php in app folder location

Now in Controller we need to create a method for create blogs and available that method in Routes to access it via url. Just editroutes/web.php file and add the following line

Route::get('blog/create','BlogController@createBlog');

/create/blog/ will be url route that land on Blog Controller's createBlog method using get method.

Now before running this route just go to the app/Http/Controllers folder and Edit BlogController.php file and Add the createBlog method in that class as following

public function createBlog()
{
return view('blog.create');
}


This code will try to load the view from/resources/views/blog/create.blade.php

In Laravel blade is a template engine. As we had not created the view file yet, so we need to create a blog folder inside/resources/views/ folder then inside blog folder create a file create.blade.php with following form

@extends('layouts.app')

@section('content')
<div class="container">
@if ($errors->any())
<div class="alert alert-danger">
<ul>
@foreach ($errors->all() as $error)
<li>{{ $error }}</li>
@endforeach
</ul>
</div><br />
@endif
<div class="row">
<form method="post" action="{{url('blog/create')}}">
<div class="form-group">
<input type="hidden" value="{{csrf_token()}}" name="_token" />
<label for="title">Title:</label>
<input type="text" class="form-control" name="title"/>
</div>
<div class="form-group">
<label for="title">Category/Tags:</label>
<input type="text" class="form-control" name="category"/>
</div>
<div class="form-group">
<label for="description">Description:</label>
<textarea cols="10" rows="10" class="form-control" name="description"></textarea>
</div>
<button type="submit" class="btn btn-primary">Submit</button>
</form>
</div>
</div>
@endsection


Now we need to add a additional route to handle the post request on blog/create route, Just edit routes/web.php file and just add following line in last:

Route::post('blog/create','BlogController@saveBlog'); 


post route to handle the form post on route blog/create


Now create a method name saveBlog to save the user input data in the form
 public function saveBlog(Request $request)
{
$blog = new Blog();

$this->validate($request, [
'title'=>'required',
'category'=>'required',
'description'=> 'required'
]);

$blog->createBlog($request->all());
return redirect('blog/index')->with('success', 'New blog has been created successfully :)'); }


Notice This method is using Blog object that we don't know that where it comes from? , So to make above code working we need to include the model which we created earlier need to include in our controller file So use following code to include it before the class created.

use App\Blog;


Now following line shows that there is a method named createBlog in Model(app/Blog.php), but in actual it is not there:

$blog->createBlog($data);


So go to the file app/Blog.php and Edit it and inside the class add following method:

 public function createBlog($data)
{

$this->user_id = auth()->user()->id;
$this->title = $data['title'];
$this->description = $data['description'];
$this->category = $data['category'];
$this->save();
return 1;
}


Now the creation of blog task has been done , Its time to show the created Entries So just create a route blog/index in routes/web.php

Route::get('blog/index','BlogController@showAllBlogs');


get route blog/index to show all the created blogs by current user


Now just add a method in controller
public function showAllBlogs()
{
$blogs = Blog::where('user_id', auth()->user()->id)->get();

return view('blog.index',compact('blogs'));
}


This method requires to create a index view in blog folder , So create a file named index.blade.php in /resources/views/blog/ folder with following code

@extends('layouts.app')

@section('content')
<div class="container">
@if(\Session::has('success'))
<div class="alert alert-success">
{{\Session::get('success')}}
</div>
@endif
<a type="button" href="{{url('blog/create')}}" class="btn btn-primary">Add New Blog</a>
<br>
<table class="table table-striped">
<thead>
<tr>
<td>ID</td>
<td>Title</td>
<td>Category</td>
<td>Description</td>
<td colspan="2">Action</td>
</tr>
</thead>
<tbody>
@foreach($blogs as $blog)
<tr>
<td>{{$blog->id}}</td>
<td>{{$blog->title}}</td>
<td>{{$blog->category}}</td>
<td>{{$blog->description}}</td>
<td>Edit</td>
<td>Delete</td>
</tr>
@endforeach
</tbody>
</table>
<div>
@endsection


Now all code is ready but we need to add 1 line of code to prevent the blog controller without authentication or without login

just add the following constructor method in BlogController class

 public function __construct()
{
$this->middleware('auth');
}


this constructor method will call very first when user will try to access any of BlogController class method, and the middleware will check whether user is logged in then only it will allow to access that method otherwise it will redirect to login page automatically.


After It Run your Code and you will able to create and listing your created blogs/articles. but the Edit and Delete links are not working right now, If you want that also working then please comment here or message me. If we get multiple requests then definitely i will write its part 2 article


Thanks very much for reading this blog, if you have any doubt about it then let me know in comments or by messaging me.

Following is the final code for BlogController.php

<?php

namespace App\Http\Controllers;

use Illuminate\Http\Request;
use App\Blog;


class BlogController extends Controller
{
public function __construct()
{
$this->middleware('auth');
}

public function createBlog()
{
return view('blog/create');
}


public function saveBlog(Request $request)
{
$blog = new Blog();

$this->validate($request, [
'title'=>'required',
'category'=>'required',
'description'=> 'required'
]);

$blog->createBlog($request->all());
return redirect('blog/index')->with('success', 'New blog has been created successfully :)');
}

public function showAllBlogs()
{
$blogs = Blog::where('user_id', auth()->user()->id)->get();

return view('blog.index',compact('blogs'));
}

}

11945 views · 5 years ago
Five Composer Tips Every PHP Developer Should Know

Composer is the way that that PHP developers manage libraries and their dependencies. Previously, developers mainly stuck to existing frameworks. If you were a Symfony developer, you used Symfony and libraries built around it. You didn’t dare cross the line to Zend Framework. These days however, developers focus less on frameworks, and more on the libraries they need to build the project they are working on. This decoupling of projects from frameworks is largely possible because of Composer and the ecosystem that has built up around it.

Like PHP, Composer is easy to get started in, but complex enough to take time and practice to master. The Composer manual does a great job of getting you up and running quickly, but some of the commands are involved enough so that many developers miss some of their power because they simply don’t understand.

I’ve picked out five commands that every user of Composer should master. In each section I give you a little insight into the command, how it is used, when it is used and why this one is important.

1: Require

Sample:

$ composer require monolog/monolog


Require is the most common command that most developers will use when using Composer. In addition to the vendor/package, you can also specify a version number to load along with modifiers. For instance, if you want version 1.18.0 of monolog specifically and never want the update command to update this, you would use this command.

$ composer require monolog/monolog:1.18.0


This command will not grab the current version of monolog (currently 1.18.2) but will instead install the specific version 1.18.0.

If you always want the most recent version of monolog greater than 1.8.0 you can use the > modifier as shown in this command.

$ composer require monolog/monolog:>1.18.0


If you want the latest in patch in your current version but don’t want any minor updates that may introduce new features, you can specify that using the tilde.

$ composer require monolog/monolog:~1.18.0


The command above will install the latest version of monolog v1.18. Updates will never update beyond the latest 1.18 version.

If you want to stay current on your major version but never want to go above it you can indicate that with the caret.

$ composer require monolog/monolog:^1.18.0


The command above will install the latest version of monolog 1. Updates continue to update beyond 1.18, but will never update to version 2.

There are other options and flags for require, you can find the complete documentation of the command here.

2: Install a package globally

The most common use of Composer is to install and manage a library within a given project. There are however, times when you want to install a given library globally so that all of your projects can use it without you having to specifically require it in each project. Composer is up to the challenge with a modifier to the require command we discussed above, global. The most common use of this is when you are using Composer to manage packages like PHPUnit.

$ composer global require "phpunit/phpunit:^5.3.*"


The command above would install PHPUnit globally. It would also allow it to be updated throughout the 5.0.0 version because we specified ~5.3.* as the version number. You should be careful in installing packages globally. As long as you do not need different versions for different projects you are ok. However, should you start a project and want to use PHPUnit 6.0.0 (when it releases) but PHPUnit 6 breaks backwards compatibility with the PHPUnit 5.* version, you would have trouble. Either you would have to stay with PHPUnit 5 for your new project, or you would have to test all your projects to make sure that your Unit Tests work after upgrading to PHPUnit 6.

Globally installed projects are something to be thought through carefully. When in doubt, install the project locally.

3: Update a single library with Composer

One of the great powers of Composer is that developers can now easily keep their dependencies up-to-date. Not only that, as we discussed in tip #1, each developer can define exactly what “up-to-date” means for them. With this simple command, Composer will check all of your dependencies in a project and download/install the latest applicable versions.

$ composer update


What about those times when you know that a new version of a specific package has released and you want it, but nothing else updated. Composer has you covered here too.

$ composer update monolog/monolog


This command will ignore everything else, and only update the monolog package and it’s dependencies.

It’s great that you can update everything, but there are times when you know that updating one or more of your packages is going to break things in a way that you aren’t ready to deal with. Composer allows you the freedom to cherry-pick the packages that you want to update, and leave the rest for a later time.

4: Don’t install dev dependencies

In a lot of projects I am working on, I want to make sure that the libraries I download and install are working before I start working with them. To this end, many packages will include things like Unit Tests and documentation. This way I can run the unit Tests on my own to validate the package first. This is all fine and good, except when I don’t want them. There are times when I know the package well enough, or have used it enough, to not have to bother with any of that.

Many packages create a distribution package that does not contain tests or docs. (The League of Extraordinary Packages does this by default on all their packages.) If you specify the --prefer-dist flag, Composer will look for a distribution file and use it instead of pulling directly from github. Of course if you want want to make sure you get the full source and all the artifacts, you can use the --prefer-src flag.

5: Optimize your autoload

Regardless of whether you --prefer-dist or --prefer-source, when your package is incorporated into your project with require, it just adds it to the end of your autoloader. This isn’t always the best solution. Therefore Composer gives us the option to optimize the autoloader with the --optimize switch. Optimizing your autoloader converts your entire autoloader into classmaps. Instead of the autoloader having to use file_exists() to locate a file, Composer creates an array of file locations for each class. This can speed up your application by as much as 30%.

$ composer dump-autoload --optimize


The command above can be issued at any time to optimize your autoloader. It’s a good idea to execute this before moving your application into production.

$ composer require monolog/monolog:~1.18.0 -o


You can also use the optimize flag with the require command. Doing this every time you require a new package will keep your autoloader up-to-date. That having said, it’s still a good idea to get in the habit of using the first command as a safety net when you roll to production, just to make sure.

BONUS: Commit your composer.lock

After you have installed your first package with composer, you now have two files in the root of your project, composer.json and composer.lock. Of the two, composer.lock is the most important one. It contains detailed information about every package and version installed. When you issue a composer install in a directory with a composer.lock file, composer will install the exact same packages and versions. Therefore, by pulling a git repo on a production server will replicate the exact same packages in production that were installed in development. Of course the corollary of this is that you never want to commit your vendor/ directory. Since you can recreate it exactly, there is no need to store all of that code in your repo.

It is recommended that also commit your composer.json. When you check out your repo into production and do an install, composer will use the composer.lock instead of the composer.json when present. This means that your production environment is setup exactly like your development environment.
11086 views · 4 years ago


It took me quite some time to settle on my first blog post in this series and I found myself thinking about the most requested functionality in my career – The good ‘ol Custom CMS – typically geared towards clients that want a straight forward, secure solution that can be expanded upon in a modular format and that’s their IP.

This will be our starting point. A blank slate to build something epic with clean code and even cleaner design. And in the spirit of building from scratch, I will refrain from using classes or a framework. The main reasoning behind this is to truly get everyone acquainted with and excited about PHP development.

Join me as I transform rudimentary code into something extraordinary that can be morphed into just about any Content, PHP, and MySQL driven project. So without further ado, let’s jump into it!

The bare necessities


If you’re just getting started with development, there’s a nifty bite sized server called UniformServer that will be your best friend throughout your coding career. PHPMyAdmin (an awesome visual db management tool) comes built in so if you’re looking for a work right out of the box solution, this is it.

Alternatively, you can opt for XAMPP or use an alternative server of your choice.

Now here’s where the exciting stuff begins, mapping things out.


I don’t see this done/encouraged often enough. Feel free to grab a piece of paper to logically map out your steps or produce a rough draft of where you’d like this project to go.

In this tutorial, I would like to achieve the following:


DB, DB, Set up your DB.


This requires a bit of planning but let’s start of with the basic structure we need to see this through.

We are going to need a user table and a content table and are a few ways to tackle this.

If you’re using the PHPMyAdmin tool you can create your database, add user permissions (Click on Permissions after creating your database), and create a table with ease.


If you’re like me and prefer to look at good ‘ol SQL then writing an SQL statement is the preferred approach.


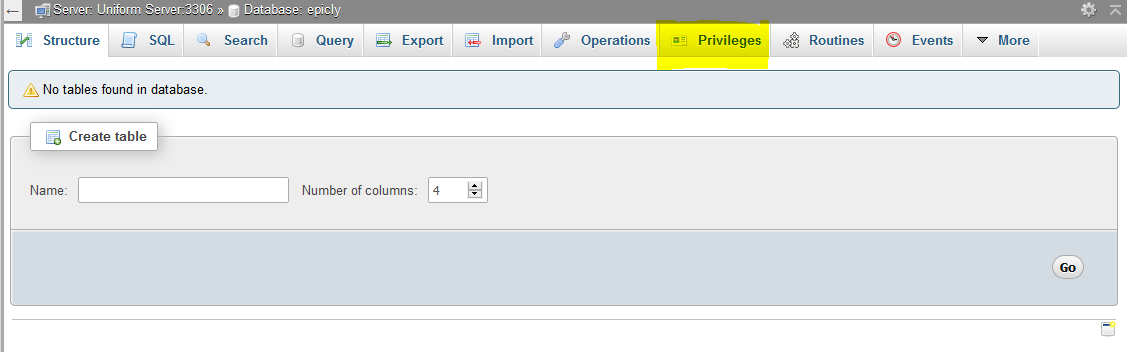
CREATE TABLE <code>mydbname</code>.<code>content</code> ( <code>ID</code> INT(11) NOT NULL AUTO_INCREMENT , <code>title</code> VARCHAR(100) NOT NULL , <code>content</code> LONGTEXT NOT NULL , <code>author</code> VARCHAR(50) NOT NULL , PRIMARY KEY (<code>ID</code>)) ENGINE = MyISAM COMMENT = 'content table';


Understanding the SQL statement

In a nutshell we are creating a table with important fields. Namely:

####

ID | Title | Content | Author

#######

The ID field is our unique identifier.Now we can move on to the file structure.

Everything has a place in the file structure game


You can use a structure that speaks to your coding style / memory.

I tend to use the following:


Choose a name for your CMS, which should be placed at the webroot of your localhost/server.

Replicate the folder structure as per the above example.

Next, we’re going to create a basic connection file.


You can create a 
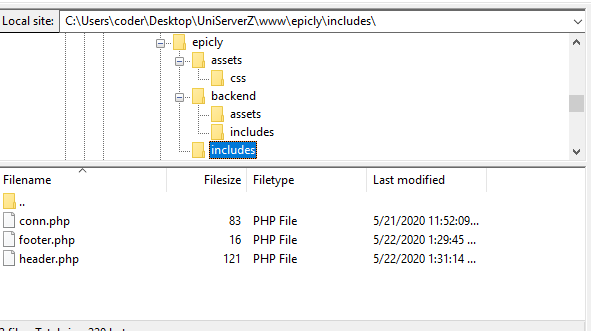
conn.php file in your root/includes folder.

The connection file will provide crucial information to connect to the database.

Type the following into your conn.php file, remember to include your own database credentials.


<?php

$letsconnect = new mysqli("localhost","dbuser","dbpass","dbname");

?>


Let’s go to the homepage (index.php)


Create a file called index.php at the root of your CMS folder.

I will be adding comments in my code to help you understand what each line does.

Comments are a useful tool for developers to add important notes private to their code.

We need to pull information from the database so it’s imperative that we include our connection file.


<?php

include('includes/conn.php');

if ($letsconnect -> connect_errno) { echo "Error " . $letsconnect -> connect_error;

}else{

$getmydata=$letsconnect -> query("SELECT * FROM content");

foreach($getmydata as $mydata){ echo "Title: "; echo $mydata['title']; echo "<br/>"; echo "Content: "; echo $mydata['content']; echo "<br/>"; echo "Author: "; echo $mydata['author']; echo "<br/>"; echo "<br/>";

}

}

$letsconnect -> close();

?>


Let’s get a (very) basic backend up and running


Create a file called index.php in your backend folder.

We need to create a basic form to capture our data.

Let’s code some HTML!


<html>

<head><title>Backend - Capture Content</title></head>

<body>

<form action="<?php $_SERVER[‘PHP_SELF’];?>" method="post">

<input type="text" name="title" placeholder="Content Title here" required/>

<textarea name="content">Content Here</textarea>

<input type="text" name="author" placeholder="Author" required/>

<input type="submit" value="Save My Data" name="savedata"/>

</form>

</body>

</html>


Next, we need to process the form data.


Type the following just above the
<form> 
tag.


<?php

if(isset($_POST['savedata'])){

include('../includes/conn.php');

if ($letsconnect->connect_error) {

die("Your Connection failed: " . $letsconnect->connect_error);

}else{

$sql = "INSERT INTO content(title,content,author)VALUES ('".$_POST["title"]."', '".$_POST["content"]."', '".$_POST["author"]."')";

if (mysqli_query($letsconnect, $sql)) {

echo "Your data was saved successfully!";

} else { echo "Error: " . $sql . "" . mysqli_error($letsconnect);

} $letsconnect->close();

}

}

?>


Note, this is a basic MySQL query to insert data. However, before using this in production it's important to add proper escaping and security to prevent SQL injections. This will be covered in the next article.


Congrats you made it to the end of tutorial 1!


Test out your creation, modify your content, and play around.

Go to your sitename/index.php to see your frontend after capturing data via sitename/backend/index.php

Next Up:


codewithme Now With Security, Functionality, and Aesthetics in mind.


Conclusion


Coding doesn’t have to be daunting and it’s my aim to divide a complex system into bitesized tutorials so you can truly use the knowledge you’ve acquired in your own projects.
9188 views · 5 years ago
Type Arrays with Variadic Functions in PHP

It's a very common task to work with an array of values, each of the same type. Integers, strings, all kinds of objects etc. But PHP is still a weakly typed language, so it's hard to tell if an arbitrary array actually contains only values of a given type.
Of course, you can always use a class:
class IntArray {
private $values = [];
public function add(int $value) {
$this->values[] = $value;
}
}

Then, whenever you need an array of integers, you may write something like this:
class BatchProcessor
{
private $ids;
public function __construct(IntArray $ids) {
$this->ids = $ids;
}
}

Not bad. You'll need a class per type, though, and that may seem a bit of an overkill for such a simple task. Luckily, same result can be achieved differently, but with the same level of confidence in every value type:
class BatchProcessor
{
private $ids;
public function __construct(int ...$ids) {
$this->ids = $ids; }
}

Voila - no need for extra class! This approach uses the PHP 7's type hinting for scalar types, in conjunction with Variable length argument lists available since PHP 5.6. In fact, variable-length argument lists have been around since probably the very first version of the language, but in 5.6 they were revisited and got some nice syntactic sugar in form of "...", so you declare and call them as easy as this:
function func(...$args){...}
$args = [1, 2, 3];
func(...$args);

The approach can work with any type-hinting available in PHP, and I hope you find it somewhat useful! Comment, discuss share and ask questions - I'll be around.
8787 views · 3 years ago


Welcome back! If you’re new to this series have a look at Part 1 here


Today’s focus is on templating, the aesthetic that will make or break your web application.

Having a clean design with well defined CSS that’s responsive and user friendly goes a long way.

Developers often stick to their lane but delving into templating will bode in your favor, you can indeed
create a functional and launch-worthy application all on your own!

Let’s jump into it!

Structured structure


Everything you tackle should be found with ease down the line. Therefore careful planning is fundamental to the success and sustainability of your project. You’ll also find that clearly defining your work lends itself to more productivity overall as you spend less that explaining your work during a handover / looking for a specific piece of code or resource. You’ll probably end up spending more time on actual work.
Finding your own unique pattern with file structure and CSS identifiers will also work in your favor as something unique to your process will most likely be easier to remember and form a tactile relationship with.

Our project’s current structure looks like this:


>If you need to backtrack, Part 1 is a great place to start!

In part 1, we created our index.php which displays info from our database.

Let’s take this a step further and create a header and a footer for our index.php

Create a file called header.php and save this to your includes folder.

Next, create a file called footer.php and save this to your includes folder.

Your file structure should now look like this.


A header above all the rest


The header file will be a file we reuse throughout your web application. This file will contain important information that’s vital to the functionality and aesthetic of your website.
The type of info you’ll expect to see in a header.php file:
Script includes
Such as JQuery and important libraries
CSS includes
CSS files loaded from internal or external sources
Meta information
Contains important information that’s readable by search engines.
The basic structure of the beginning of your app, including your menu, and your logo.
For now, how header is going to have a basic layout.

Let’s get our HTML on!

<html>
<head>
<title>My Awesome CMS – Page Title</title>
</head>
<body>


A footer that sets the bar

Create a file called footer.php and save it to your includes folder (yourcms/includes/footer.php).

Add this code to your new file.

</body>
</html>


Next, let’s focus on the gravy… The CSS


CSS, when written beautifully, can truly set you apart.

You can tell your web application to load various styles to specific elements by defining unique identifiers.
Styles that are only used once are denoted with a # (a CSS “ID”) whereas styles that are reused multiple times are denoted with a . (a CSS “class”)

The best way to delve into the realm of CSS is to learn by experience.

Let’s create!


First, we need to create and load our CSS file. Remember our nifty new pal header.php? This created a convenient way to load our CSS file!

Add the following code to your header.php just above the </head> tag.

<link href=”../assets/css/style.css” type=”text/css” rel=”stylesheet”/> 


The ../ in the link to our stylesheet means we have to leave the current directory (the directory that header.php is in) and look for the assets/css/ directories.

Go ahead and create the css folder under your assets folder.

Next we’re going to create some simple CSS to test things out.

It’s time to add some style!


We are going to create two divs.
A div is a divider / section in HTML.
Add this to your index.php (located in your CMS’ root folder) above the <?php tag.

<div id="myfirstid"></div>
<div class="myfirstclass"></div>


Then, create a CSS file

Add this:

#myfirstid{
Background:lightblue;
Font-family:Arial;
Font-size:44px;
Font-weight: Bold;
}
.myfirstclass{
Font-size:15px;
Color: darkblue;
}


Save your newly created CSS to assets/css/ as style.css.

Pulling it all together, let’s see what we can do!


Let’s apply what we just learned to our index.php. But first, we should add our header.php and footer.php files.

Including everyone


Add this to the top of your index.php file:

include(‘includes/header.php’);


Remove the <divs> we used for practice earlier, we have something better in store!

Add this to the bottom of your index.php:

include(‘includes/footer.php’);


Next, let’s modify our code so we can add some style to the data we retrieve from our database.

Modify the following line:
foreach($getmydata as $mydata){ echo "Title: "; echo $mydata['title']; echo "<br/>"; echo "Content: "; echo $mydata['content']; echo "<br/>"; echo "Author: "; echo $mydata['author']; echo "<br/>"; echo "<br/>";


as follows:
?>

<div id=”myfirstid”>
<?php
foreach($getmydata as $mydata){
echo "<div class=”myfirstclass”>Title: ";
echo $mydata['title'];
echo "<br/>";
echo "Content: ";
echo $mydata['content'];
echo "<br/>";
echo "Author: ";
echo $mydata['author'];
echo "</div><br/><br/>";
}?>
</div>
<?php


Your full index.php should now look like this:

<?php
include('includes/header.php');
include('includes/conn.php');

if ($letsconnect -> connect_errno) { echo "Error " . $letsconnect -> connect_error;

}else{

$getmydata=$letsconnect -> query("SELECT * FROM content");

?>
<div id="myfirstid">
<?php
foreach($getmydata as $mydata){
echo "<div class=”myfirstclass”>Title: ";
echo $mydata['title'];
echo "<br/>";
echo "Content: ";
echo $mydata['content'];
echo "<br/>";
echo "Author: ";
echo $mydata['author'];
echo "</div><br/><br/>";
}
?>
</div>
<?php
}

$letsconnect -> close();
include('includes/footer.php');
?>


Go ahead, test it out!

There’s a lot to unpack and I will break things down a little more during our next tutorial!

Challenge


Study the final index.php and try to form a few theories about why closing a php tag is necessary before adding raw html.

Next Up: #CodeWithMe Part 4: Building A Good Base

SPONSORS