PHP & Web Development Blogs

Search Results For: service
Showing 6 to 10 of 16 blog articles.
12679 views · 5 years ago
Creating a PHP Daemon Service

What is a Daemon?

The term daemon was coined by the programmers of Project MAC at MIT. It is inspired on Maxwell's demon in charge of sorting molecules in the background. The UNIX systems adopted this terminology for daemon programs.

It also refers to a character from Greek mythology that performs the tasks for which the gods do not want to take. As stated in the "Reference System Administrator UNIX", in ancient Greece, the concept of "personal daemon" was, in part, comparable to the modern concept of "guardian angel." BSD family of operating systems use the image as a demon's logo.

Daemons are usually started at machine boot time. In the technical sense, a demon is considered a process that does not have a controlling terminal, and accordingly there is no user interface. Most often, the ancestor process of the deamon is init - process root on UNIX, although many daemons run from special rcd scripts started from a terminal console.

Richard Stevenson describes the following steps for writing daemons:
    . Resetting the file mode creation mask to 0 function umask(), to mask some bits of access rights from the starting process.
    . Cause fork() and finish the parent process. This is done so that if the process was launched as a group, the shell believes that the group finished at the same time, the child inherits the process group ID of the parent and gets its own process ID. This ensures that it will not become process group leader.
    . Create a new session by calling setsid(). The process becomes a leader of the new session, the leader of a new group of processes and loses the control of the terminal.
    . Make the root directory of the current working directory as the current directory will be mounted.
    . Close all file descriptors.
    . Make redirect descriptors 0,1 and 2 (STDIN, STDOUT and STDERR) to /dev/null or files /var/log/project_name.out because some standard library functions use these descriptors.
    . Record the pid (process ID number) in the pid-file: /var/run/projectname.pid.
    . Correctly process the signals and SigTerm SigHup: end with the destruction of all child processes and pid - files and / or re-configuration.

How to Create Daemons in PHP

To create demons in PHP you need to use the extensions pcntl and posix. To implement the fast communication withing daemon scripts it is recommended to use the extension libevent for asynchronous I/O.

Lets take a closer look at the code to start a daemon:
umask(0);
$pid = pcntl_fork(); 
if ($pid < 0) {
print('fork failed');
exit 1;
}


After a fork, the execution of the program works as if there are two branches of the code, one for the parent process and the second for the child process. What distinguishes these two processes is the result value returned the fork() function call. The parent process ID receives the newly created process number and the child process receives a 0.
if ($pid > 0) { echo "daemon process started
";
exit; }

$sid = posix_setsid(); if ($sid < 0) {
exit 2;
}

chdir('/'); file_put_contents($pidFilename, getmypid() );
run_process();


The implementation of step 5 "to close all file descriptors" can be done in two ways. Well, closing all file descriptors is difficult to implement in PHP. You just need to open any file descriptors before fork(). Second, you can override the standard output to an error log file using init_set() or use buffering using ob_start() to a variable and store it in log file:
ob_start();
var_dump($some_object);
$content = ob_get_clean();
fwrite($fd_log, $content); 


Typically, ob_start() is the start of the daemon life cycle and ob_get_clean() and fwrite() calls are the end. However, you can directly override STDIN, STDOUT and STDERR:
ini_set('error_log', $logDir.'/error.log');
fclose(STDIN); 
fclose(STDOUT);
fclose(STDERR);
$STDIN = fopen('/dev/null', 'r');
$STDOUT = fopen($logDir.'/application.log', 'ab');
$STDERR = fopen($logDir.'/application.error.log', 'ab');


Now, our process is disconnected from the terminal and the standard output is redirected to a log file.

Handling Signals

Signal processing is carried out with the handlers that you can use either via the library pcntl (pcntl_signal_dispatch()), or by using libevent. In the first case, you must define a signal handler:
function sig_handler($signo)
{
global $fd_log;
switch ($signo) {
case SIGTERM:
fclose($fd_log); unlink($pidfile); exit;
break;
case SIGHUP:
init_data(); break;
default:
}
}

pcntl_signal(SIGTERM, "sig_handler");
pcntl_signal(SIGHUP, "sig_handler");


Note that signals are only processed when the process is in an active mode. Signals received when the process is waiting for input or in sleep mode will not be processed. Use the wait function pcntl_signal_dispatch(). We can ignore the signal using flag SIG_IGN: pcntl_signal(SIGHUP, SIG_IGN); Or, if necessary, restore the signal handler using the flag SIG_DFL, which was previously installed by default: pcntl_signal(SIGHUP, SIG_DFL);

Asynchronous I/O with Libevent

In the case you use blocking input / output signal processing is not applied. It is recommended to use the library libevent which provides non-blocking as input / output, processing signals, and timers. Libevent library provides a simple mechanism to start the callback functions for events on file descriptor: Write, Read, Timeout, Signal.

Initially, you have to declare one or more events with an handler (callback function) and attach them to the basic context of the events:
$base = event_base_new();
$event = event_new();
$errno = 0;
$errstr = '';
$socket = stream_socket_server("tcp://$IP:$port", $errno, $errstr);
stream_set_blocking($socket, 0); event_set($event, $socket, EV_READ | EV_PERSIST, 'onAccept', $base);


Function handlers 'onRead', 'onWrite', 'onError' must implement the processing logic. Data is written into the buffer, which is obtained in the non-blocking mode:
function onRead($buffer, $id)
{
while($read = event_buffer_read($buffer, 256)) {
var_dump($read);
}
}


The main event loop runs with the function event_base_loop($base);. With a few lines of code, you can exit the handler only by calling: event_base_loobreak(); or after the specified time (timeout) event_loop_exit();.

Error handling deals with failure Events:
function onError($buffer, $error, $id)
{
global $id, $buffers, $ctx_connections;
event_buffer_disable($buffers[$id], EV_READ | EV_WRITE);
event_buffer_free($buffers[$id]);
fclose($ctx_connections[$id]);
unset($buffers[$id], $ctx_connections[$id]);
}


It should be noted the following subtlety: Working with timers is only possible through the file descriptor. The example of official the documentation does not work. Here is an example of processing that runs at regular intervals.
$event2 = event_new();
$tmpfile = tmpfile();
event_set($event2, $tmpfile, 0, 'onTimer', $interval);
$res = event_base_set($event2, $base);
event_add($event2, 1000000 * $interval);


With this code we can have a working timer finishes only once. If we need a "permanent" Timer, using the function onTimer we need create a new event each time, and reassign it to process through a "period of time":
function onTimer($tmpfile, $flag, $interval)
{
$global $base, $event2;

if ($event2) {
event_delete($event2);
event_free($event2);
}

call_user_function(‘process_data’,$args);

$event2 = event_new();
event_set($event2, $tmpfile, 0, 'onTimer', $interval);
$res = event_base_set($event2, $base);
event_add($event2, 1000000 * $interval);
}


At the end of the daemon we must release all previously allocated resources:
event_delete($event);
event_free($event);
event_base_free($base);

event_base_set($event, $base);
event_add($event);


Also it should be noted that for the signal processing handler is set the flag EV_SIGNAL: event_set($event, SIGHUP, EV_SIGNAL, 'onSignal', $base);

If needed constant signal processing, it is necessary to set a flag EV_PERSIST. Here follows a handler for the event onAccept, which occurs when a new connection is a accepted on a file descriptor:
function onAccept($socket, $flag, $base) {
global $id, $buffers, $ctx_connections;
$id++;
$connection = stream_socket_accept($socket);
stream_set_blocking($connection, 0);
$buffer = event_buffer_new($connection, 'onRead', NULL, 'onError', $id);
event_buffer_base_set($buffer, $base);
event_buffer_timeout_set($buffer, 30, 30);
event_buffer_watermark_set($buffer, EV_READ, 0, 0xffffff); event_buffer_priority_set($buffer, 10); event_buffer_enable($buffer, EV_READ | EV_PERSIST); $ctx_connections[$id] = $connection;
$buffers[$id] = $buffer;
}


Monitoring a Daemon

It is good practice to develop the application so that it was possible to monitor the daemon process. Key indicators for monitoring are the number of items processed / requests in the time interval, the speed of processing with queries, the average time to process a single request or downtime.

With the help of these metrics can be understood workload of our demon, and if it does not cope with the load it gets, you can run another process in parallel, or for running multiple child processes.

To determine these variables need to check these features at regular intervals, such as once per second. For example downtime is calculated as the difference between the measurement interval and total time daemon.

Typically downtime is determined as a percentage of a measurement interval. For example, if in one second were executed 10 cycles with a total processing time of 50ms, the time will be 950ms or 95%.

Query performance wile be 10rps (request per second). Average processing time of one request: the ratio of the total time spent on processing requests to the number of requests processed, will be 5ms.

These characteristics, as well as additional features such as memory stack size queue, number of transactions, the average time to access the database, and so on.

An external monitor can be obtain data through a TCP connection or unix socket, usually in the format of Nagios or zabbix, depending on the monitoring system. To do this, the demon should use an additional system port.

As mentioned above, if one worker process can not handle the load, usually we run in parallel multiple processes. Starting a parallel process should be done by the parent master process that uses fork() to launch a series of child processes.

Why not run processes using exec() or system()? Because, as a rule, you must have direct control over the master and child processes. In this case, we can handle it via interaction signals. If you use the exec command or system, then launch the initial interpreter, and it has already started processes that are not direct descendants of the parent process.

Also, there is a misconception that you can make a demon process through command nohup. Yes, it is possible to issue a command: nohup php mydaemon.php -master >> /var/log/daemon.log 2 >> /var/log/daemon.error.log &

But, in this case, would be difficult to perform log rotation, as nohup "captures" file descriptors for STDOUT / STDERR and release them only at the end of the command, which may overload of the process or the entire server. Overload demon process may affect the integrity of data processing and possibly cause partial loss of some data.

Starting a Daemon

Starting the daemon must happen either automatically at boot time, or with the help of a "boot script."

All startup scripts are usually in the directory /etc/rc.d. The startup script in the directory service is made /etc/init.d/ . Run command start service myapp or start group /etc/init.d/myapp depending on the type of OS.

Here is a sample script text:
#! /bin/sh
#
$appdir = /usr/share/myapp/app.php
$parms = --master –proc=8 --daemon
export $appdir
export $parms
if [ ! -x appdir ]; then
exit 1
fi

if [ -x /etc/rc.d/init.d/functions ]; then
. /etc/rc.d/init.d/functions
fi

RETVAL=0

start () {
echo "Starting app"
daemon /usr/bin/php $appdir $parms
RETVAL=$?
[ $RETVAL -eq 0 ] && touch /var/lock/subsys/mydaemon
echo
return $RETVAL
}

stop () {
echo -n "Stopping $prog: "
killproc /usr/bin/fetchmail
RETVAL=$?
[ $RETVAL -eq 0 ] && rm -f /var/lock/subsys/mydaemon
echo
return $RETVAL
}

case in
start)
start
;;
stop)
stop
;;
restart)
stop
start
;;
status)
status /usr/bin/mydaemon
;;
*)
echo "Usage:
php
if (is_file('app.phar')) {
unlink('app.phar');
}
$phar = new Phar('app.phar', 0, 'app.phar');
$phar->compressFiles(Phar::GZ);
$phar->setSignatureAlgorithm (Phar::SHA1);
$files = array();
$files['bootstrap.php'] = './bootstrap.php';
$rd = new RecursiveIteratorIterator(new RecursiveDirectoryIterator('.'));
foreach($rd as $file){
if ($file->getFilename() != '..' && $file->getFilename() != '.' && $file->getFilename() != __FILE__) {
if ( $file->getPath() != './log'&& $file->getPath() != './script'&& $file->getPath() != '.')
$files[substr($file->getPath().DIRECTORY_SEPARATOR.$file->getFilename(),2)] =
$file->getPath().DIRECTORY_SEPARATOR.$file->getFilename();
}
}
if (isset($opt['version'])) {
$version = $opt['version'];
$file = "buildFromIterator(new ArrayIterator($files));
$phar->setStub($phar->createDefaultStub('bootstrap.php'));
$phar = null;
}
 {start|stop|restart|status}"
;;

RETVAL=$?
exit $RETVAL


Distributing Your PHP Daemon

To distribute a daemon it is better to pack it in a single phar archive module. The assembled module should include all the necessary PHP and .ini files.

Below is a sample build script:
#php app.phar
myDaemon version 0.1 Debug
usage:
--daemon – run as daemon
--debug – run in debug mode
--settings – print settings
--nofork – not run child processes
--check – check dependency modules
--master – run as master
--proc=[8] – run child processes


Additionally, it may be advisable to make a PEAR package as a standard unix-console utility that when run with no arguments prints its own usage instruction:
[NMD%%CODE%%]


Conclusion

Creating daemons in PHP it is not hard but to make them run correctly it is important to follow the steps described in this article.

Post a comment here if you have questions or comments on how to create daemon services in PHP.
8068 views · 3 years ago
Web Sockets in PHP

In his talk Websockets in PHP, John Fransler walks us through the use of WebSockets in PHP.

While discussing bi-directional real-time application development, John notes that PHP is often not invited to the table due to its lack of native support. Of all the possible attempts to bring in PHP on this stage of real-time development, Ratchet, a PHP WebSocket library, comes closest. "Ratchet is a loosely coupled PHP library providing developers with tools to create real-time, bi-directional applications between clients and servers over WebSockets."* Ahem!

Today's dynamic world


In today's dynamic content world of the internet, it is required to serve real-time bi-directional messages between clients and servers. WebSockets are simple, full-duplex, and persistent. They work over Http and are a standard today.

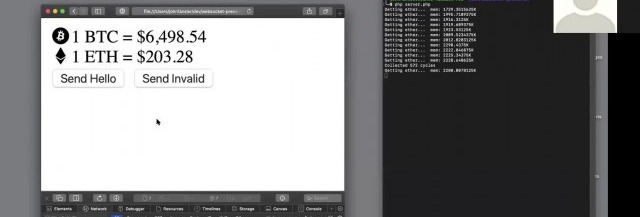
WebSockets have compatibility with 96.5% of clients globally

There's a very high chance your client has the necessary plumbing to access your content via WebSockets. WebSockets gives the ability to have real-time data on to your clients without the need for polling.

To understand WebSockets, John takes an example of a Javascript client and Ratchet Server. Javascript has everything built in to allow access to a socket. For example, you can use the send method on a WebSocket variable to send a message to the server, or if you want to respond to a message from the server, you use the OnConnection method.

While on the Server, John uses Ratchet, which is built on React PHP. A server script is then configured and set up to run and listen on a port for incoming HTTP requests. For messages, JSON is used, and to find public methods, a router is set up. He then goes on to instantiate the server-side script in Ratchet.

There are four functions of a Ratchets message component interface that are used in this example:

OnOpen gets called when a new connection is made.

OnClose gets called when a client quits. It's essential to keep an eye on memory management, and essential to keep tidying up as you move through the code.

OnError gets called when there is an exception faced by the user.

OnMessage gives the text of the JSON message, which is being exchanged with the client.

For Initialization, Jason continues to walk through the example. He shows how one can loop through the clients, both inside the server and outside the server. Outside the server, it’s a feature of React PHP. On database access, and with traditional standard synchronous MySQL in PHP, what usually happens is that it forces the code to wait for the query to return a result and do nothing — Fortunately, with Asynchronous MySQLi, that is not the case.

John gets into the details explaining Variables, References & Pointers. He also gives a demo where a central site has updated information on the Bitcoin and ether prices. A client terminal reflects the last values. Now the client doesn't have to poll the server for new values. When there is a change in the Bitcoin or ether values, the server pushes down the client's update. No polling helps with a lot of overheads and gets closer to real-time.

Using Supervisord


For Long-running applications - Jason recommends running a supervisord, use proxy to expose the port, and add a site certificate. Supervisord keeps an eye out for the server running the service; it can be used to restart the service and log any service issues. Recommended proxies are AWS load balancer, Nginx, and HA Proxy. For scalability, use multiple smaller WebSocket servers and a smaller number of clients per server used and load balancing. If one has to support a chat feature to allow clients to talk to each other in near real-time, it is recommended to use Redis. The Redis server proxies the messages between the server nodes.

The talk concludes with John summarizing best practices on error handling and takes QnA on various aspects of WebSockets such as handling load balancers and asynchronous calls to MSQLi.

The presentation for this video, along with the code, is hosted at John Curt's GitHub. More info about John's current areas of interest can be found on John's Blog.

Watch the video now


Related videos
7531 views · 5 years ago
Now that the Thanksgiving and Black Friday are left behind, we're all back at our desks, some of us having PHPStorm open for the whole day. In this post, I'll say a few words on this beautiful IDE, PHPUnit and XDebug.
You know that unit tests are essential, don't you? So do the PHPStorm developers. This industry-standard level IDE has tons of capabilities for integrating test frameworks and debuggers into your project. Even if you use VMs or containers to run your development environment, chances are they got you covered!

Blind Pew from Treasure Island

I often see even experienced PHP programmers debugging their code with var_dump(), which is obviously not the best way to do it. If you see the code for the first time, if you work with legacy code - step-by-step interactive debugging is the way to go. Sometimes it can save you hours of old school var_dumping.

As of unit tests, I often hear that it's good enough to run tests from the terminal. I even know a guy who runs watch phpunit /path/to/test while developing: this way the test is run every 2 seconds, you switch to the terminal whenever you want to see the latest results and that's it. However, there are certain advantages in running tests from the IDE. First, it's super-handy to launch a test method, test class or a whole folder with tests, just by pressing a hotkey. Second, the test results appear right there, in PHPStorm, with failures and their stack traces, every entry clickable and takes you directly to the file:line where a nasty thing happened. I also find the ability to run a debugger for a unit test, extremely attractive. Test fails, you click on a trace entry, get to a problematic line, place a break point, re-run the test in debug mode - and there you go.

For all those integrations, you will first need to setup the PHP interpreter for the project: Configuring PHP Development Environment. You will find both local and remote interpreter setups. "Local" is the PHP that you have on your workstation, the host machine. "Remote" can be pretty much everything: SSH if your Dev environment runs on a shared sandbox for all developers, docker or docker-compose if you run it using docker containers.

Next step - creating PHPUnit configuration. Go toSettings -> Languages and Frameworks -> PHP -> Test Frameworks. Follow this guide, it has much more information which will be more up-to-date than this post.Don't forget to set Path Mappings for your remote environments! That is, you probably have your project in, say, $HOME/projects/cool-project, but inside a docker or on a remote host it might be located at /app or /var/www, then you have to let PHPStorm know about this.

Once you're done with PHPUnit setup, you can finally run your tests! The default shortcut on my Linux machine isCtrl+Shift+F10 (shortcuts are usually different on Mac though). Place a cursor inside a test method, press the shotcut: PHPStorm will launch PHPUnit withthat particular test method! When the cursor in a scope of test class but not inside a test method - the whole test class will be run. And, you also can select a whole folder with tests, in the project tree and run it, ain't that cool?

A small tip for the docker-compose lovers. When I first set PHPStorm integration with docker-compose and ran the tests, I was quite surprised (unpleasantly) to see that myphp-fpm service that I was connecting to, is gone after the test process is finished. Took me some time to figure out that it's PHPStorm's expected behavior. It stops the target service after it's done testing. A workaround I started to use is as follows: I just add another service calledphpunit which uses a php-fpm or php-cli image, and is not needed by anything except unit testing in PHPStorm.

Now to debugging.


Debugging is like being the detective in a crime movie where you are also the murderer. Filipe Fortes a.k.a. @fortes


Obviously, your PHP interpreter in development environment will need a debugger extension in order for you to debug interactively. PHPStorm support the two most widely used options: XDebug and Zend Debugger. When using docker I usually make a separate Dockerfile for development, using production image as base, then add development tools,XDebug being the most important. Honestly, I've never usedZend Debugger, so have little to tell about its' nuances.

Got an extension? Go to Debugging Ultimate Guide! Debugger settings in PHPStorm are atSettings -> Languages and Frameworks -> PHP -> Debug. Most of the time you don't need to change them.Again, a note for docker-compose users. There is an XDebug setting that allow debugger to resolve the client (PHPStorm) IP address:xdebug.remoteconnect_back_. That's a disappointment but those will not work, at least with a default docker-compose setup. Thing is, all containers in a compose stack are running behind a network proxy provided by docker-compose. That is, the REMOTE_ADDR for all the containers will always be the IP of proxy. A workaround:

* disablexdebug.remoteconnect_back_;
* add.user.ini to the application root folder with the following contents:xdebug.remotehost = 192.168.X.X_ (your machine's IP address in the LAN). It's generally a good idea to exclude.user.ini from VCS control.

As a conclusion: if you still usevardump()_ to debug, stop living in the stone age, upgrade your knowledge and become more productive! If you don't write unit tests, start doing it. If your managers say it's a waste of time, tell them that it's coding without tests that is a waste of time. And, if you find this post of any use, or have an opinion, or a question - please do comment!
6807 views · 5 years ago
Custom extension to Laravel Application class

Hello folks! This post is for those of you using Laravel. This beautiful framework makes web development super-easy compared to most of competitors. In the heart of Laravel is the Application class, which is responsible for bootstrapping, registering services and also serves as a dependency injection container. What I do with my Laravel apps, is that I take a slight detour from the common path by adding a custom Application class. While this is not really necessary, I find this approach nice, and will try to share my thought below.

It's normal practice in Laravel world to build all kinds of objects like this:

$cache = app("cache");


I find it a bit confusing to call app("cache"") and expect a Cache\Repository instance as result. If I pass the result of this call to a function that requires a Cache\Repository as parameter, I will probably have a code inspection warning from IDE. Moreover, if I want proper autocompletion, I will have to add additional comment:


$cache = app("cache");


This is where a custom application class might be handy:

namespace App;
class MyApp extends Application
{
public function cacheRepository(): Repository
{
return $this->make(Repository::class);
}
}


This way I get a TypeError in case of a misconfiguration, and I have a type-hint which allows the IDE to recognize the return value. Bye-bye nasty comment lines and IDE warnings! I make a method per service, with type-hints, like dbConnection() or viewFactory() - works really well for me!

I also thought that, if I have a custom class, then all the custom setup that normally you have in bootstrap/app.php, should reside in that custom class:

namespace App;
class MyApp extends Application
{
public function __construct()
{
define('LARAVEL_START', microtime(true));
define("APP_ROOT", realpath(__DIR__ . "/../"));
parent::__construct(APP_ROOT);
$this->setUp();
}
private function setUp()
{
$this->singleton(
Contracts\Http\Kernel::class,
\App\Http\Kernel::class
);
}
}


Then your bootstrap/app.php becomes just this:

return new \App\MyApp;


The Laravel app() function will also return an instance of MyApp from now on. However, it's @phpdoc says it returns \Illuminate\Foundation\Application, so for better clarity, I also added my own accessor method:

namespace App;
class MyApp extends Application
{
public static function app(): self
{

$ret = parent::getInstance();
return $ret;
}
}


I tend to limit the use of global/static functions and methods, but sometimes it can be handy, and whenever I need an instance of MyApp, I just call MyApp::app(). The IDE wil be aware of the return type due to the type-hint, so I get everything I want for clean and clear development.

With your projects in Laravel, you may or may not want to follow this particular advice, but just be aware that extending a framework built-in classes for your team's comfort, is definitely something that can make your life easier. See you around, don't forget to leave comments!
6146 views · 5 years ago
Press Release

To say that we have been hard at work here at Nomad PHP, or that I'm excited about these three announcements would be a tremendous understatement. Over the past several months, behind the scenes, we've been working to bring even more features and benefits to Nomad PHP - these have already included unlimited streaming of all past meetings and access to PHP Architect.

Available today, however, you'll also have access to online, live workshops - as well as soon have the ability to stream select PHP conferences live, and finally to prove the knowledge you have gained through our online certification.

Online, Live Workshops

Like our online meetings, we are excited to announce that available today you can participate in online, live, and interactive workshops. Our first workshop will feature Michael Stowe, author of Undisturbed REST: a guide to Designing the Perfect API as he demonstrates how to build the perfect API using modern technologies and techniques.

Additional workshops will be announced as we continue, with a minimum of one workshop per quarter. These workshops will be part of your Nomad PHP subscription, and will be recorded for later viewing.

Nomad PHP Certification

With the many changes impacting the PHP ecosystem, we're proud to announce the ability to prove your knowledge with our online certification. Each certification is made up numerous, randomly selected questions to be completed within a specific time frame. Depending on the exam it may or may not be proctored, but all exams monitor user activity to ensure compliance.

To pass the exam, a passing grade (specified on each exam) must be completed for each section within the allotted time frame. Failure to complete or pass any section will result in a failing grade for the entire exam.

Upon completion, you will receive a digital certification with verification to post on LinkedIn or your website, as well as having your Nomad PHP updated to show the passed certification.

Initial certification exams will include PHP Developer Level I, PHP Engineer Level II, and API Specialist Level I. The PHP Developer exam will cover core components of PHP, the Engineer will cover a broad spectrum of topics including modern technologies, and the API Specialist will cover REST design and architecture practices.

All three exams will be available by January 31, 2019, and will be included with a Nomad PHP subscription.

Stream Select PHP Conferences Live

One of the primary goals of Nomad PHP is to bring the community together, and allow users all over the country to participate in conference level talks. What better way to do this than to bring community conferences online?

Like our traditional talks, these conferences and select conference sessions will be live-streamed as part of your Nomad PHP subscription, allowing you to participate in real-time with in-person conference attendees.

The first conference to be streamed will be DayCamp4Developers: Beyond Performance on January 18, 2018. Additional conferences to be streamed will be announced shortly.

Community and Corporate Sponsorships

With these new additions to Nomad PHP, now is the perfect time to take advantage of our new Community and Corporate sponsorships.

Your support of Nomad PHP not only makes all the above possible, but allows Nomad PHP to continue to serve and give back the community. We're proud, that despite operating at a loss, to have already contributed over$4,000 to the PHP community in the last 5 months.

To learn more about the sponsorship and community opportunities we have available, please visit our Advertising section.

Other Ways to Support Nomad PHP

Of course, while financial support helps us keep afloat and do more for the community, there are even more, and just as important ways to support Nomad PHP. Please consider linking to Nomad PHP, or sharing the service with your friends.

SPONSORS