Learn from your fellow PHP developers with our PHP blogs, or help share the knowledge you've gained by writing your own.


composer create-project laravel/laravel --prefer-dist tiny_blogcd tiny_blogpublic function up()
{
Schema::create('blogs', function (Blueprint $table) {
$table->increments('id');
$table->integer('user_id');
$table->string('category');
$table->string('title');
$table->text('description');
$table->timestamps();
});
}
public function down()
 {
 Schema::dropIfExists('blogs');
 }
php artisan migratephp artisan make:authphp artisan servehttp://127.0.0.1:8000php artisan make:controller BlogControllerphp artisan make:model BlogRoute::get('blog/create','BlogController@createBlog');
public function createBlog()
{
 return view('blog.create');
}
@extends('layouts.app')

@section('content')
<div class="container">
@if ($errors->any())
 <div class="alert alert-danger">
 <ul>
 @foreach ($errors->all() as $error)
 <li>{{ $error }}</li>
 @endforeach
 </ul>
 </div><br />
@endif
 <div class="row">
 <form method="post" action="{{url('blog/create')}}">
 <div class="form-group">
 <input type="hidden" value="{{csrf_token()}}" name="_token" />
 <label for="title">Title:</label>
 <input type="text" class="form-control" name="title"/>
 </div>
 <div class="form-group">
 <label for="title">Category/Tags:</label>
 <input type="text" class="form-control" name="category"/>
 </div>
 <div class="form-group">
 <label for="description">Description:</label>
 <textarea cols="10" rows="10" class="form-control" name="description"></textarea>
 </div>
 <button type="submit" class="btn btn-primary">Submit</button>
 </form>
 </div>
</div>
@endsection
Route::post('blog/create','BlogController@saveBlog'); public function saveBlog(Request $request)
{
$blog = new Blog();
$this->validate($request, [
'title'=>'required',
'category'=>'required',
'description'=> 'required'
]);
$blog->createBlog($request->all());
return redirect('blog/index')->with('success', 'New blog has been created successfully :)'); }
use App\Blog;Model(app/Blog.php), but in actual it is not there:$blog->createBlog($data);
public function createBlog($data)
{
$this->user_id = auth()->user()->id;
$this->title = $data['title'];
$this->description = $data['description'];
$this->category = $data['category'];
$this->save();
return 1;
}
Route::get('blog/index','BlogController@showAllBlogs');
public function showAllBlogs()
{
$blogs = Blog::where('user_id', auth()->user()->id)->get();
return view('blog.index',compact('blogs'));
}
@extends('layouts.app')
@section('content')
<div class="container">
@if(\Session::has('success'))
<div class="alert alert-success">
{{\Session::get('success')}}
</div>
@endif
<a type="button" href="{{url('blog/create')}}" class="btn btn-primary">Add New Blog</a>
<br>
<table class="table table-striped">
<thead>
<tr>
<td>ID</td>
<td>Title</td>
<td>Category</td>
<td>Description</td>
<td colspan="2">Action</td>
</tr>
</thead>
<tbody>
@foreach($blogs as $blog)
<tr>
<td>{{$blog->id}}</td>
<td>{{$blog->title}}</td>
<td>{{$blog->category}}</td>
<td>{{$blog->description}}</td>
<td>Edit</td>
<td>Delete</td>
</tr>
@endforeach
</tbody>
</table>
<div>
@endsection
public function __construct()
{
$this->middleware('auth');
}
<?php
namespace App\Http\Controllers;
use Illuminate\Http\Request;
use App\Blog;
class BlogController extends Controller
{
public function __construct()
{
$this->middleware('auth');
}
public function createBlog()
{
return view('blog/create');
}
 public function saveBlog(Request $request)
 {
 $blog = new Blog();

 $this->validate($request, [
 'title'=>'required',
'category'=>'required',
 'description'=> 'required'
 ]);

 $blog->createBlog($request->all());
 return redirect('blog/index')->with('success', 'New blog has been created successfully :)'); }
public function showAllBlogs()
 {
 $blogs = Blog::where('user_id', auth()->user()->id)->get();

 return view('blog.index',compact('blogs'));
 }
}


hasManyThrough() for the relation Schema::create('users', function (Blueprint $table) {
$table->increments('id');
$table->string('name');
$table->string('email')->unique();
$table->string('password');
$table->integer('country_id')->unsigned();
$table->rememberToken();
$table->timestamps();
$table->foreign('country_id')->references('id')->on('countries')
->onDelete('cascade');
});
Schema::create('posts', function (Blueprint $table) {

 $table->increments('id');

 $table->string("name");

 $table->integer('user_id')->unsigned();

 $table->timestamps();

 $table->foreign('user_id')->references('id')->on('users')

 ->onDelete('cascade');

});
Schema::create('countries', function (Blueprint $table) {

 $table->increments('id');

 $table->string('name');

 $table->timestamps();

});
<?php


namespace App;

use Illuminate\Database\Eloquent\Model;


class Country extends Model

{

 public function posts(){

 return $this->hasManyThrough(

 Post::class,

 User::class,

 'country_id',
 'user_id',
 'id',
 'id'
 );

 }

}
$country = Country::find(1);

dd($country->posts);
morphMany() and morphTo() for relation.Schema::create('posts', function (Blueprint $table) {
$table->increments('id');
$table->string("name");
$table->timestamps();
});
Schema::create('videos', function (Blueprint $table) {

 $table->increments('id');

 $table->string("name");

 $table->timestamps();

});
Schema::create('comments', function (Blueprint $table) {

 $table->increments('id');

 $table->string("body");

 $table->integer('commentable_id');

 $table->string("commentable_type");

 $table->timestamps();

});
<?php

namespace App;

use Illuminate\Database\Eloquent\Model;


class Post extends Model

{


 public function comments(){

 return $this->morphMany(Comment::class, 'commentable');

 }

}
<?php

namespace App;

use Illuminate\Database\Eloquent\Model;


class Video extends Model{


 public function comments(){

 return $this->morphMany(Comment::class, 'commentable');

 }

}
<?php

namespace App;

use Illuminate\Database\Eloquent\Model;

class Comment extends Model{


 public function commentable(){

 return $this->morphTo();

 }

}
$post = Post::find(1);

$comment = new Comment;

$comment->body = "Hi Harikrishnan";

$post->comments()->save($comment);


$video = Video::find(1);

$comment = new Comment;

$comment->body = "Hi Harikrishnan";

$video->comments()->save($comment);
$post = Post::find(1);

dd($post->comments);


$video = Video::find(1);

dd($video->comments);
morphToMany() and morphedByMany() will be used for many to many polymorphic relationshipsSchema::create('posts', function (Blueprint $table) {
$table->increments('id');
$table->string("name");
$table->timestamps();
});
Schema::create('videos', function (Blueprint $table) {

 $table->increments('id');

 $table->string("name");

 $table->timestamps();

});
Schema::create('tags', function (Blueprint $table) {

 $table->increments('id');

 $table->string("name");

 $table->timestamps();

});
Schema::create('taggables', function (Blueprint $table) {

 $table->integer("tag_id");

 $table->integer("taggable_id");

 $table->string("taggable_type");

});
<?php

namespace App;

use Illuminate\Database\Eloquent\Model;

class Post extends Model

{


 public function tags(){

 return $this->morphToMany(Tag::class, 'taggable');

 }

}
<?php

namespace App;

use Illuminate\Database\Eloquent\Model;

class Video extends Model

{


 public function tags(){

 return $this->morphToMany(Tag::class, 'taggable');

 }

}
<?php

namespace App;

use Illuminate\Database\Eloquent\Model;

class Tag extends Model

{


 public function posts(){

 return $this->morphedByMany(Post::class, 'taggable');

 }


 public function videos(){

 return $this->morphedByMany(Video::class, 'taggable');

 }

}
$post = Post::find(1);
$tag = new Tag;
$tag->name = "Hi Harikrishnan";
$post->tags()->save($tag);


$video = Video::find(1);
$tag = new Tag;
$tag->name = "Vishnu";
$video->tags()->save($tag);


$post = Post::find(1);
$tag1 = new Tag;
$tag1->name = "Kerala Blasters";
$tag2 = new Tag;
$tag2->name = "Manajapadda";
$post->tags()->saveMany([$tag1, $tag2]);


$video = Video::find(1);
$tag1 = new Tag;
$tag1->name = "Kerala Blasters";
$tag2 = new Tag;
$tag2->name = "Manajappada";
$video->tags()->saveMany([$tag1, $tag2]);


$post = Post::find(1);
$tag1 = Tag::find(3);
$tag2 = Tag::find(4);
$post->tags()->attach([$tag1->id, $tag2->id]);


$video = Video::find(1);
$tag1 = Tag::find(3);
$tag2 = Tag::find(4);
$video->tags()->attach([$tag1->id, $tag2->id]);


$post = Post::find(1);
$tag1 = Tag::find(3);
$tag2 = Tag::find(4);
$post->tags()->sync([$tag1->id, $tag2->id]);


$video = Video::find(1);
$tag1 = Tag::find(3);
$tag2 = Tag::find(4);
$video->tags()->sync([$tag1->id, $tag2->id]);
$post = Post::find(1);
dd($post->tags);


$video = Video::find(1);
dd($video->tags)


$tag = Tag::find(1);
dd($tag->posts);


$tag = Tag::find(1);
dd($tag->videos);

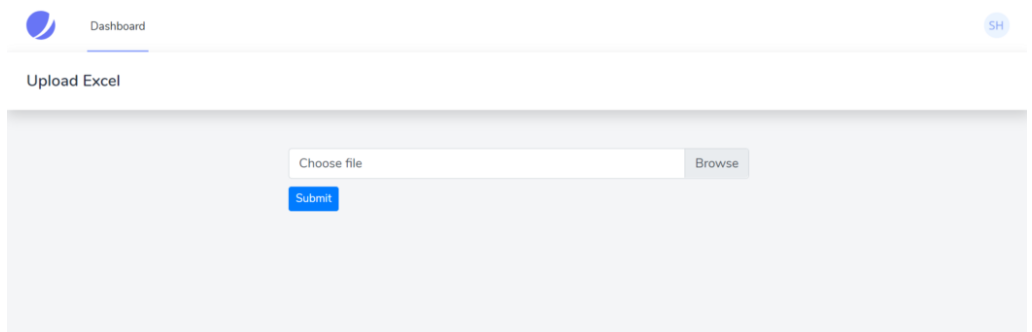
<form method="post" enctype="multipart/form-data"> @csrf <div class="custom-file"> <input type="file" accept=".csv" name="excel" class="custom-file-input" id="customFile" /> <label class="custom-file-label" for="customFile">Choose file</label	> </div> <div> <button type="submit" class="btn btn-primary btn-sm" style="margin-top: 10px"	>Submit> </div>

</form>
php artisan make:controller UploadController
Route::post('/upload', [UploadController::class, 'upload'])->name('upload')->middleware('auth');
<form method="post" action="{{route('upload')}}" enctype="multipart/form-data">
$file = $request->file('excel');
if (($handle = fopen($file, "r")) !== FALSE) { while (($data = fgetcsv($handle, 1000, ",")) !== FALSE) { ..... }

}
{ "name": "test", "job": "test"

}
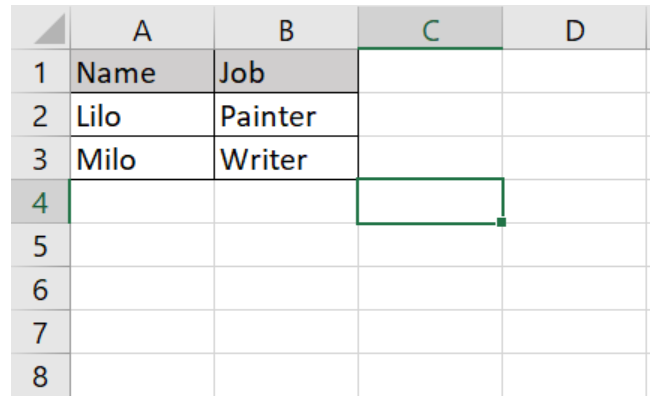
if (($handle = fopen($file, "r")) !== FALSE) { while (($data = fgetcsv($handle, 1000, ",")) !== FALSE) { Http::post('https://reqres.in/api/users', [ 'name' => $data[0], 'job' => $data[1], ]); }

}
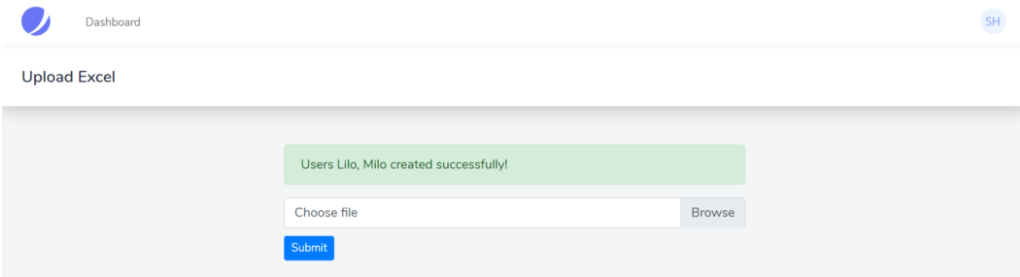
public function upload(Request $request){ $file = $request->file('excel'); if($file){ $row = 1; $array = []; if (($handle = fopen($file, "r")) !== FALSE) { while (($data = fgetcsv($handle, 1000, ",")) !== FALSE) { if($row > 1){ Http::post('https://reqres.in/api/users', [ 'name' => $data[0], 'job' => $data[1], ]); array_push($array,$data[0]); } $request->session()->flash('status', 'Users '.implode($array,", ").' created successfully!'); $row++; } } }else{ $request->session()->flash('error', 'Please choose a file to submit.'); } return view('dashboard');

}
<div class="container max-w-7xl mx-auto sm:px-6 lg:px-8" style="width: 50%"> @if (session('status')) <div class="alert alert-success"> {{ session('status') }} </div> @endif @if (session('error')) <div class="alert alert-error"> {{ session('error') }} </div> @endif <form action="{{route('upload')}}" method="post" enctype="multipart/form-data"> @csrf <div class="custom-file"> <input type="file" accept=".csv" name="excel" class="custom-file-input" id="customFile" /> <label class="custom-file-label" for="customFile">Choose file</label> </div> <div> <button type="submit" class="btn btn-primary btn-sm" style="margin-top: 10px">Submit</button> </div> </form>

</div>
 g10dra 116,049
  mike 79,342
  crocodile2u 78,028
  harikrishnanr 62,292
  calevans 37,818
  MindNovae 28,770
  dmamontov 19,373
  tanja 16,713
  damnjan 13,143
  ahmedkhan
 SPONSORS

SPONSORS