The following is a sponsored blogpost by Cloudways
Developing an application is not the sole thing you should bank on. You must strive to find the best hosting solution to deploy that application also. The application’s speed is dependent on the hosting provider, that is why I always advise you to go for the best hosting solution to get the ultimate app performance.
Now a days, it is a big challenge to choose any web hosting, as each hosting has its own pros and cons which you must know, before considering it finally for the deployment. I don’t recommend shared hosting for PHP/Laravel based applications, because you always get lot of server hassles like downtime, hacking, 500 errors, lousy support and other problems that are part and parcel of shared hosting.
For PHP applications, you must focus on more technical aspects like caching, configs, databases, etc. because these are essential performance points for any vanilla or framework-based PHP application. Additionally, if the app focuses on user engagement (for instance, ecommerce store), the hosting solution should be robust enough to handle spikes in traffic.
Here, I would like to introduce Cloudways
PHP server hosting to you which provides easy, developer and designer friendly managed hosting platform. With Cloudways, you don't need to focus on PHP hosting, but must focus on building your application. You can easily launch cloud servers on five providers including DigitalOcean, Linode, Vultr, AWS and GCE.
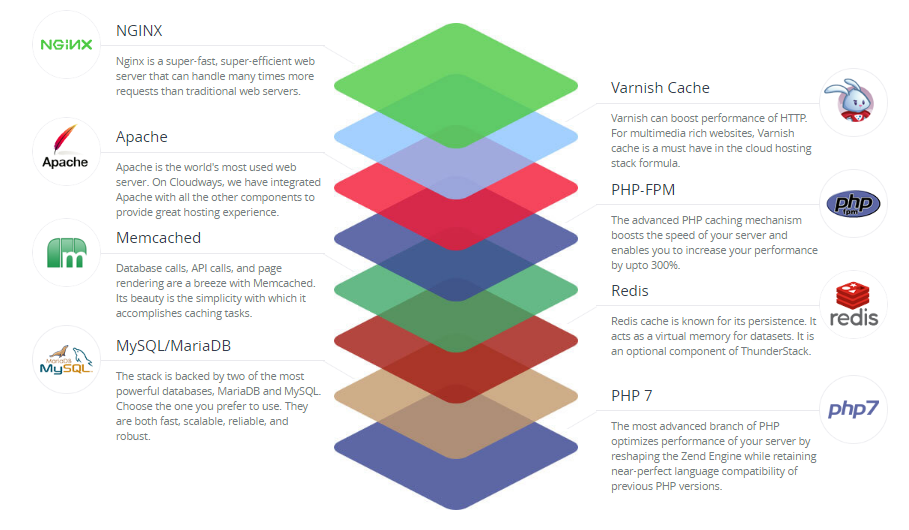
Cloudways ThunderStack
Being a developer, you must be familiar with the concept of stack - an arrangement of technologies that form the underlying hosting solution.
To provide a blazing fast speed and a glitch-free performance, Cloudways has built a PHP stack, known as ThunderStack. This stack consists of technologies that offer maximum uptime and page load speed to all PHP applications. Check out the following visual representation of ThunderStack and the constituent technologies:

As you can see, ThunderStack comprises of a mix of static and dynamic caches with two web servers, Nginx and Apache. This combination ensures the ultimate experience for the users and visitors of your application.
Frameworks and CMS
The strength and popularity of PHP lies in the variety of frameworks and CMS it offers to the developers. Realizing this diversity, Cloudways offers a hassle-free installation of major PHP frameworks including Symfony, Laravel, CakePHP, Zend, and Codeigniter. Similarly, popular CMS such as WordPress, Bolt, Craft, October, Couch, and Coaster CMS - you can install these with the 1-click option. The best part is that if you have a framework or CMS that is not on the list, you can easily install it through Composer.
1-Click PHP Server & Application Installation
Setting up a stack on an unmanaged VPS could take an entire day!
When you opt for Cloudways managed cloud hosting, the entire process of setting up the server, installation of core PHP files and then the setup of the required framework is over in a matter of minutes.
Just
sign up at Cloudways, choose your desired cloud provider, and select the PHP stack application.
As you can see, your LAMP stack is ready for business in minutes.
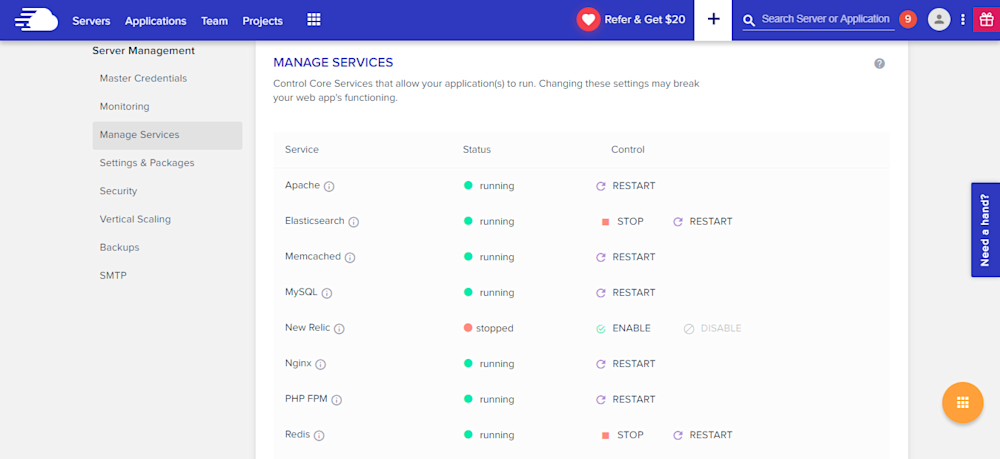
Many PHP applications fail because essential services are either turned off or not set up properly. Cloudways offers a centralized location where you can view and set the status of all essential services such as:
* Apache
* Elasticsearch
* Memcached
* MySQL
* PHP-FPM
* Nginx
* New Relic
* Redis
* Varnish
Similarly, you can manage SMTP add-ons without any fuss.
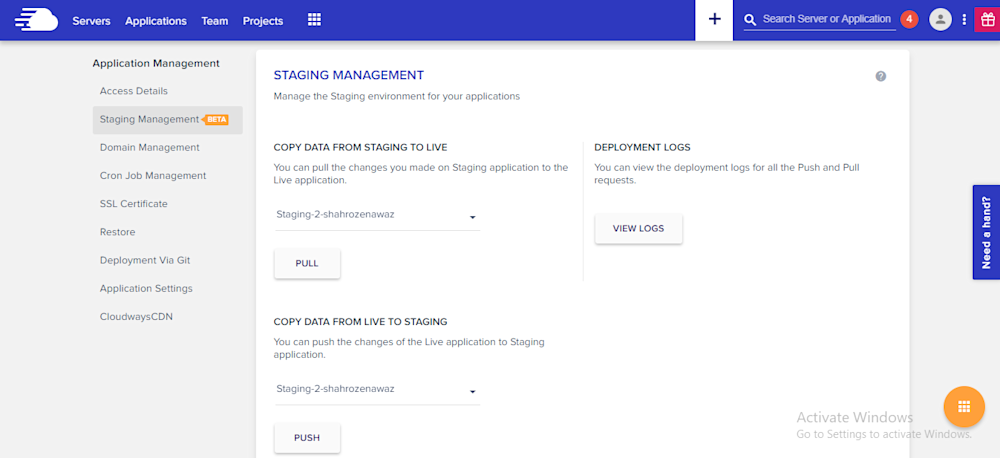
Staging Environment
With Cloudways, you can test your web applications for possible bugs and errors before taking it live.
Using the staging feature, developers can first deploy their web sites on test domains where they can analyze the applications performance and potential problems. This helps site administrators to fix those issues timely and view the application performance in real-time.
A default sub domain comes pre-installed with the newly launched application, making it easy for the administrators to test the applications on those testing subdomains. Overall, it's a great feature which helps developers know about the possible errors that may arise during the live deployment.
Pre-Installed Composer & Git
PHP development requires working with external libraries and packages. Suppose you are working with Laravel and you need to install an external package. Since Composer has become the standard way of installing packages, it comes preinstalled on the Cloudways platform. Just launch the application and start using Composer in your project.
Similarly, if you are familiar with Git and maintain your project on GitHub or BitBucket, you don’t need to worry about Git installation. Git also comes pre-configured on Cloudways. You can start running commands right after application launch.
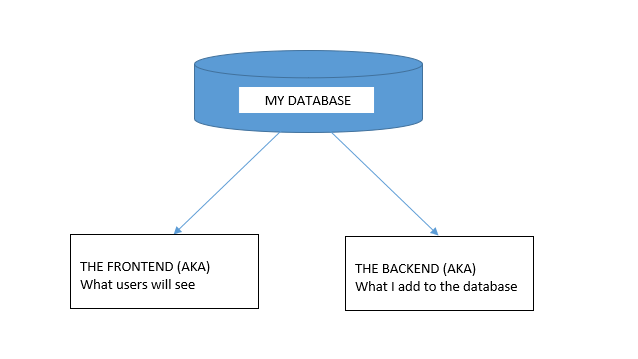
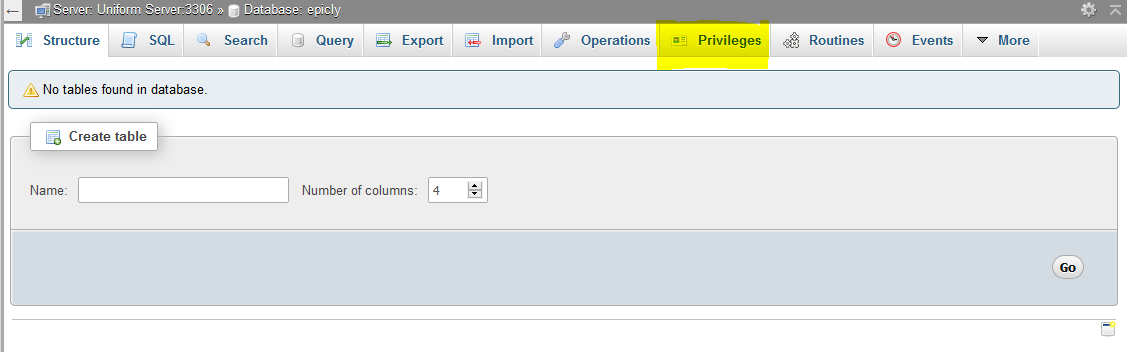
Cloudways MySQL Manager
When you work with databases in PHP, you need a database manager. On the Cloudways platform, you will get a custom-built MySQL manager, in which you can perform all the tasks of a typical DB manager.
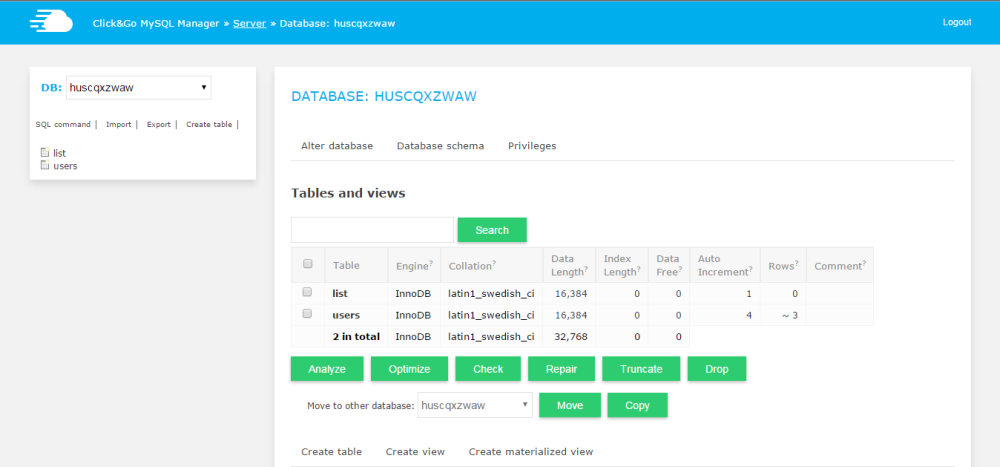
However, if you wish to install and use another database manager like PHPMyAdmin, you can install it by following this simple guide on installing
PHPMyadmin.
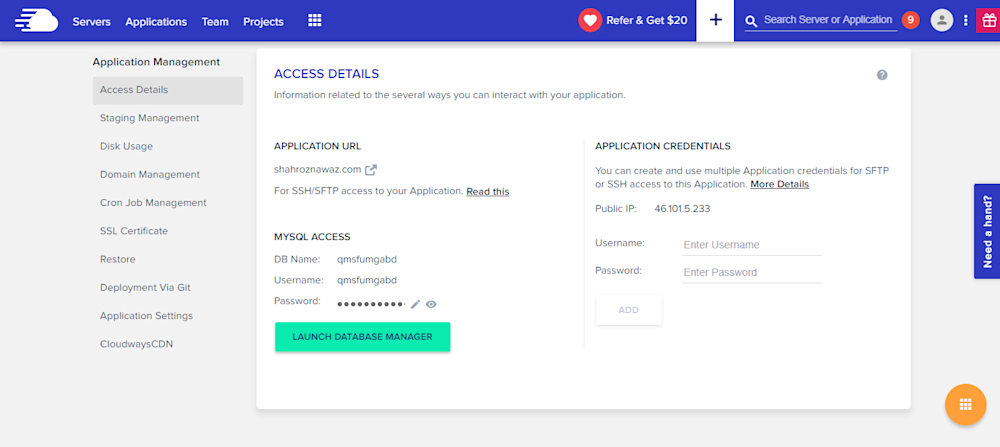
Server & Application Level SSH
If you use Linux, you typically use SSH for accessing the server(s) and individual applications. A third-party developer requires application and server level access as per the requirements of the client. Cloudways offers SSH access to fit the requirements of the client and users.
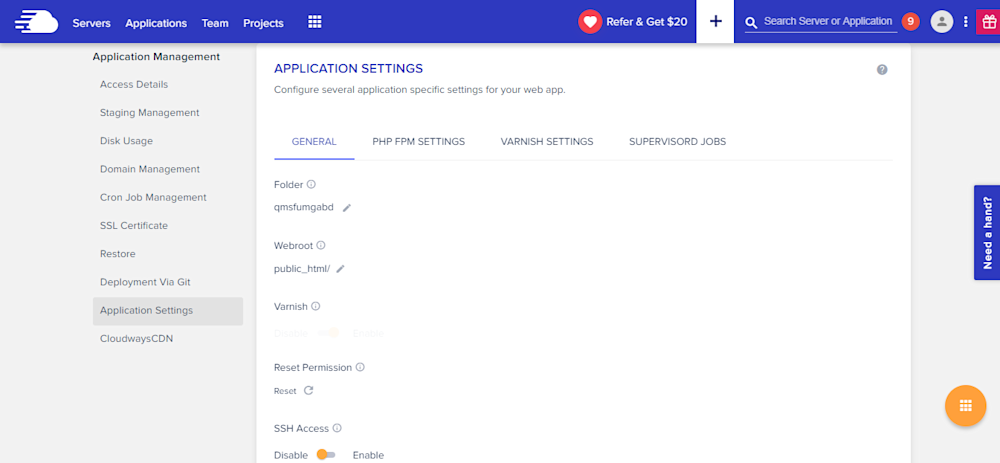
PHP-FPM, Varnish & Cron Settings
Cloudways provides custom UI panel to set and maintain PHP-FPM and Varnish settings. Although the default configuration is already in place, you can easily change all the settings to suit your own, particular development related requirements. In Varnish settings, you can define URL that you want to exclude from caching. You can also set permissions in this panel.

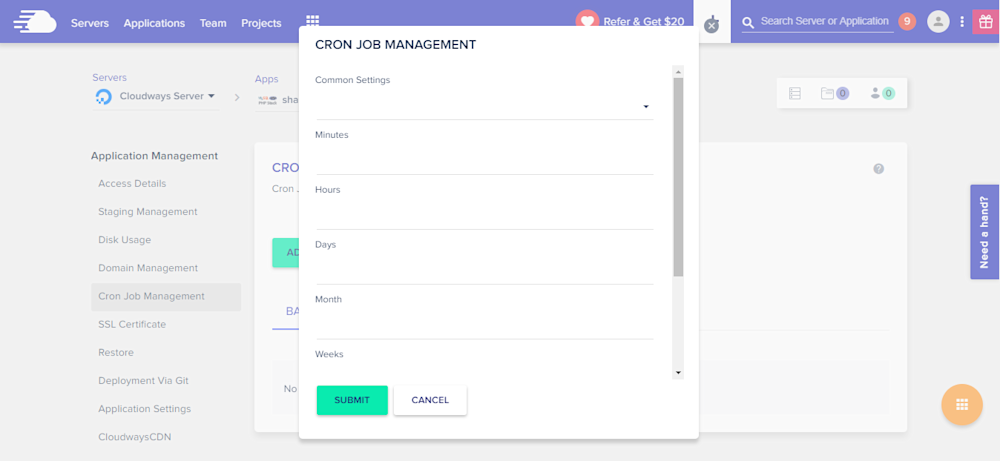
Cron job is a very commonly used component of PHP application development process. On Cloudways platform, you can easily set up Cron jobs in just a few clicks. Just declare the PHP script URL and the time when the script will run.
Cloudways API & Personal Assistant Bot
Cloudways provides an internal API that offers all important aspects of the server and application management. Through Cloudways API, you can easily develop, integrate, automate, and manage your servers and web apps on Cloudways Platform using the RESTful API. Check out some of the
use cases developed using Cloudways API. You just need your API key and email for authentication of the HTTP calls on API Playground and custom applications.
Cloudways employs a smart assistant named CloudwaysBot to notify all users about server and application level issues. CloudwaysBot sends the notifications on pre-approved channels including email, Slack and popular task management tools such as Asana and Trello.
Run Your APIs on PHP Stack
Do you have your own API which you want to run on the PHP stack? No problem, because you can do that, too with Cloudways! You can also use REST API like
Slim,
Silex,
Lumen, and others. You can use APIs to speed up performance and require fast servers with lots of resources. So, if you think that your API response time is getting slower due to the large number of requests, you can easily scale your server(s) with a click to address the situation.
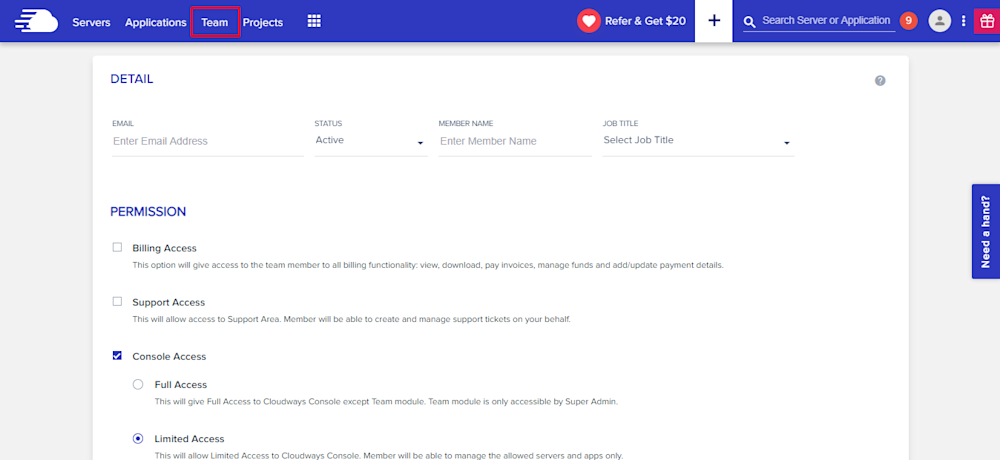
Team Collaboration
When you work on a large number of applications with multiple developers, you need to assign them on any specific application. Cloudways provides an awesome feature of team collaboration through which you can assign developers to specific application and give access to them. You can use this tool to assign one developer to multiple applications. Through team feature, you can connect the team together and work on single platform. Access can be of different type; i.e. billing, support and console. You can either give the full access or a limited one by selecting the features in Team tab.
Final Words
Managed cloud hosting ensures that you are not bothered by any hosting or server related issues. For practical purposes, this means that developers can concentrate on writing awesome code without worrying about underlying infrastructure and hosting related issues. Do
sign up and check out Cloudways for the best and the most cost-effective cloud hosting solution for your next PHP project!


 g10dra 155,671
  mike 108,011
  crocodile2u 106,166
  harikrishnanr 80,295
  calevans 80,039
  christiemarie 54,634
  dmamontov 54,098
  MindNovae 52,788
  HowTos 24,616
  tanja
tanja 

