PHP & Web Development Blogs

Search Results For: message
Showing 6 to 10 of 13 blog articles.
16357 views · 5 years ago
Implement Web Push Notification in PHP using W3C provided Notification API

Hi Guys,
I am sharing you the simple steps by which you can broadcast the web push notifications to your subscriber. In this tutorial we are making a subscriber form and saving information using Ajax and PHP and then through a server side code returning response to current logged in user and showing notification to that user.
Following are the steps to build this system


1. Create a database, I am creating db with name 'web_notifications'


Creating subscribers and notifications tables using following sql statements


CREATE TABLE IF NOT EXISTS <code>subscribers</code> (
<code>id</code> int(11) NOT NULL,
<code>name</code> varchar(255) NOT NULL,
<code>email</code> varchar(255) NOT NULL,
<code>createdAt</code> timestamp NOT NULL DEFAULT CURRENT_TIMESTAMP
) ENGINE=InnoDB DEFAULT CHARSET=latin1;

ALTER TABLE <code>subscribers</code> ADD PRIMARY KEY (<code>id</code>);

ALTER TABLE <code>subscribers</code> MODIFY <code>id</code> int(11) NOT NULL AUTO_INCREMENT;


CREATE TABLE IF NOT EXISTS <code>notifications</code> (
<code>id</code> int(11) NOT NULL,
<code>to_user</code> int(11) NOT NULL,
<code>title</code> varchar(255) NOT NULL,
<code>body</code> varchar(255) NOT NULL,
<code>url</code> varchar(255) NOT NULL,
<code>is_sent</code> int(11) NOT NULL DEFAULT '0',
<code>createdAt</code> timestamp NOT NULL DEFAULT CURRENT_TIMESTAMP
) ENGINE=InnoDB DEFAULT CHARSET=latin1;

ALTER TABLE <code>notifications</code> ADD PRIMARY KEY (<code>id</code>);

ALTER TABLE <code>notifications</code> MODIFY <code>id</code> int(11) NOT NULL AUTO_INCREMENT;


2. Now create a db_connect.php file with following code


<?php 
session_start();
$servername = "localhost";
$username = "root";
$password = "";
$dbname = "web_notifications";

$conn = new mysqli($servername, $username, $password, $dbname);
if ($conn->connect_error) {
die("Connection failed: " . $conn->connect_error);
}
?>


3. Create a cookies.js file to read and write browser cookies


function WriteCookie(key,content) {
var now = new Date();
now.setMonth( now.getMonth() + 1 );
document.cookie = key+"=" + escape(content) + ";";
document.cookie = "expires=" + now.toUTCString() + ";"
}

function ReadCookie(key) {
var allcookies = document.cookie;
cookiearray = allcookies.split(';');
var CookieData=Array();
for(var i=0; i<cookiearray.length; i++) {
k = cookiearray[i].split('=')[0];
v = cookiearray[i].split('=')[1];
CookieData[k]=v;
}
return CookieData[key];
}


4. Create a ajax file to read and mark is_sent if any notification foun to be sent in database for that user. create file with name 'fetch_notifications.php' with following content


<?php require 'db_connect.php';

$sql = "SELECT id,title,body,url FROM notifications where to_user='".@$_GET['user_id']."' and is_sent='0' ";
$result = $conn->query($sql);

$data=array();
if ($result->num_rows > 0) {
while($row = $result->fetch_assoc()) {
$data[]=$row;

$upd = "update notifications set is_sent='1' where id='".$row['id']."' ";
$conn->query($upd);

}
}

if(count($data)>0)
{
$response=array("status"=>1,"notification"=>$data);
}
else
{
$response=array("status"=>0,"error"=>"No new notification!");
}

echo json_encode($response);

$conn->close();
?>


5. Now code index.php to show subscriber form and on submit insert record into the subscriber table


<?php require 'db_connect.php'; ?>
<!DOCTYPE html>
<html>
<head>
<title>Web Push Notification Demo</title>
<script src="./cookies.js" type="text/javascript"></script>
<link href=" <script src=" <script src=" <link rel="stylesheet" href="https://use.fontawesome.com/releases/v5.1.0/css/all.css" integrity="sha384-lKuwvrZot6UHsBSfcMvOkWwlCMgc0TaWr+30HWe3a4ltaBwTZhyTEggF5tJv8tbt" crossorigin="anonymous">
<?php
if(isset($_POST['subscribe_form']))
{
$_SESSION['is_login']=0;
$username=$conn->real_escape_string($_POST['username']);
$useremail=$conn->real_escape_string($_POST['useremail']);


$sql = "INSERT INTO subscribers set name='".$username."',email='".$useremail."' ";
if ($conn->query($sql) === TRUE) {
$_SESSION['is_login']=1;
$_SESSION['Uid']= $conn->insert_id;
$_SESSION['Uname']= $username;
?>
<script type="text/javascript">
WriteCookie("Uid","<?php echo $_SESSION['Uid']; ?>");
</script>
<?php
$msg="<p style='color:green'>You have subscribe for push notification succesfully :)</p>";
} else {
$msg="<p style='color:red'>Error in subscribing for notifications</p>";
}


}

?>
<div class="container">
<?php
if(isset($msg) && $msg!='')
{
?>
<br>
<div class="alert alert-info">
<?php echo $msg; ?>
</div>
<?php
}

if(isset($_SESSION['is_login']) && $_SESSION['is_login']==1)
{
?>
<h2>Welcome <?php echo $_SESSION['Uname']; ?></h2>
<script type="text/javascript">

setInterval(function(){
check_notification();
}, 10000);

function check_notification()
{
var Uid=ReadCookie("Uid");
if(Uid!==undefined)
{
$.ajax({url: "fetch_notifications.php?user_id="+Uid, success: function(result){
var response=JSON.parse(result);
if(response.status==1)
{

response=response.notifications;
for (var i = response.length - 1; i >= 0; i--) {
var url = response[i]['url'];
var noti = new Notification(response[i]['title'], {
icon: 'logo.png', body: response[i]['body'],
});
noti.onclick = function () {
window.open(url);
noti.close();
};

};

}
else{
console.log(response.error);

}

}

});
}
}


</script>
<?php
}
else
{
?>
<h2 class="text-center">Subscribe for Notifications</h2>
<div class="row justify-content-center">
<div class="col-12 col-md-8 col-lg-6 pb-5">

<div class="card border-primary rounded-0">
<div class="card-header p-0">
<div class="bg-info text-white text-center py-2">
<h3><i class="fa fa-envelope"></i> Information</h3>
<p class="m-0">provide your information</p>
</div>
</div>
<div class="card-body p-3">
<form method="post">
<!--Body-->
<div class="form-group">
<div class="input-group mb-2">
<div class="input-group-prepend">
<div class="input-group-text"><i class="fa fa-user text-info"></i></div>
</div>
<input type="text" class="form-control" id="username" name="username" placeholder="Input Your Name Here" required>
</div>
</div>
<div class="form-group">
<div class="input-group mb-2">
<div class="input-group-prepend">
<div class="input-group-text"><i class="fa fa-envelope text-info"></i></div>
</div>
<input type="text" class="form-control" id="useremail" name="useremail" pattern="[^@\s]+@[^@\s]+\.[^@\s]+" title="Invalid email address" placeholder="[email protected]" required>
</div>
</div>

<div class="text-center">
<input type="submit" value="Subscribe" name="subscribe_form" class="btn btn-info btn-block rounded-0 py-2">
</div>
</form>
</div>

</div>


</div>
</div>
<?php }?>
</div>


</head>
<body>

</body>
</html>
<?php
$conn->close();
?>


The frontend of your subscription page (index.php) should look like this:


Subscribing Form to User

Now we are ready to receive notification in frontend, but we still need to create an admin page from where we can send notification to subscriber(s).


6. Create a table for admin user


CREATE TABLE IF NOT EXISTS <code>admin</code> (
<code>id</code> int(11) NOT NULL,
<code>username</code> varchar(255) NOT NULL,
<code>password</code> varchar(255) NOT NULL,
<code>createdAt</code> timestamp NOT NULL DEFAULT CURRENT_TIMESTAMP
) ENGINE=InnoDB DEFAULT CHARSET=latin1;

ALTER TABLE <code>admin</code> ADD PRIMARY KEY (<code>id</code>);

ALTER TABLE <code>admin</code> MODIFY <code>id</code> int(11) NOT NULL AUTO_INCREMENT;

INSERT INTO <code>web_notifications</code>.<code>admin</code> (<code>id</code>, <code>username</code>, <code>password</code>, <code>createdAt</code>) VALUES (NULL, 'admin', MD5('123456'), CURRENT_TIMESTAMP);


Following is the code for admin.php to add the notifications to subscriber(s) account also i have inserted following login credentials for admin in admin table:
username:admin
password:123456


7. Now put following code in admin.php


<?php require 'db_connect.php'; ?>
<!DOCTYPE html>
<html>
<head>
<title>ADMIN PAGE</title>
<link href=" <script src=" <script src="
<link rel="stylesheet" href="https://use.fontawesome.com/releases/v5.1.0/css/all.css" integrity="sha384-lKuwvrZot6UHsBSfcMvOkWwlCMgc0TaWr+30HWe3a4ltaBwTZhyTEggF5tJv8tbt" crossorigin="anonymous">
<?php
if(isset($_POST['login']))
{
$_SESSION['admin_login']=0;
$username=$conn->real_escape_string($_POST['username']);
$password=$conn->real_escape_string($_POST['password']);
$sql = "SELECT * FROM admin where username='".$username."' and password='".md5($password)."' ";
$result = $conn->query($sql);
if ($result->num_rows > 0) {
$_SESSION['admin_login']=1;
$msg="<p style='color:green'>Admin Logged-in Successfully :)</p>";
}
else {
$msg="<p style='color:red'>INVALID CREDENTIALS FOR ADMIN</p>";
}


}
if(isset($_POST['add_notification']))
{
$title=$conn->real_escape_string($_POST['title']);
$body=$conn->real_escape_string($_POST['body']);
$url=$conn->real_escape_string($_POST['url']);
$users=$_POST['users'];

foreach ($users as $user_id) {
$ins = "insert into notifications set to_user='".$user_id."' , title='".$title."', url='".$url."', body='".$body."' ";
$conn->query($ins);
}
$msg="<p style='color:green'>Notification(s) added to subscribers account.</p>";

}

?>
<div class="container">
<?php
if(isset($msg) && $msg!='')
{
?>
<br>
<div class="alert alert-info">
<?php echo $msg; ?>
</div>
<?php
}

if(isset($_SESSION['admin_login']) && $_SESSION['admin_login']==1)
{
?>
<h2>Welcome Admin, Send notification to Subscriber(s)</h2>

<form method="post">


<div class="form-group">
<label for="sel1">Select Subscriber(s):</label>
<select multiple="multiple" required="required" class="form-control" id="users" name="users[]">
<?php
$sql = "SELECT id,name FROM subscribers";
$result = $conn->query($sql);

$data=array();
if ($result->num_rows > 0) {
while($row = $result->fetch_assoc()) {
echo "<option value='".$row['id']."'>".$row['name']."</option>";
}
}
?>
</select>
</div>

<div class="form-group">
<label for="email">Title</label>
<input type="text" required class="form-control" placeholder="notification title here" name="title" id="title">
</div>

<div class="form-group">
<label for="email">Message</label>
<textarea required class="form-control" placeholder="notification message here" name="body" id="body"></textarea>
</div>

<div class="form-group">
<label for="email">Url</label>
<input type="url" required class="form-control" placeholder="notification landing/click url here" name="url" id="url">
</div>

<input type="submit" class="btn btn-primary btn-block" name="add_notification" value="Submit" />

</form>


<?php
}
else
{
?>
<h2 class="text-center">ADMINISTRATOR</h2>
<div class="row justify-content-center">
<div class="col-12 col-md-8 col-lg-6 pb-5">

<div class="card border-primary rounded-0">
<div class="card-header p-0">
<div class="bg-info text-white text-center py-2">
<h3><i class="fa fa-envelope"></i> LOGIN</h3>
<p class="m-0">provide admin login credentials</p>
</div>
</div>
<div class="card-body p-3">
<form method="post">
<!--Body-->
<div class="form-group">
<div class="input-group mb-2">
<div class="input-group-prepend">
<div class="input-group-text"><i class="fa fa-user text-info"></i></div>
</div>
<input type="text" class="form-control" id="username" name="username" placeholder="Input username here" required>
</div>
</div>
<div class="form-group">
<div class="input-group mb-2">
<div class="input-group-prepend">
<div class="input-group-text"><i class="fa fa-key text-info"></i></div>
</div>
<input type="password" class="form-control" id="password" name="password" placeholder="your password here" required>
</div>
</div>

<div class="text-center">
<input type="submit" value="Login" name="login" class="btn btn-info btn-block rounded-0 py-2">
</div>
</form>
</div>

</div>


</div>
</div>
<?php }?>
</div>


</head>
<body>

</body>
</html>
<?php
$conn->close();
?>


The admin page will ask login credentials first then it will look like following screenshot:

Admin Send Notifiv=cation to subscribers

Now in your project if you open index.php you have a frontend where user will register themselves to receive notifications, and admin.php is your backend where you can send notifications to users or subscribers


If you face any problem in setup this small project please just let me know in the comments below, or by messaging me.
15935 views · 5 years ago
Create Alarm and Monitoring on Custom Memory and Disk Metrics for Amazon EC2

Today I am going write a blog on how to Monitor Memory and Disk custom metrics and creating alarm in Ubuntu.

To do this, we can use Amazon CloudWatch, which provides a flexible, scalable and reliable solution for monitoring our server.

Amazon Cloud Watch will allow us to collect the custom metrics from our applications that we will monitor to troubleshoot any issues, spot trends, and configure operational performance. CloudWatch functions display alarms, graphs, custom metrics data and including statistics.

Installing the Scripts


Before we start installing the scripts for monitoring, we should install all the dependent packages need to perform on Ubuntu.

First login to your AWS server, and from our terminal, install below packages

sudo apt-get update
sudo apt-get install unzip
sudo apt-get install libwww-perl libdatetime-perl


Now Install the Monitoring Scripts


Following are the steps to download and then unzip we need to configure the Cloud Watch Monitoring scripts on our server:
1. In the terminal, we need to change our directory and where we want to add our monitoring scripts.
2. Now run the below command and download the source:

curl https://aws-cloudwatch.s3.amazonaws.com/downloads/CloudWatchMonitoringScripts-1.2.2.zip -O

3. Now uncompress the currently downloaded sources using the following commands

unzip CloudWatchMonitoringScripts-1.2.2.zip && \

rm CloudWatchMonitoringScripts-1.2.2.zip && \

cd aws-scripts-mon


The directory will contain Perl scripts, because of the execution of these scripts only report memory run and disk space utilization metrics will run in our Ubuntu server.
Currently, our folder will contain the following files:
mon-get-instance-stats.pl - This Perl file is used to displaying the current utilization statistics reports for our AWS instance on which these file scripts will be executed.
mon-put-instance-data.pl - This Perl script file will be used for collecting the system metrics on our ubuntu server and which will send them to the Amazon Cloud Watch.
awscreds.template - This Perl script file will contain an example for AWS credentials keys and secret access key named with access key ID.
CloudWatchClient.pm - This Perl script file module will be used to simplify by calling Amazon Cloud Watch from using other scripts.
LICENSE.txt – This file contains the license details for Apache 2.0.
NOTICE.txt – This file contains will gives us information about Copyright notice.
4. For performing the Cloud Watch operations, we need to confirm that whether our scripts have corresponding permissions for the actions:

If we are associated with an IAM role with our EC2 Ubuntu instance, we need to verify that which will grant the permissions to perform the below-listed operations:

cloudwatch:GetMetricStatistics

cloudwatch:PutMetricData

ec2:DescribeTags

cloudwatch:ListMetrics


Now we need to copy the ‘awscreds.template’ file into ‘awscreds.conf’ by using the command below and which will update the file with details of the AWS credentials.

cp awscreds.template awscreds.conf

AWSAccessKeyId = my_access_key_id

AWSSecretKey = my_secret_access_key


Now we completed the configuration.

mon-put-instance-data.pl


This Perl script file will collect memory, disk space utilization data and swap the current system details and then it makes handling a remote call to Amazon Cloud Watch to reports details to the collected cloud watch data as a custom metrics.

We can perform a simple test run, by running the below without sending data to Amazon CloudWatch

./mon-put-instance-data.pl --mem-util --verify --verbose


Now we are going to set a cron for scheduling our metrics and we will send them to Amazon CloudWatch
1. Now we need to edit the crontab by using below command:

 crontab -e

2. Now we will update the file using the following query which will disk space utilization and report memory for particular paths to Amazon CloudWatch in every five minutes:

*/5 * * * * ~/STORAGE/cloudwatch/aws-scripts-mon/mon-put-instance-data.pl --mem-util --mem-avail --mem-used --disk-space-util --disk-space-avail --disk-space-used --disk-path=/ --disk-path=/STORAGE --from-cron


If there is an error, the scripts will write an error message in our system log.

Use of Options

--mem-used
The above command will collect the information about used memory and which will send the details of the reports in MBs into the MemoryUsed metrics. This will give us information about the metric counts memory allocated by applications and the OS as used.
--mem-util
The above command will collect the information about memory utilization in percentages and which will send the details of the Memory Utilization metrics and it will count the usage of the memory applications and the OS.
--disk-space-util
The above command will collect the information to collect the current utilized disk space and which will send the reports in percentages to the DiskSpaceUtilization for the metric and for the selected disks.
--mem-avail
The above command will collect the information about the available memory and which will send the reports in MBs to the MemoryAvailable metrics details. This is the metric counts memory allocated by the applications and the OS as used.
--disk-path=PATH
The above command will collect the information and will point out the which disk path to report disk space.
--disk-space-avail
The above command will collect the information about the available disk space and which will send the reports in GBs to the DiskSpaceAvailable metric for the selected disks.
--disk-space-used
The above command will collect the information about the disk space used and which will send the reports in GBs to the DiskSpaceUsed metric for the selected disks.

The PATH can specify to point or any of the files can be located on which are mounted point for the filesystem which needs to be reported.

If we want to points to the multiple disks, then specify both of the disks like below:

--disk-path=/ --disk-path=/home


Setting an Alarm for Custom Metrics


Before we are going to running our Perl Scripts, then we need to create an alarm that will be listed in our default metrics except for the custom metrics. You can see some default metrics are listed in below image:


Once we completed setting the cron, then the custom metrics will be located in Linux System Metrics.

Now we are going to creating the alarm for our custom metrics
1. We need to open the cloudwatch console panel at https://console.aws.amazon.com/cloudwatch/home
2. Now navigate to the navigation panel, we need to click on Alarm and we can Create Alarm.
3. This will open a popup which with the list of the CloudWatch metrics by category.
4. Now click on the Linux System Metrics . This will be listed out with custom metrics you can see in the below pictures


5. Now we need to select metric details and we need to click on the NEXT button. Now we need to navigate to Define Alarm step.


6. Now we need to define an Alarm with required fields

Now we need to enter the Alarm name for identifying them. Then we need to give a description of our alarm.

Next, we need to give the condition with the maximum limit of bytes count or percentage when it notifies the alarm. If the condition satisfies, then the alarm will start trigger.

We need to provide a piece of additional information about for our alarm.

We need to define what are the actions to be taken when our alarm changes it state.

We need to select or create a new topic with emails needed for sending notification about alarm state.
7. Finally, we need to choose the Create Alarm.

So its completed. Now the alarm is created for our selected custom metrics.

Finished!

Now the alarm will be listed out under the selected state in our AWS panel. Now we need to select an alarm from the list seen and we can see the details and history of our alarm.
13881 views · 5 years ago
Creating a Tiny Blog Management system in Laravel 5.7

Hey There,
I am expecting you are familiar with PHP. In this post I will be using the Laravel framework to create a small blog system. I am showing here very simple steps to create blogs, If you want this complete code then please message me.
What are major Prequisites for Laravel:
* PHP version >= 5.6
* Composer should be installed in system

Create a project with name tiny_blog with following command

composer create-project laravel/laravel --prefer-dist tiny_blog


enter into the laravel project

cd tiny_blog


create a migration file using following artisan command
<pre>php artisan make:migration create_blog_table</pre>
After this command you will found a new file created in database/migrations folder in your project, Just edit the file having 'create_blog_table' appended in its name

Now replace following code to create table schema with function up(), So now the method will look like following:

public function up()
{
Schema::create('blogs', function (Blueprint $table) {
$table->increments('id');
$table->integer('user_id');
$table->string('category');
$table->string('title');
$table->text('description');
$table->timestamps();
});

}


replace following snippet with down method, it will look like following:

public function down()
{
Schema::dropIfExists('blogs');
}


Its time to run the migration file we have created

php artisan migrate


After running,It will create the blogs table in database.Now time to create form and insert data into the table

Laravel itsef provide authentication , use following artisan command :

php artisan make:auth


Now start Larvel:

php artisan serve


it will start the laravel development server at http://127.0.0.1:8000


Now if you run that url the basic default ui will be created and login & register link you can see in Top right position of header

You can register and login now.this feature is provided by authentication module.
Now we need to create a controller for manage blogs with following command:

php artisan make:controller BlogController


will create a file namedBlogController.php in** app/HTTP/controllers** folder location

Now we need to create a Model also, use following command

php artisan make:model Blog


will create a file namedBlog.php in app folder location

Now in Controller we need to create a method for create blogs and available that method in Routes to access it via url. Just editroutes/web.php file and add the following line

Route::get('blog/create','BlogController@createBlog');

/create/blog/ will be url route that land on Blog Controller's createBlog method using get method.

Now before running this route just go to the app/Http/Controllers folder and Edit BlogController.php file and Add the createBlog method in that class as following

public function createBlog()
{
return view('blog.create');
}


This code will try to load the view from/resources/views/blog/create.blade.php

In Laravel blade is a template engine. As we had not created the view file yet, so we need to create a blog folder inside/resources/views/ folder then inside blog folder create a file create.blade.php with following form

@extends('layouts.app')

@section('content')
<div class="container">
@if ($errors->any())
<div class="alert alert-danger">
<ul>
@foreach ($errors->all() as $error)
<li>{{ $error }}</li>
@endforeach
</ul>
</div><br />
@endif
<div class="row">
<form method="post" action="{{url('blog/create')}}">
<div class="form-group">
<input type="hidden" value="{{csrf_token()}}" name="_token" />
<label for="title">Title:</label>
<input type="text" class="form-control" name="title"/>
</div>
<div class="form-group">
<label for="title">Category/Tags:</label>
<input type="text" class="form-control" name="category"/>
</div>
<div class="form-group">
<label for="description">Description:</label>
<textarea cols="10" rows="10" class="form-control" name="description"></textarea>
</div>
<button type="submit" class="btn btn-primary">Submit</button>
</form>
</div>
</div>
@endsection


Now we need to add a additional route to handle the post request on blog/create route, Just edit routes/web.php file and just add following line in last:

Route::post('blog/create','BlogController@saveBlog'); 


post route to handle the form post on route blog/create


Now create a method name saveBlog to save the user input data in the form
 public function saveBlog(Request $request)
{
$blog = new Blog();

$this->validate($request, [
'title'=>'required',
'category'=>'required',
'description'=> 'required'
]);

$blog->createBlog($request->all());
return redirect('blog/index')->with('success', 'New blog has been created successfully :)'); }


Notice This method is using Blog object that we don't know that where it comes from? , So to make above code working we need to include the model which we created earlier need to include in our controller file So use following code to include it before the class created.

use App\Blog;


Now following line shows that there is a method named createBlog in Model(app/Blog.php), but in actual it is not there:

$blog->createBlog($data);


So go to the file app/Blog.php and Edit it and inside the class add following method:

 public function createBlog($data)
{

$this->user_id = auth()->user()->id;
$this->title = $data['title'];
$this->description = $data['description'];
$this->category = $data['category'];
$this->save();
return 1;
}


Now the creation of blog task has been done , Its time to show the created Entries So just create a route blog/index in routes/web.php

Route::get('blog/index','BlogController@showAllBlogs');


get route blog/index to show all the created blogs by current user


Now just add a method in controller
public function showAllBlogs()
{
$blogs = Blog::where('user_id', auth()->user()->id)->get();

return view('blog.index',compact('blogs'));
}


This method requires to create a index view in blog folder , So create a file named index.blade.php in /resources/views/blog/ folder with following code

@extends('layouts.app')

@section('content')
<div class="container">
@if(\Session::has('success'))
<div class="alert alert-success">
{{\Session::get('success')}}
</div>
@endif
<a type="button" href="{{url('blog/create')}}" class="btn btn-primary">Add New Blog</a>
<br>
<table class="table table-striped">
<thead>
<tr>
<td>ID</td>
<td>Title</td>
<td>Category</td>
<td>Description</td>
<td colspan="2">Action</td>
</tr>
</thead>
<tbody>
@foreach($blogs as $blog)
<tr>
<td>{{$blog->id}}</td>
<td>{{$blog->title}}</td>
<td>{{$blog->category}}</td>
<td>{{$blog->description}}</td>
<td>Edit</td>
<td>Delete</td>
</tr>
@endforeach
</tbody>
</table>
<div>
@endsection


Now all code is ready but we need to add 1 line of code to prevent the blog controller without authentication or without login

just add the following constructor method in BlogController class

 public function __construct()
{
$this->middleware('auth');
}


this constructor method will call very first when user will try to access any of BlogController class method, and the middleware will check whether user is logged in then only it will allow to access that method otherwise it will redirect to login page automatically.


After It Run your Code and you will able to create and listing your created blogs/articles. but the Edit and Delete links are not working right now, If you want that also working then please comment here or message me. If we get multiple requests then definitely i will write its part 2 article


Thanks very much for reading this blog, if you have any doubt about it then let me know in comments or by messaging me.

Following is the final code for BlogController.php

<?php

namespace App\Http\Controllers;

use Illuminate\Http\Request;
use App\Blog;


class BlogController extends Controller
{
public function __construct()
{
$this->middleware('auth');
}

public function createBlog()
{
return view('blog/create');
}


public function saveBlog(Request $request)
{
$blog = new Blog();

$this->validate($request, [
'title'=>'required',
'category'=>'required',
'description'=> 'required'
]);

$blog->createBlog($request->all());
return redirect('blog/index')->with('success', 'New blog has been created successfully :)');
}

public function showAllBlogs()
{
$blogs = Blog::where('user_id', auth()->user()->id)->get();

return view('blog.index',compact('blogs'));
}

}
10734 views · 3 years ago
Web Sockets in PHP

In his talk Websockets in PHP, John Fransler walks us through the use of WebSockets in PHP.

While discussing bi-directional real-time application development, John notes that PHP is often not invited to the table due to its lack of native support. Of all the possible attempts to bring in PHP on this stage of real-time development, Ratchet, a PHP WebSocket library, comes closest. "Ratchet is a loosely coupled PHP library providing developers with tools to create real-time, bi-directional applications between clients and servers over WebSockets."* Ahem!

Today's dynamic world


In today's dynamic content world of the internet, it is required to serve real-time bi-directional messages between clients and servers. WebSockets are simple, full-duplex, and persistent. They work over Http and are a standard today.

WebSockets have compatibility with 96.5% of clients globally

There's a very high chance your client has the necessary plumbing to access your content via WebSockets. WebSockets gives the ability to have real-time data on to your clients without the need for polling.

To understand WebSockets, John takes an example of a Javascript client and Ratchet Server. Javascript has everything built in to allow access to a socket. For example, you can use the send method on a WebSocket variable to send a message to the server, or if you want to respond to a message from the server, you use the OnConnection method.

While on the Server, John uses Ratchet, which is built on React PHP. A server script is then configured and set up to run and listen on a port for incoming HTTP requests. For messages, JSON is used, and to find public methods, a router is set up. He then goes on to instantiate the server-side script in Ratchet.

There are four functions of a Ratchets message component interface that are used in this example:

OnOpen gets called when a new connection is made.

OnClose gets called when a client quits. It's essential to keep an eye on memory management, and essential to keep tidying up as you move through the code.

OnError gets called when there is an exception faced by the user.

OnMessage gives the text of the JSON message, which is being exchanged with the client.

For Initialization, Jason continues to walk through the example. He shows how one can loop through the clients, both inside the server and outside the server. Outside the server, it’s a feature of React PHP. On database access, and with traditional standard synchronous MySQL in PHP, what usually happens is that it forces the code to wait for the query to return a result and do nothing — Fortunately, with Asynchronous MySQLi, that is not the case.

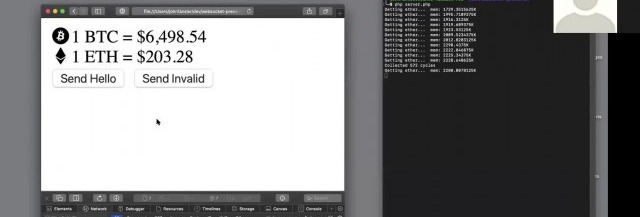
John gets into the details explaining Variables, References & Pointers. He also gives a demo where a central site has updated information on the Bitcoin and ether prices. A client terminal reflects the last values. Now the client doesn't have to poll the server for new values. When there is a change in the Bitcoin or ether values, the server pushes down the client's update. No polling helps with a lot of overheads and gets closer to real-time.

Using Supervisord


For Long-running applications - Jason recommends running a supervisord, use proxy to expose the port, and add a site certificate. Supervisord keeps an eye out for the server running the service; it can be used to restart the service and log any service issues. Recommended proxies are AWS load balancer, Nginx, and HA Proxy. For scalability, use multiple smaller WebSocket servers and a smaller number of clients per server used and load balancing. If one has to support a chat feature to allow clients to talk to each other in near real-time, it is recommended to use Redis. The Redis server proxies the messages between the server nodes.

The talk concludes with John summarizing best practices on error handling and takes QnA on various aspects of WebSockets such as handling load balancers and asynchronous calls to MSQLi.

The presentation for this video, along with the code, is hosted at John Curt's GitHub. More info about John's current areas of interest can be found on John's Blog.

Watch the video now


Related videos
8971 views · 3 years ago


Recently I was faced with a task to post data from a .csv file to an external REST API. I’m just going to log in to this article about what I did to get the job done.

Let’s start by creating a template for uploading the file. For this article’s sake, lets make the changes in the dashboard.blade.php file.


<form method="post" enctype="multipart/form-data"> @csrf <div class="custom-file"> <input type="file" accept=".csv" name="excel" class="custom-file-input" id="customFile" /> <label class="custom-file-label" for="customFile">Choose file</label > </div> <div> <button type="submit" class="btn btn-primary btn-sm" style="margin-top: 10px" >Submit> </div>

</form>

Note : Don’t forget to add enctype=”multipart/form-data”!


Once the user has submitted the file, we need a new router to process the file and send its content to the REST API. Let’s start by creating a Controller.


php artisan make:controller UploadController


Now in the web.php file,


Route::post('/upload', [UploadController::class, 'upload'])->name('upload')->middleware('auth');


In the UploadController.php , create a function named upload. We will be writing all the code inside this function. Also, we need an action for the form.


<form method="post" action="{{route('upload')}}" enctype="multipart/form-data">


Now inside the upload function, we need to get the submitted file and parse its contents.

Get the submitted file,


$file = $request->file('excel');


Parse the submitted file,


if (($handle = fopen($file, "r")) !== FALSE) { while (($data = fgetcsv($handle, 1000, ",")) !== FALSE) { ..... }

}


We will be using a dummy REST API to create users — https://reqres.in/api/users. This is the request body required to create a user.


{ "name": "test", "job": "test"

}


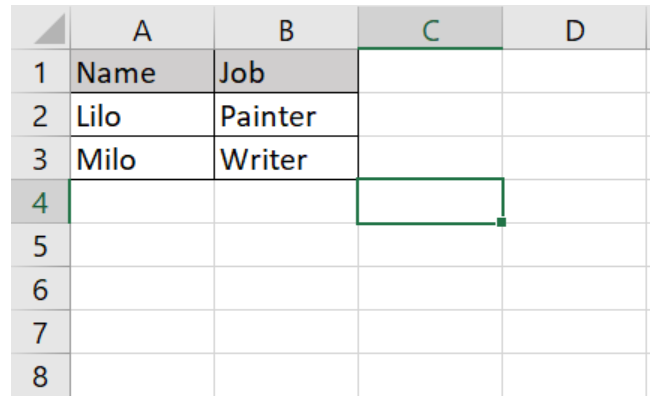
Keeping this in mind, we will create a sample .csv template to be submitted. The fields need to be two, namely Name and Job.


We need to send the values from this file as the request body to the API. So let’s add the code to loop through the content of this file.


if (($handle = fopen($file, "r")) !== FALSE) { while (($data = fgetcsv($handle, 1000, ",")) !== FALSE) { Http::post('https://reqres.in/api/users', [ 'name' => $data[0], 'job' => $data[1], ]); }

}


This will create each student for each row of the file. But we don’t need to send the data of the first row of the file.

Full code:


public function upload(Request $request){ $file = $request->file('excel'); if($file){ $row = 1; $array = []; if (($handle = fopen($file, "r")) !== FALSE) { while (($data = fgetcsv($handle, 1000, ",")) !== FALSE) { if($row > 1){ Http::post('https://reqres.in/api/users', [ 'name' => $data[0], 'job' => $data[1], ]); array_push($array,$data[0]); } $request->session()->flash('status', 'Users '.implode($array,", ").' created successfully!'); $row++; } } }else{ $request->session()->flash('error', 'Please choose a file to submit.'); } return view('dashboard');

}


This will post the data starting from the second row of the file, display a success message once the users are created, and an error message if the submit button is clicked without choosing a file.

Full template:


<div class="container max-w-7xl mx-auto sm:px-6 lg:px-8" style="width: 50%"> @if (session('status')) <div class="alert alert-success"> {{ session('status') }} </div> @endif @if (session('error')) <div class="alert alert-error"> {{ session('error') }} </div> @endif <form action="{{route('upload')}}" method="post" enctype="multipart/form-data"> @csrf <div class="custom-file"> <input type="file" accept=".csv" name="excel" class="custom-file-input" id="customFile" /> <label class="custom-file-label" for="customFile">Choose file</label> </div> <div> <button type="submit" class="btn btn-primary btn-sm" style="margin-top: 10px">Submit</button> </div> </form>

</div>


That’s it, thanks for reading :)

SPONSORS

The Ultimate Managed Hosting Platform